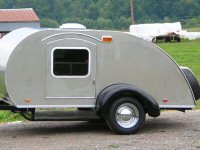
Skinning the hatch is giving me a headache! Ive made the hatch sit inside the main body walls and the hatch outer skin would obviosuly be the same width as the rest of the main body. The lip of the hatch skin which is about 12mm over hangon either side would sit on top of the main body edge making it all flush.
But now I realsie that the hatch egde trim will have nothing to screw into except the outer ply skin and aluminium skin which will only be about 6mm.
Is it best to cut a notch in the main body side walls where the hatch opens and closes onto and add the notch cut out to the over hanging hatch skin edge for the trim to screw into?
Does that make any sence!!?
Skinning Hatch and attaching edge trim
16 posts
• Page 1 of 2 • 1, 2
Skinning Hatch and attaching edge trim
![]() by andy2 » Tue May 05, 2015 8:50 am
by andy2 » Tue May 05, 2015 8:50 am
- andy2
- Teardrop Inspector
- Posts: 11
- Joined: Mon Mar 16, 2015 4:43 pm
Re: Skinning Hatch and attaching edge trim
![]() by KCStudly » Tue May 05, 2015 9:17 pm
by KCStudly » Tue May 05, 2015 9:17 pm
Aggie79/Tom did something similar on his Silver Beatle build. He laminated a thin strip of the aluminum skin under the flange of the hatch ply, applied the outer aluminum skin, then used trim molding to provide an overlapping lip along the edge. He used aluminum rivets up thru all four layers and capped the proud end of the rivets with the molding trim insert. Follow this portion of his build to see how he did it.
KC
My Build: The Poet Creek Express Hybrid Foamie
Poet Creek Or Bust
Engineering the TLAR way - "That Looks About Right"
TnTTT ORIGINAL 200A LANTERN CLUB = "The 200A Gang"
Green Lantern Corpsmen
My Build: The Poet Creek Express Hybrid Foamie
Poet Creek Or Bust
Engineering the TLAR way - "That Looks About Right"
TnTTT ORIGINAL 200A LANTERN CLUB = "The 200A Gang"
Green Lantern Corpsmen
-

KCStudly - Donating Member
- Posts: 9640
- Images: 8169
- Joined: Mon Feb 06, 2012 10:18 pm
- Location: Southeastern CT, USA


