The Poet Creek Express - Foamie Hybrid
Moderator: eaglesdare
Re: The Poet Creek Express - Foamie Hybrid
![]() by OP827 » Wed May 27, 2015 2:23 pm
by OP827 » Wed May 27, 2015 2:23 pm
From the datasheet, it looks like the PL300 glue needs to evaporate in order to cure. Sanded surface foam has no pores to outside, so no, it is not porous. Let me know how it goes. The glue should cure on the perimeter to some extent, up to 2 inches I guestimate before it becomes self-sealed, similar when it is in a tube.
-

OP827 - Donating Member
- Posts: 1595
- Images: 414
- Joined: Fri Apr 25, 2014 7:27 pm
- Location: Bruce County Ontario
Re: The Poet Creek Express - Foamie Hybrid
![]() by KCStudly » Wed May 27, 2015 11:44 pm
by KCStudly » Wed May 27, 2015 11:44 pm
Yup. The starter piece became the destructive test piece. Not so much because the product would not stick foam to foam, but because of a combination of factors. That pesky issue of the strap/stretcher clamp method not being good at pulling sideways on a nearly flat surface was the big one, and that other thing. You know, lack of air flow thru foam complicated by my application method.
I don't think it is an air cure issue per se, otherwise how does it stick to wood and brick? I suspect that it is a water evaporation/absorption issue, or lack thereof. The stuff is water cleanup while soft, so that tracks. So it has the same issues as the other glue options: don't use too much product, and make sure you clamp it well.
Here’s what I found when I pulled the stretcher off. The sides and bottom of the starter panel where attached well, but the top had pulled away and there was up to about 1/4 inch gap.
It seems like the stretcher had slacked up in the middle and allowed the panel to spring away from the hatch along most of the top edge. I could see where the adhesive was strung and had dried bridging the gap in several places.
Karl and I kind of poked around and pulled on it a little to see how hard it was stuck and whether I should cut it back to where it was soundly attached, peel it all the way off or just try to re-stick the top edge. The little bridges of PL wouldn’t let it go back everywhere, even after slicing them, and the more we pried and probed the more it seemed like the panel might come back off.
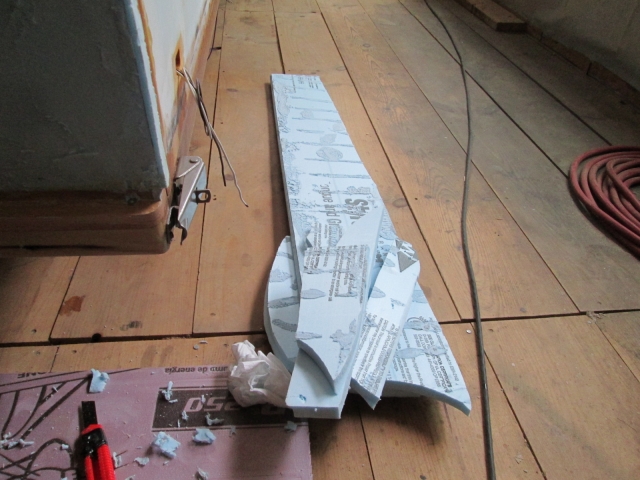
It seemed to tear at the PL if we just kept steady pressure on it and did not rush the process, but I wouldn’t call it easy. It didn’t just zip off, in fact it broke into a few pieces due to the amount of force we had to apply; but at least it tore at the PL and not the foam.
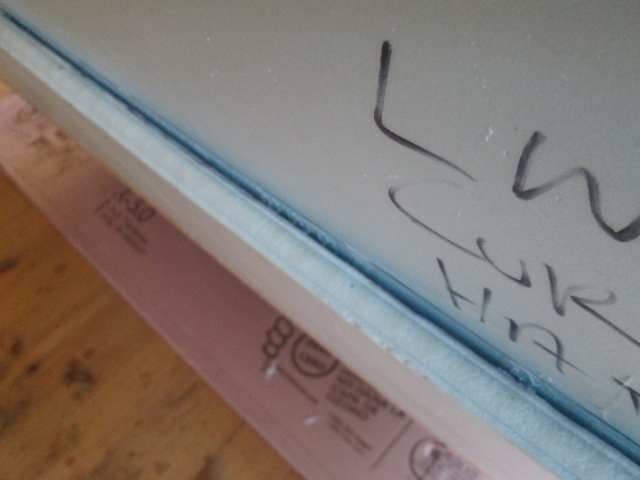
Now I had used a generous amount of the PL300 and some of the beads were pretty fat, so I wasn’t totally surprised that there was still wet goop in the heart of them. As advertised, the edges of the beads had cured and sealed the rest inside. Where I had spread the perimeter edges of the panel to about 1 to 1-1/2 inches wide (using a flat spreader this time) it had dried fully. Referring back to the label instructions, it says 1/4 inch vertical beads 10 inches apart, and to fasten and prop for 24 hrs.
I think my using a zig-zag triangle pattern in some spots didn’t help any (maybe sealed more air out), that the larger beads (a result of squeezing the trigger harder with slower travel speeds on the nozzle) are wasteful, and that my earlier success gluing some of the smaller panels to foam was probably attributed to the notched trowel technique (wherein the notched application controlled the bead size to one that would dry completely and provided air channels to help cure).
Anyway, if I am going to try the PL300 some more, I would use fewer vertical beads, flatten them with the notched trowel, and be sure to spread the edge beads so the troughs cut across the beads letting air in to the field. But I think I might go back and try either the 3M green contact adhesive, or reconsider thickened epoxy, for the larger panels on the hatch at least.
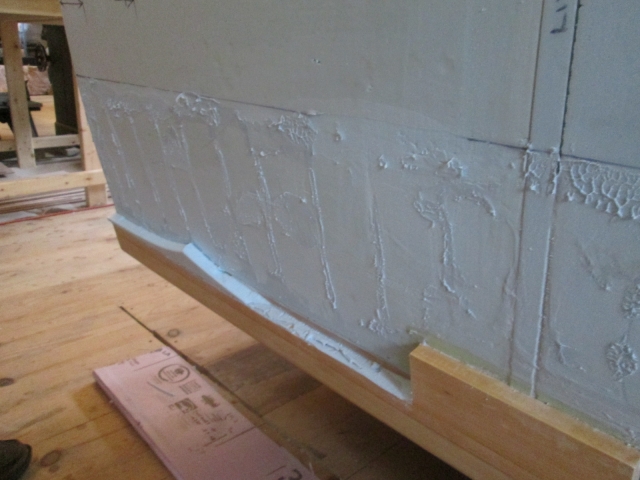
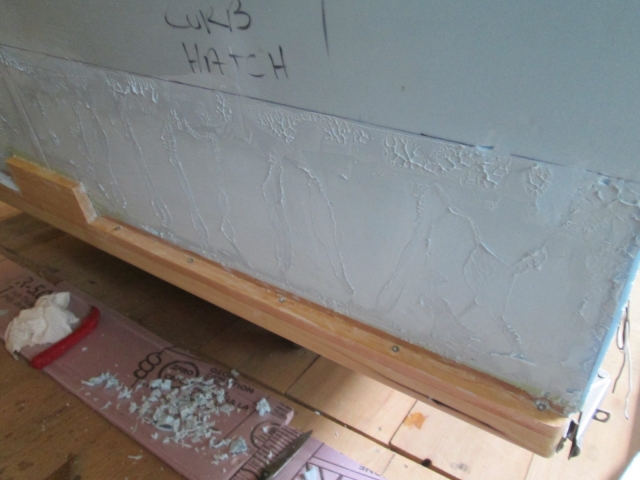
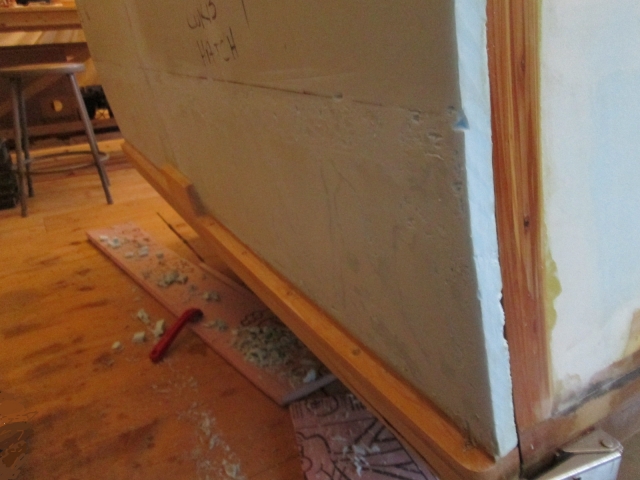
As far as the cleanup and getting back to where I was before this little setback, I started by scraping the top of the bumper and along the wooden cleat. Here’s what it looked like after busting the starter panel off.
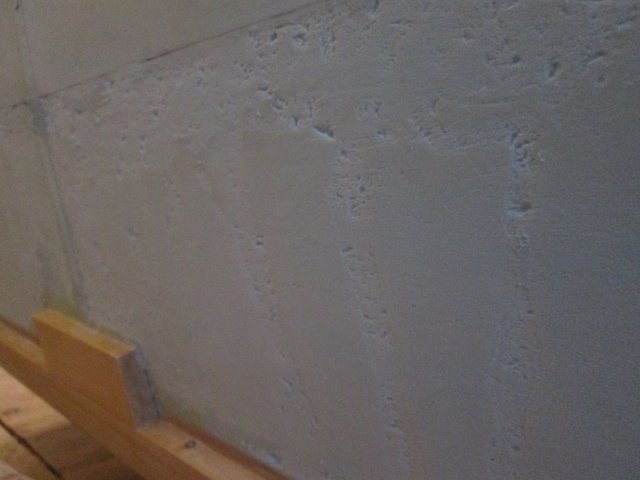
And here’s what it looked like after scraping.

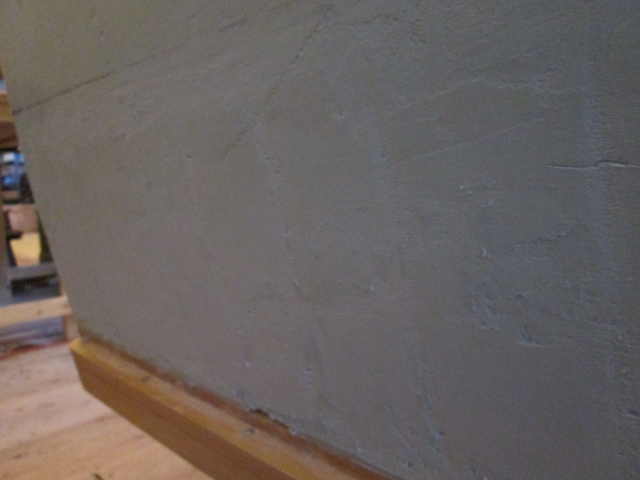
The rest was a combination of damp paper towels to get the uncured stuff, and peeling what would roll up easily. It took some experimentation but what seemed to work the best for the rest of it was a combination of scrubbing fairly rigorously with the damp paper towel (just the right amount of friction and lubrication) combined with peeling with the pads of my thumbs in a dragging motion. That did a reasonably good job of rolling the PL off of the foam without gouging like sandpaper would, or pulling up big chunks of foam. Here is where I left off, ready to try again (or something else).
I don't think it is an air cure issue per se, otherwise how does it stick to wood and brick? I suspect that it is a water evaporation/absorption issue, or lack thereof. The stuff is water cleanup while soft, so that tracks. So it has the same issues as the other glue options: don't use too much product, and make sure you clamp it well.
Here’s what I found when I pulled the stretcher off. The sides and bottom of the starter panel where attached well, but the top had pulled away and there was up to about 1/4 inch gap.
It seems like the stretcher had slacked up in the middle and allowed the panel to spring away from the hatch along most of the top edge. I could see where the adhesive was strung and had dried bridging the gap in several places.
Karl and I kind of poked around and pulled on it a little to see how hard it was stuck and whether I should cut it back to where it was soundly attached, peel it all the way off or just try to re-stick the top edge. The little bridges of PL wouldn’t let it go back everywhere, even after slicing them, and the more we pried and probed the more it seemed like the panel might come back off.
It seemed to tear at the PL if we just kept steady pressure on it and did not rush the process, but I wouldn’t call it easy. It didn’t just zip off, in fact it broke into a few pieces due to the amount of force we had to apply; but at least it tore at the PL and not the foam.
Now I had used a generous amount of the PL300 and some of the beads were pretty fat, so I wasn’t totally surprised that there was still wet goop in the heart of them. As advertised, the edges of the beads had cured and sealed the rest inside. Where I had spread the perimeter edges of the panel to about 1 to 1-1/2 inches wide (using a flat spreader this time) it had dried fully. Referring back to the label instructions, it says 1/4 inch vertical beads 10 inches apart, and to fasten and prop for 24 hrs.
I think my using a zig-zag triangle pattern in some spots didn’t help any (maybe sealed more air out), that the larger beads (a result of squeezing the trigger harder with slower travel speeds on the nozzle) are wasteful, and that my earlier success gluing some of the smaller panels to foam was probably attributed to the notched trowel technique (wherein the notched application controlled the bead size to one that would dry completely and provided air channels to help cure).
Anyway, if I am going to try the PL300 some more, I would use fewer vertical beads, flatten them with the notched trowel, and be sure to spread the edge beads so the troughs cut across the beads letting air in to the field. But I think I might go back and try either the 3M green contact adhesive, or reconsider thickened epoxy, for the larger panels on the hatch at least.
As far as the cleanup and getting back to where I was before this little setback, I started by scraping the top of the bumper and along the wooden cleat. Here’s what it looked like after busting the starter panel off.
And here’s what it looked like after scraping.
The rest was a combination of damp paper towels to get the uncured stuff, and peeling what would roll up easily. It took some experimentation but what seemed to work the best for the rest of it was a combination of scrubbing fairly rigorously with the damp paper towel (just the right amount of friction and lubrication) combined with peeling with the pads of my thumbs in a dragging motion. That did a reasonably good job of rolling the PL off of the foam without gouging like sandpaper would, or pulling up big chunks of foam. Here is where I left off, ready to try again (or something else).
KC
My Build: The Poet Creek Express Hybrid Foamie
Poet Creek Or Bust
Engineering the TLAR way - "That Looks About Right"
TnTTT ORIGINAL 200A LANTERN CLUB = "The 200A Gang"
Green Lantern Corpsmen
My Build: The Poet Creek Express Hybrid Foamie
Poet Creek Or Bust
Engineering the TLAR way - "That Looks About Right"
TnTTT ORIGINAL 200A LANTERN CLUB = "The 200A Gang"
Green Lantern Corpsmen
-

KCStudly - Donating Member
- Posts: 9640
- Images: 8169
- Joined: Mon Feb 06, 2012 10:18 pm
- Location: Southeastern CT, USA


