Adding dimensions

Things that don't fit anywhere else...

Adding dimensions

Postby Chris C » Sat Jun 03, 2006 9:14 am

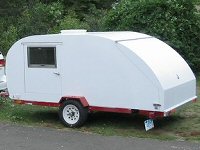
I've seen some of the more computer savy on the site add things to a digital photograph.............such as dimensions, arrows, circles, etc., etc. I don't have the slightest idea how to do that and need to dimension a photograph for future reference. Can anyone walk me through the process, or if that would be too much trouble, could someone point me to a link where I could learn how to do that? Any help would be greatly appreciated.
Chris :D

The tension between what is good enough and what is beyond that creates the space for character to become our work.

Teardrop Trailer Build Pictures: http://tinyurl.com/px5cd
Chris C
.
 
Posts: 3302
Joined: Sun May 15, 2005 7:24 pm
Location: Norman, Oklahoma

Postby Sonetpro » Sat Jun 03, 2006 9:19 am

Chris, Do you have photoshop or simular?
}><)))'> ~--------------·´¯) SteveT
You don't know what the limit's are until you take it there.ImageImageImage
User avatar
Sonetpro
Site Admin
 
Posts: 2038
Images: 107
Joined: Sun Oct 30, 2005 8:11 am
Location: Plantersville, TX

Postby Chris C » Sat Jun 03, 2006 9:25 am

Yes, PhotoShop 7.
Chris :D

The tension between what is good enough and what is beyond that creates the space for character to become our work.

Teardrop Trailer Build Pictures: http://tinyurl.com/px5cd
Chris C
.
 
Posts: 3302
Joined: Sun May 15, 2005 7:24 pm
Location: Norman, Oklahoma
Top

Postby Steve_Cox » Sat Jun 03, 2006 9:39 am

Steve
User avatar
Steve_Cox
4000 Club
4000 Club
 
Posts: 4903
Images: 196
Joined: Sun Apr 03, 2005 8:46 am
Location: Albuquerque New Mexico
Top

Postby Sonetpro » Sat Jun 03, 2006 9:40 am

I have 7 also. If you go to window and make sure tools is checked it will give you a toolbar on the left. With it you can add text draw lines cut a portion of the picture out and all sorts of thing. You'll just have to play with it to get it to do what you want.
}><)))'> ~--------------·´¯) SteveT
You don't know what the limit's are until you take it there.ImageImageImage
User avatar
Sonetpro
Site Admin
 
Posts: 2038
Images: 107
Joined: Sun Oct 30, 2005 8:11 am
Location: Plantersville, TX
Top

Postby Sonetpro » Sat Jun 03, 2006 9:41 am

Steve_Cox wrote:Photoshop Basics Link

Steve that's a good link. I've never seen it before. Thanks.
}><)))'> ~--------------·´¯) SteveT
You don't know what the limit's are until you take it there.ImageImageImage
User avatar
Sonetpro
Site Admin
 
Posts: 2038
Images: 107
Joined: Sun Oct 30, 2005 8:11 am
Location: Plantersville, TX
Top

Postby Chris C » Sat Jun 03, 2006 9:49 am

I've been playing with all the tools, but can't seem to find a way to do what I want. :thinking:

Thanks for the link, Steve. I've never seen that one before. Bet it'll help. :thumbsup:
Chris :D

The tension between what is good enough and what is beyond that creates the space for character to become our work.

Teardrop Trailer Build Pictures: http://tinyurl.com/px5cd
Chris C
.
 
Posts: 3302
Joined: Sun May 15, 2005 7:24 pm
Location: Norman, Oklahoma
Top

Postby toypusher » Sat Jun 03, 2006 12:11 pm

Chris,

I am assuming that you know the demensions?? If so, just bring your photo into photoshop and use the text tool to put text where you want. Some of the fonts have symbols in them to make arrows, etc.

If you have PowerPoint by chance, it is even easier. Just try this:

Open PowerPoint and select ‘Blank Presentation’

Under ‘Content Layouts’ select the blank page (1st on left)

Just find the photo that you want to work on and do a ‘right click and copy’ of it

Go to the blank presentation and do a ‘Right click and paste’ the image into the blank page.

At the bottom of the page, select the ‘Text Box’ icon and place it where you want the text. (you may want or need to change the text color also)

To make the arrow – just click on the ‘Arrow’ icon on the bottom of the page - start at the text and draw towards the area you want it to point to.

To change the color of the arrow – just click on it to select it and the ‘right-click’ and use ‘Format AutoShape’ to change the color or thickness of the arrow.

Now go to ‘File’ – ‘Save As’

Under ‘Save as type’ use the drop down button and select ‘JPEG File Interchange Format (*.jpg)

Under the ‘File name’ section – enter the name of the photo to enclude the ‘.jpg’ extension

Go to the ‘Save in’ section at the top and select where you want to save the photo

It will ask about saving Current slide or all slides - just select current slide

You can then close that slide (do not save it as a ‘.ppt’ file unless you think that you will want to make changes to that photo later) Or you can just select everything and delete it to start with another photo

Done!

Your saved .jpg file will have a large white border on it now. I used PhotoShop (because I have it and like it, but any graphics editing program that will let you crop will do) and cropped the white border from the photo and here it is:

Hope this helps.
User avatar
toypusher
Site Admin
 
Posts: 43040
Images: 324
Joined: Fri Jan 28, 2005 12:21 pm
Location: York, PA Area
Top

Postby Gage » Sat Jun 03, 2006 12:24 pm

Chris, I was going to tell you about the same thing as what Steve did. Only difference being is I have Microsoft Picture-It. Just keep playing with it, you'll get it (you can change font also).

Have a good day.

:thinking:
Sorry, I forgot about your PM.
Image Image Image
Remember 'Teardrop Time'.......Take your time, you don't have to have it finished NOW.
User avatar
Gage
8000 Club
8000 Club
 
Posts: 8321
Images: 28
Joined: Sat Apr 17, 2004 9:14 pm
Location: Palmdale, CA
Top

Postby Chris C » Sat Jun 03, 2006 4:55 pm

Kerry, I can't find anything marked "text tool".............and don't have power point. Think I'll just take the easy way out and print the picture and get out the old pencil! :lol: Not too good with all this high tech stuff anyway! :lol: Thanks for all the help.
Chris :D

The tension between what is good enough and what is beyond that creates the space for character to become our work.

Teardrop Trailer Build Pictures: http://tinyurl.com/px5cd
Chris C
.
 
Posts: 3302
Joined: Sun May 15, 2005 7:24 pm
Location: Norman, Oklahoma
Top

Postby Ira » Sat Jun 03, 2006 5:44 pm

Before anything...

From the "Window" or "View" pull-down, make sure you have "View Layers" or "Layers Window" selected. (The difference has to do with the version of Photoshop tha you're using.)

From THAT little window, you select "New Layer," and you give it the name of your choice.

You then make sure that this NEW layer is selected before you add type ("T" tool), play with rules, arrows, or do anything else funky. Just click onits name in the list to make it the active layer.

Otherwise, you'll be drawing directly on the original image, which is now considered the "background" layer. By doing this stuff on a NEW layer(s), you can screw up as much as you want without affecting the main image. So if you DO want to do something on the main image, you have to SELECT it in the layers window (pallette). Otherwise, anything you do will affect that NEW layer you just created.

If you screw up, you can either delete the entire new layer without affecting your main image, or "select all" and delete, while keeping that new layer and the name you gave it.

When you're DONE with all of this fun, you then select "Flatten," to convert the two layers ONE layer, and then save in the file format of your choice...which will most likely be JPEG.

And you can make as many of these additional layers as you want before flattening, which is a good idea. Because you can now move the into precise positions independent of each other.
Here we go again!
User avatar
Ira
Forum Storyteller
 
Posts: 5652
Images: 118
Joined: Tue Nov 29, 2005 2:16 pm
Location: South Florida
Top

Postby Chris C » Sat Jun 03, 2006 6:32 pm

Okay, Ira..............

Thanks for the help. I found the Layers, but I got a window that gives me three choices: Layers, Channels, and Paths. It doesn't give me the choice to pick a New Layer. :thinking: By the way, I'm heading out the door with my Sweetie to try out a new Italian restaurant here in town. I'll check back later.
Chris :D

The tension between what is good enough and what is beyond that creates the space for character to become our work.

Teardrop Trailer Build Pictures: http://tinyurl.com/px5cd
Chris C
.
 
Posts: 3302
Joined: Sun May 15, 2005 7:24 pm
Location: Norman, Oklahoma
Top

Postby Kevin A » Sat Jun 03, 2006 7:13 pm

Ira,

Couldn't the same thing be done with a duplicate layer? seems that way you would be using the actual image while still keeping the original intact.
"Follow me, I'm right behind you"

ImageImage
User avatar
Kevin A
The other guy
 
Posts: 3222
Images: 289
Joined: Mon Jan 17, 2005 1:16 am
Location: California, Eureka
Top

Postby toypusher » Sat Jun 03, 2006 7:59 pm

Chris C wrote:Okay, Ira..............

Thanks for the help. I found the Layers, but I got a window that gives me three choices: Layers, Channels, and Paths. It doesn't give me the choice to pick a New Layer. :thinking: By the way, I'm heading out the door with my Sweetie to try out a new Italian restaurant here in town. I'll check back later.


Chris,

When you select the "T" tool, it will automatically create a new layer. Just make sure that it is the one that is highlighted in the Layers box. I will try to bring up PhotoShop 7 and take a couple of screen shots to post for you. Just hang in there and keep trying. But make sure that you are working on a copy of your pic so that you will not loose the original.

OK, I use PS alot, and don't really have to stop and think about it very often, so I will try to explain a little to help you.

After you select the 'T' tool tools menu, you have to place the cursor in your picture and click where you want to start the text. This will give you the new layer in the 'Layers' tool menu. I will email a screen shot to you.
User avatar
toypusher
Site Admin
 
Posts: 43040
Images: 324
Joined: Fri Jan 28, 2005 12:21 pm
Location: York, PA Area
Top

Postby Chris C » Sun Jun 04, 2006 7:39 am

Thanks for all your posts, guys. My hot date lasted MUCH longer than I originally thought. 8) I really want to understand how to do this with PhotoShop. I'm headed to church right now and will be busy much of the afternoon also. Probably won't be able to deal with this until much later. Just didn't want you to think I'd forgotten you.
Chris :D

The tension between what is good enough and what is beyond that creates the space for character to become our work.

Teardrop Trailer Build Pictures: http://tinyurl.com/px5cd
Chris C
.
 
Posts: 3302
Joined: Sun May 15, 2005 7:24 pm
Location: Norman, Oklahoma
Top

Next

Return to Off Topic

Who is online

Users browsing this forum: Google [Bot] and 0 guests