Small caravan box by Tom

...ask your questions in the appropriate forums BUT document your build here...preferably in a single thread...dates for updates, are appreciated....

Re: Small caravan box by Tom

Postby Sheddie » Sun Jun 28, 2015 12:44 am

Hi Tom. Yes, this sure is a much better build than the first version. The materials that you are using this time will give you a stronger and lighter construction. The impregnated wood, or chip board as we know it here, is fine for things like flooring in houses, where it is supported in large sheets over joists and weight is not an issue. But as framing for the camper it is heavy compared to real wood and doesn't have a lot of strength.
I am liking what you are doing now and watching with interest as your design developes. Good work :thumbsup:
User avatar
Sheddie
1000 Club
1000 Club
 
Posts: 1499
Images: 1129
Joined: Mon Jul 01, 2013 3:26 pm
Location: Whangarei, New Zealand

Re: Small caravan box by Tom

Postby ipy » Sun Jun 28, 2015 4:49 am

I haven`t managed to hide my caravan box in a garage yesterday and today came a heavy rain and it damaged whe whole thing.

So looks like I need to scrap version two as well. Will not try the third time...
ipy
Teardrop Advisor
 
Posts: 92
Images: 15
Joined: Fri May 08, 2015 4:25 pm

Re: Small caravan box by Tom

Postby Sheddie » Sun Jun 28, 2015 6:05 am

Hi Tom, I am very sad to here your news. What damage has the rain done? Is it possible that when it dries out that you could continue with it? It will be heart breaking if you give up now as you and your family have put so much effort into this project so far. It is a pity that we are on opposite sides of the world and can't come and help you. Good luck with whatever you decide to do. :shake hands:
User avatar
Sheddie
1000 Club
1000 Club
 
Posts: 1499
Images: 1129
Joined: Mon Jul 01, 2013 3:26 pm
Location: Whangarei, New Zealand
Top

Re: Small caravan box by Tom

Postby noseoil » Sun Jun 28, 2015 10:47 pm

Tom, so sorry to hear that it got rained on. Is it possible that it may dry out and still be OK like Frank suggested? I know you put a lot of thought, time & effort into this build.
Build log: viewtopic.php?f=50&t=60248
The time you spend planning is more important than the time you spend building.........

137905
User avatar
noseoil
1000 Club
1000 Club
 
Posts: 1822
Images: 670
Joined: Sun Apr 27, 2014 8:46 am
Location: Raton, New Mexico, living the good life!
Top

Re: Small caravan box by Tom

Postby dales133 » Mon Jun 29, 2015 1:47 am

Dry it out and give it a few days to ponder Tom.
I'm sure your angry and feeling a bit defeated at the moment but I'm sure at least the majority is salvageable.
Keep at it bud were all here to help you push through
User avatar
dales133
4000 Club
4000 Club
 
Posts: 4605
Images: 1
Joined: Mon Oct 13, 2014 5:26 pm
Top

Re: Small caravan box by Tom

Postby ipy » Mon Jun 29, 2015 7:40 am

I partially dismantled my caravan box. Roof as well as front walls are removed and need to be repaired. Plywood that was on external parts looks like on the pictures.

I bought new pieces of a plywood and also a small gazebo under which I keep my trailer in case of rain.

What happend yesterday really upsets me and if you had not told me to try fix the problem I probably would have destroyed the box.
Attachments
Gazebo.jpg
Gazebo.jpg (80.82 KiB) Viewed 1757 times
Plywood1.jpg
Plywood1.jpg (26.63 KiB) Viewed 1757 times
Plywood2.jpg
Plywood2.jpg (22.61 KiB) Viewed 1757 times
ipy
Teardrop Advisor
 
Posts: 92
Images: 15
Joined: Fri May 08, 2015 4:25 pm
Top

Re: Small caravan box by Tom

Postby dales133 » Mon Jun 29, 2015 7:59 am

Pleased you've had a second thought Tom.
All is not lost
User avatar
dales133
4000 Club
4000 Club
 
Posts: 4605
Images: 1
Joined: Mon Oct 13, 2014 5:26 pm
Top

Re: Small caravan box by Tom

Postby noseoil » Mon Jun 29, 2015 7:59 am

Tom, glad you are going to work on it again. Everything can be fixed, it's an opportunity to learn & not a problem!

I have two large blue plastic tarps on my build right now, because the rains are coming. I can't decide if I am more worried about the rains, or the neighborhood cats which all seem to want to claim ownership of my trailer. The last thing I need is a good soaking rain, followed by a parade of cats marking different parts of the build for me as they sneak around the yard at night.....

Really like the way the build is going, it's a nice design and deserves to be finished so we can all see the paint you will use!
Build log: viewtopic.php?f=50&t=60248
The time you spend planning is more important than the time you spend building.........

137905
User avatar
noseoil
1000 Club
1000 Club
 
Posts: 1822
Images: 670
Joined: Sun Apr 27, 2014 8:46 am
Location: Raton, New Mexico, living the good life!
Top

Re: Small caravan box by Tom

Postby rebapuck » Mon Jun 29, 2015 2:35 pm

As they say in the VW forums..."that will buff out"
Judy
1966 VW camper
1967 VW singlecab
Image
User avatar
rebapuck
.
 
Posts: 2243
Images: 1
Joined: Thu May 14, 2009 1:55 pm
Location: Chapel Hill NC
Top

Re: Small caravan box by Tom

Postby Sheddie » Mon Jun 29, 2015 2:45 pm

:thumbsup: I am pleased that you have decided to continue. We are all behind you. :applause:
User avatar
Sheddie
1000 Club
1000 Club
 
Posts: 1499
Images: 1129
Joined: Mon Jul 01, 2013 3:26 pm
Location: Whangarei, New Zealand
Top

Re: Small caravan box by Tom

Postby KCStudly » Mon Jun 29, 2015 3:05 pm

Squirt some glue under those ripples and clamp 'em down. If the overhanging section was not supposed to be trimmed off anyway, perhaps a small bead of 5/8 inch square could be glued along the edge to stiffen it flat again?

I understand the frustration of the moment, but you have to either walk away for a minute (or day) and collect your thoughts so that you can analyze the problem with an open mind. Thus finding the most logical solution to move on. Most times when I find myself in a pickle or don't know how I am going to fix something that went wrong on my build, I will work on another aspect for a little while. That way I am still making forward progress and I can ponder what the fix needs to be. Usually with a little time the solution presents itself and is not that much of a big deal once it is done. Okay, looking back some things took a lot more effort from start to finish than they should have, but that's part of the building process; learning as we go.

Only undo the absolute minimum that you have to to make the repair. It will cost less money and time that way.
KC
My Build: The Poet Creek Express Hybrid Foamie

Poet Creek Or Bust
Engineering the TLAR way - "That Looks About Right"
TnTTT ORIGINAL 200A LANTERN CLUB = "The 200A Gang"
Green Lantern Corpsmen
User avatar
KCStudly
Donating Member
 
Posts: 9640
Images: 8169
Joined: Mon Feb 06, 2012 10:18 pm
Location: Southeastern CT, USA
Top

Re: Small caravan box by Tom

Postby dales133 » Mon Jun 29, 2015 8:36 pm

There ya go Tom everyone wants to see it finished, take a breather the get it done
User avatar
dales133
4000 Club
4000 Club
 
Posts: 4605
Images: 1
Joined: Mon Oct 13, 2014 5:26 pm
Top

Re: Small caravan box by Tom

Postby ipy » Fri Jul 03, 2015 1:51 pm

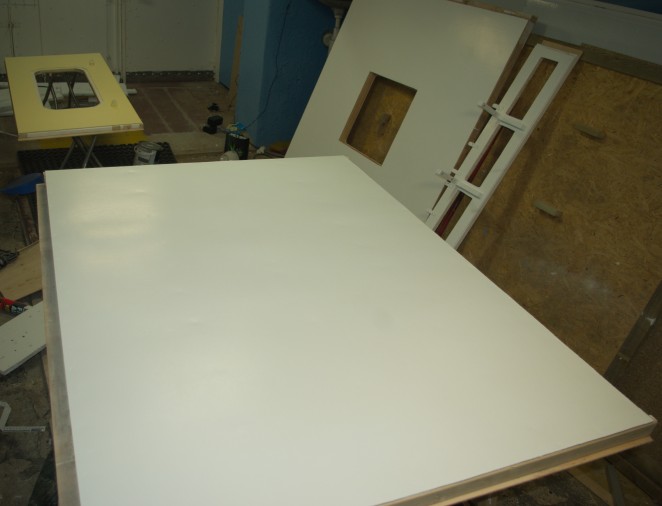
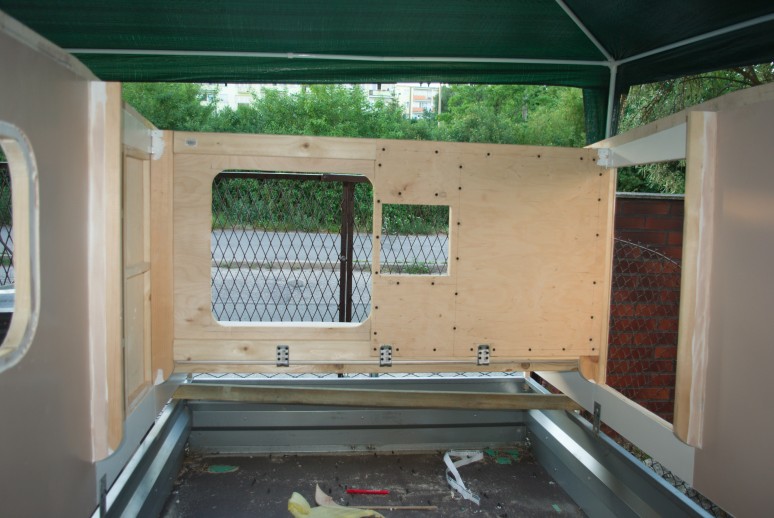
Everything is nearly ready for a final part: joining roof panels with walls. Old, damaged plywood is replaced with a new one, rear wall is insulated and have both layers of plywood, wall between child bedroom and main room is insulated as well, walls in child bedroom are finally painted. All parts of ceilling are also painted. I cut out a little bigger entrance to a child bedroom as well as made an opening for a storage compartment, accessible from child bedroom.

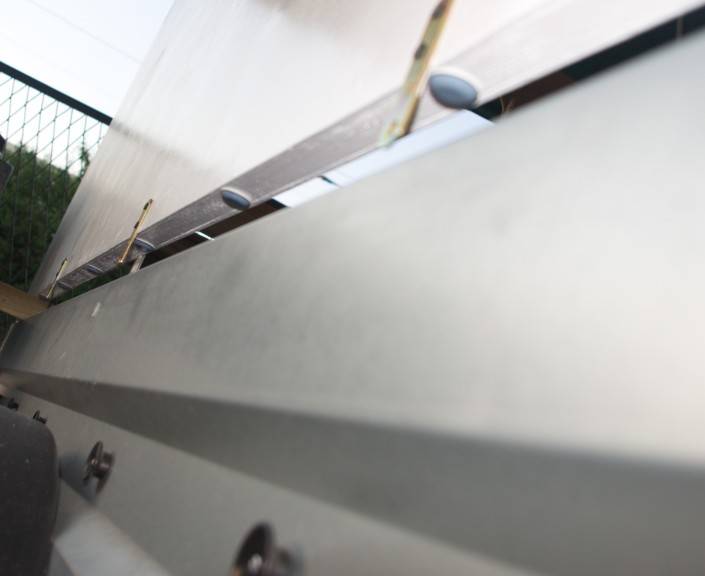
On lower edges of my caravan box I applied self-adhesive, round "legs" made from teflon, to keep a small distance between wall and a trailer board. On sides of walls there are metal elements that will hold boards and ensure walls will not bend. SImilar element will be installed inside, also.

I decided to use a polyurethane varnish for newly built external parts. It is designed for painting garden chairs, tables, fences and wooden finishes of buildings. UV protected, water and weather proof, allowing walls to "breathe" and long- lasting. I hope this is a good solution...

Now I wait until weather forecast will say there will be no rain for at least two days...
Attachments
WallSupports.jpg
WallSupports.jpg (40.09 KiB) Viewed 1660 times
NewParts.jpg
NewParts.jpg (41 KiB) Viewed 1660 times
BedroomWall2.jpg
BedroomWall2.jpg (91.07 KiB) Viewed 1660 times
ipy
Teardrop Advisor
 
Posts: 92
Images: 15
Joined: Fri May 08, 2015 4:25 pm
Top

Re: Small caravan box by Tom

Postby MTalon » Fri Jul 03, 2015 3:03 pm

The feeling of completion will be so much more rewarding then giving up! keep up the good work and you will be there in no time.
MTalon
Teardrop Inspector
 
Posts: 22
Images: 11
Joined: Tue Mar 24, 2015 4:19 pm
Top

Re: Small caravan box by Tom

Postby Sheddie » Fri Jul 03, 2015 4:25 pm

Hi Tom,
Good to see you are back in to it and progress is happening :thumbsup:
You will need to make sure that what you are painting the exterior with is soaking well into the ply as well as creating a water resistant barrier, as the wood in the ply looks like it is quite absorbent. Apply plenty of coats. ;)
User avatar
Sheddie
1000 Club
1000 Club
 
Posts: 1499
Images: 1129
Joined: Mon Jul 01, 2013 3:26 pm
Location: Whangarei, New Zealand
Top

PreviousNext

Return to Build Journals

Who is online

Users browsing this forum: No registered users and 13 guests