We are about to receive our aluminum to skin our TD. One question we have is which to put on first...the sides or the roof panel? How to you hold the sides on before attaching with trim? Since we have read many posts saying to just "float" the aluminum over the luan to allow for the different material movement, we assume that the only thing holding the aliminum on the trailer is the edge/roof trim and the doors. We are using Frank Bear's doors on our build.
Thanks for any suggestions,
Denny and Linda
Installing aluminum next. Sides or roof first?
8 posts
• Page 1 of 1
Installing aluminum next. Sides or roof first?
![]() by Whuttitiz » Sun Jul 26, 2015 9:41 am
by Whuttitiz » Sun Jul 26, 2015 9:41 am
- Whuttitiz
- Teardrop Inspector
- Posts: 10
- Joined: Tue Jul 29, 2014 5:52 am
Re: Installing aluminum next. Sides or roof first?
![]() by tony.latham » Sun Jul 26, 2015 7:34 pm
by tony.latham » Sun Jul 26, 2015 7:34 pm
I put the top piece on first. I attached it to the front bottom with about four flathead stainless steel screws that are countersunk. Then I tighten the straps and monkey around until it's as square as it's going to get. Then I attached it to the hatch spar with three or four screws that are also countersunk. These will be under the hinge (make sure you don't put them where the hinge screws will be). The front ones will be covered with trim. (I'll route the fan hole in later....)
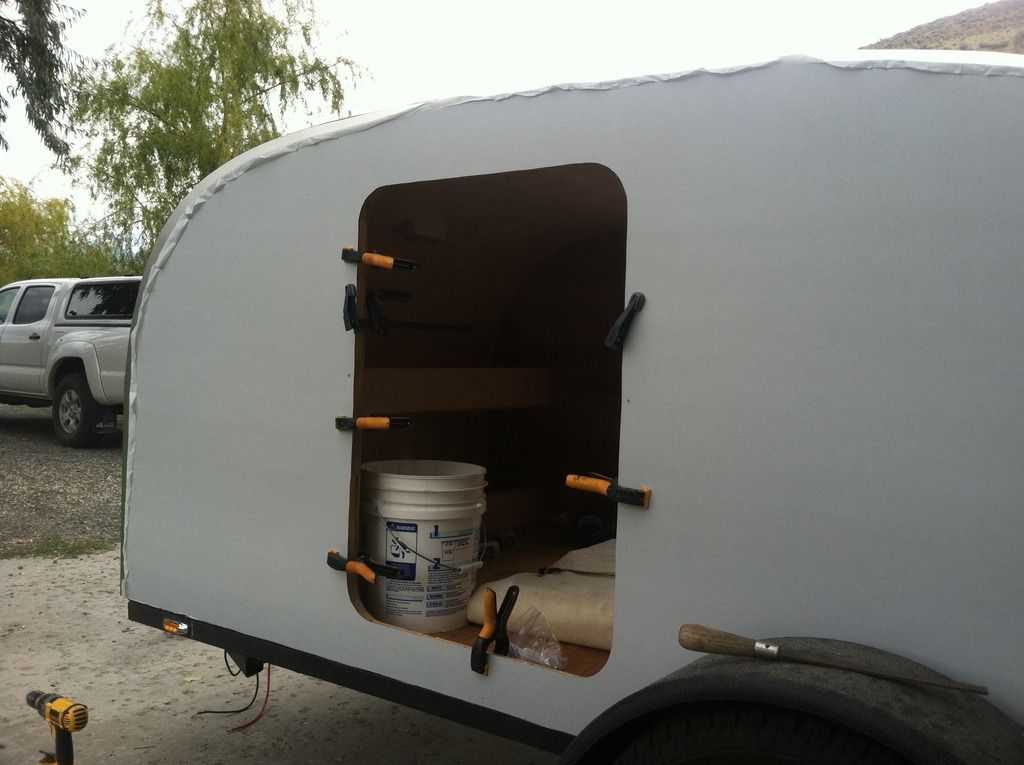
If you look in this photo, I've got 1 x 2's between the cabin and the dollie. I'll set the side piece on those. (I cut the side aluminum about a 1/4" proud). Once it's set on the boards, I can clamp it onto the door opeing and galley edge using spring clamps. I'll then place four countersunk FH screws around the door. (Take a look at your doors to see how close these need to be. Perhaps as close as 3/8".) Then I'll trim with a flush bit router. (Put some blue tape on your roof piece to protect it from the bearing. And some blue tape on the sides so your router base doesn't drag a piece of aluminum across it.)
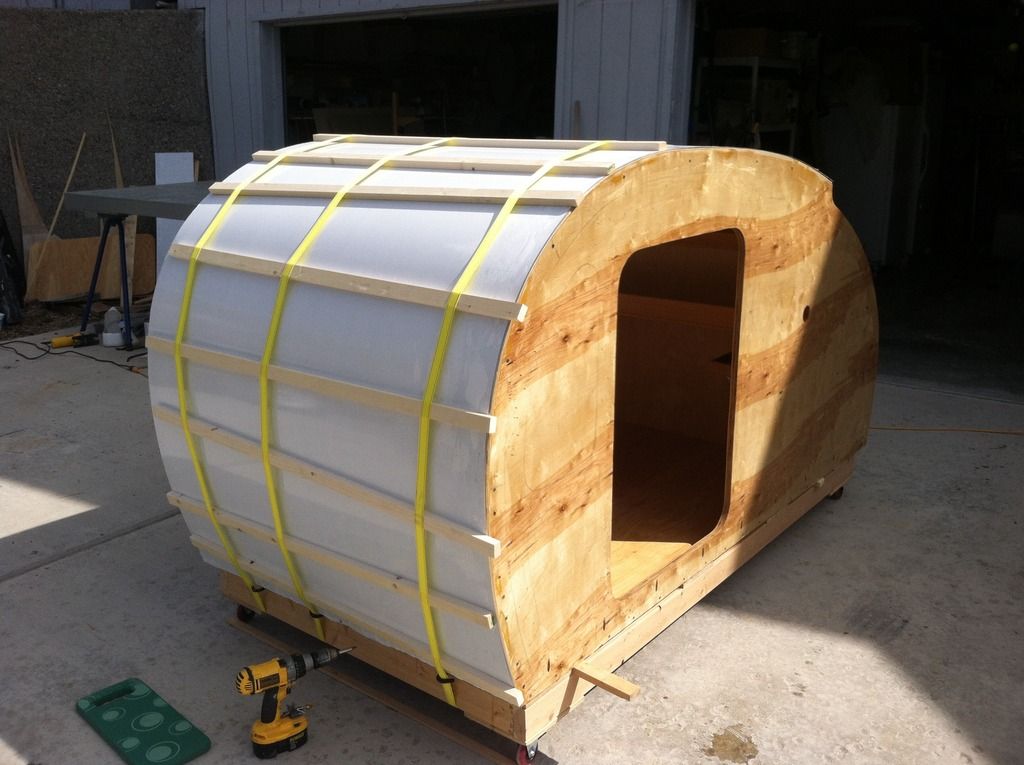
Now you can start putting on your trim. I dry fit the it, remove it, and then add sealant and screw it back in place.
This next pic is of sheathng on my first drop. Of course I built on the chassis like most do... (I don't do it like that anymore). I put a couple of 6 penny finish nails about a half inch between the chassis and the cabin. One up front and one back by the hatch. After the aluminum is on, I pull the nails and stick a daub of sealant where they were. It works well.
I think I put more thought into my first aluminum sheathing job than perhaps any other step. Overkill thought on my part. It's a fairly simple task.
Tony
If you look in this photo, I've got 1 x 2's between the cabin and the dollie. I'll set the side piece on those. (I cut the side aluminum about a 1/4" proud). Once it's set on the boards, I can clamp it onto the door opeing and galley edge using spring clamps. I'll then place four countersunk FH screws around the door. (Take a look at your doors to see how close these need to be. Perhaps as close as 3/8".) Then I'll trim with a flush bit router. (Put some blue tape on your roof piece to protect it from the bearing. And some blue tape on the sides so your router base doesn't drag a piece of aluminum across it.)

Now you can start putting on your trim. I dry fit the it, remove it, and then add sealant and screw it back in place.
This next pic is of sheathng on my first drop. Of course I built on the chassis like most do... (I don't do it like that anymore). I put a couple of 6 penny finish nails about a half inch between the chassis and the cabin. One up front and one back by the hatch. After the aluminum is on, I pull the nails and stick a daub of sealant where they were. It works well.

I think I put more thought into my first aluminum sheathing job than perhaps any other step. Overkill thought on my part. It's a fairly simple task.
Tony

-

tony.latham - Gold Donating Member
- Posts: 7074
- Images: 17
- Joined: Mon Jul 08, 2013 4:03 pm
- Location: Middle of Idaho on the edge of nowhere