Last few days progress. Installed foot board cabinet frames. I'm sure my ventilation design was a lot more work than an RV vent and fan in the ceiling, but, I can just picture being at the beach when a sudden downpour soaks my mattress due to an open vent. I want to eliminate all chances of leaks through the roof.
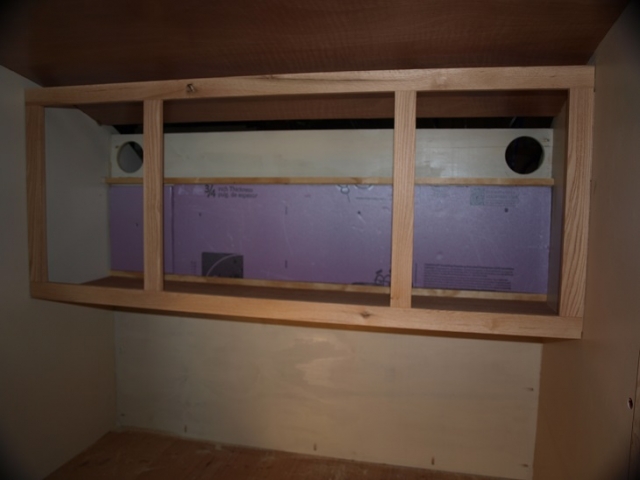
I originally was going to install a 200mm case fan in the front of the cabin with duct going out the front and into a tongue box, then out the bottom of the tongue box. Beans I don't know if I'll put a tongue box anytime soon I decided to incorporate the duct design in the rear foot board cabinets. If you look close at the following photos you can see about a 1" gap between the ceiling skin and the cabinet frames. That is the only part of the duct showing in the cabin. I skinned inside the cabinets from the top/front of the frame down to the inside of the bulkhead wall. Two 45cfm 120mm case fans at the top of the bulkhead will exhaust air out the galley area. I might hide that end of the duct in a cabinet top.
I wanted to maximize the flow of air through the vent system. I
roughly figured the two fans at about 40 square inches in area (4.5 x 4.5 x 2), so, the gap on top of the cabinets at 1" by 58" should give very good air flow off the ceiling of the cabin. I can get 120mm case fans with as much as 120cfm each (noisy) if these 45cfm fans prove to be less than ideal. Roughly, the cabin is less than 130 cubic feet. With the two 45cfm fans the air should change in less than three minutes assuming no make-up air restriction. A Fantastic Fan at 900 cfm seems overkill for 130 Cu Ft and I saved a good amount of cash. The case fans were less than $20 for four of them. This should be good...
Cabinet frames before interior skin/duct
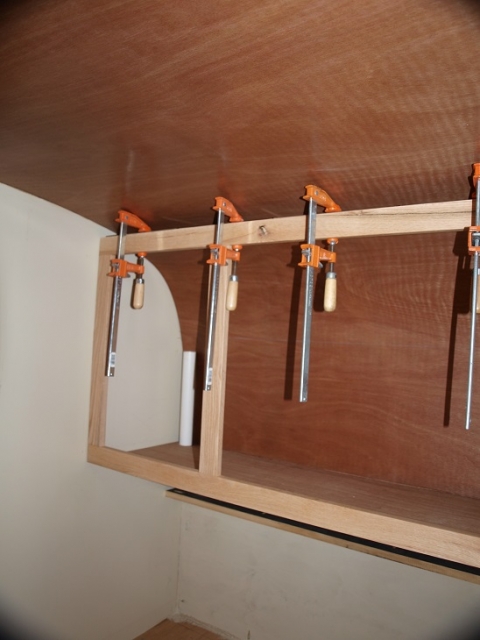
Skin installed and top edge clamped overnight. Love this 1/8" lauan!
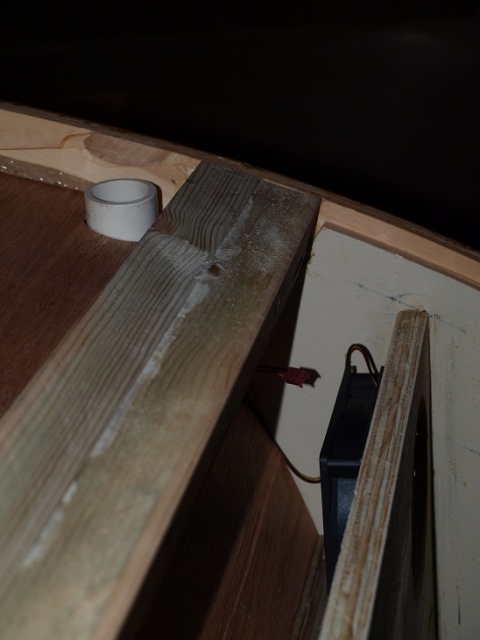
This image shows the backside, inside the duct that was created using the lauan skin. I'll cover this access point somehow to close it up and provide access for maintenance.
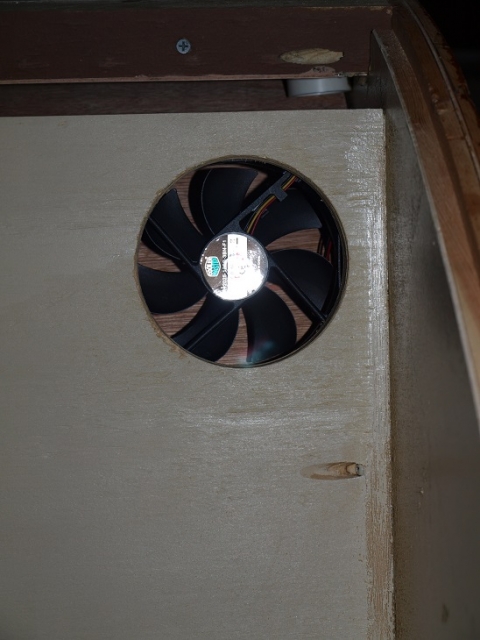
Galley view of ducts. DON"T DO WHAT I DID... Predrill your 4-1/2" holes prior to installing bulkhead on a drill press. Those of you that have experience with a Milwaukee 1/2" drill motor attached to a 4-1/2" hole saw know what I'm getting at! More than a few choice words that can't be repeated here...
UPDATE on the previous struggle. Had I thought this through at the time I would have taken some scrap 3/4" plywood and used the same hole saw ON MY DRILL PRESS to make a pilot hole. Then temporarily screw that onto the location of my fan ports and the pilot plywood would have helped guide the hole saw through the bulkhead. And maybe another on the inside to help the finish of the cut without binding. I was close to a visit to the ER for a broken wrist or forearm after several kickbacks of the hole saw. If I was smart and not in a rush...
Close up of galley view
Next up...
-Finish electrical cabinet door installation
-Order a electrical inlet thingy
-Final design for galley cabinets, electric