Teardrops n Tiny Travel Trailersor t n ttt for short (tnttt.com) |
Skinning with FRP
10 posts
• Page 1 of 1
Skinning with FRP
![]() by oldsloane » Thu Aug 13, 2015 9:08 am
by oldsloane » Thu Aug 13, 2015 9:08 am
I have been experimenting with FRP which I am convinced would make a durable skin for my trailer. I glued a small piece to a 3/4" piece of fir plywood using ordinary yellow wood glue and so far it has sat out in direct sunlight (we are having a low 30 degree heat wave) for a few days with no detrimental effects. I have whacked it very hard with a ball peen hammer, shot it with a high power slingshot using a steel BB and tried to pry off the plastic with my hands. Every test has had a very positive outcome and other than some indecision about what glue to use I am convinced that it will make a very nice covering for my trailer. Any comments, suggestions, etc.?
- oldsloane
- Teardrop Inspector
- Posts: 9
- Images: 6
- Joined: Tue Jul 07, 2015 3:42 pm
Re: Skinning with FRP
![]() by M C Toyer » Thu Aug 13, 2015 10:45 am
by M C Toyer » Thu Aug 13, 2015 10:45 am
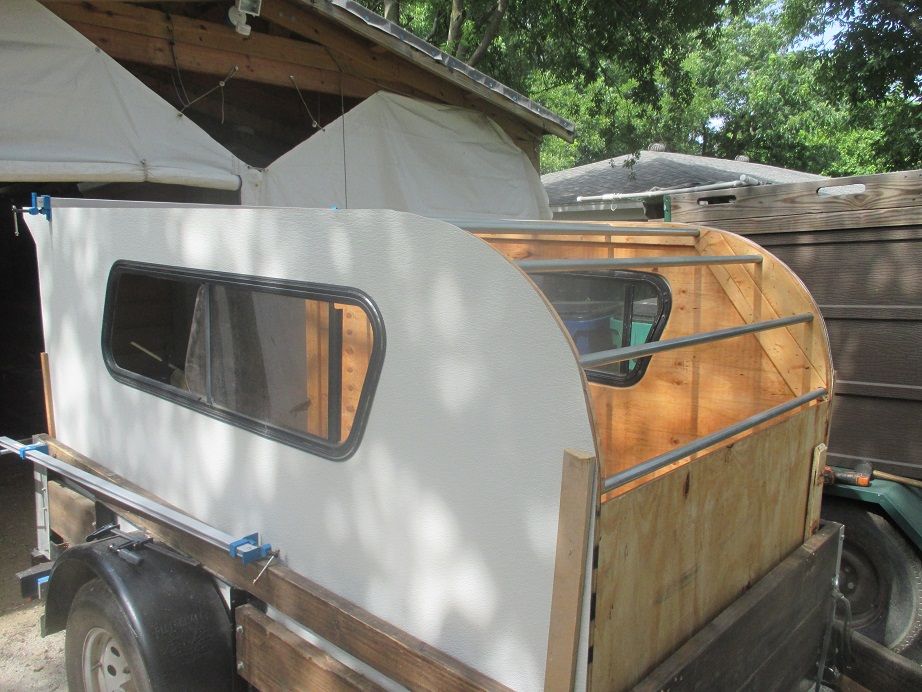
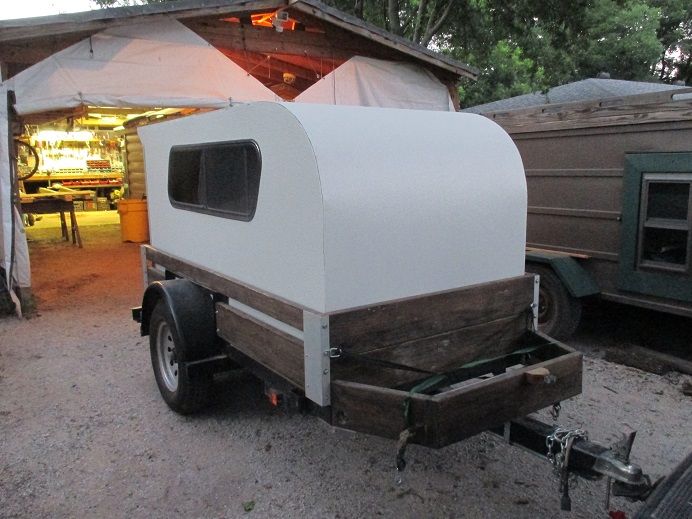
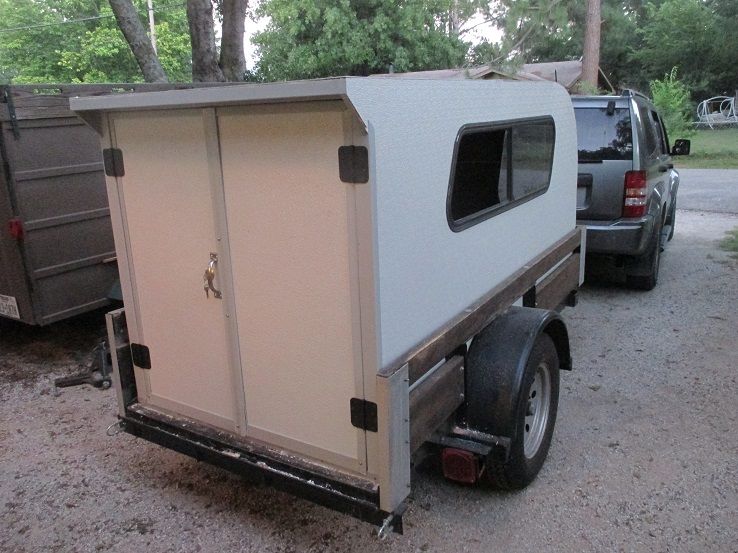
I used off the shelf 4' x 8' FRP from Home Depot with the pebble finish on my slide-in shell. I am well pleased with the appearance and ease of maintenance and, so far, the durability.
The FRP is bonded to the 5/8" plywood sidewalls with Tite Bond III and to the doors with contact cement. The sidewall is additionally secured by the outer window flange, The door edges are trimmed with C channel. I have not seen any oil canning or bubbles.
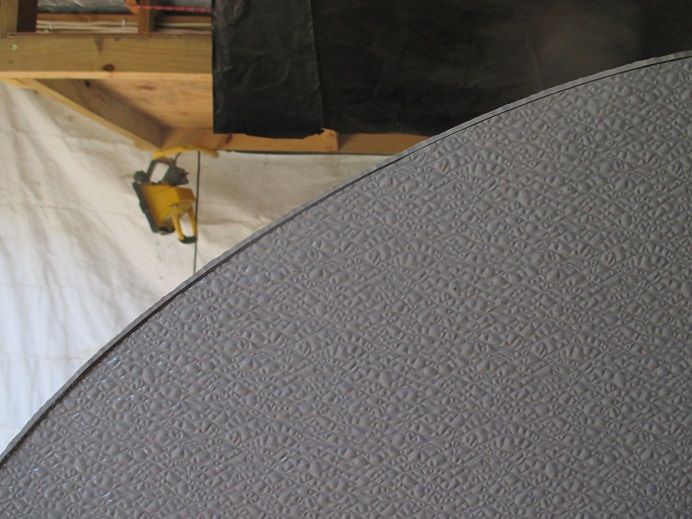
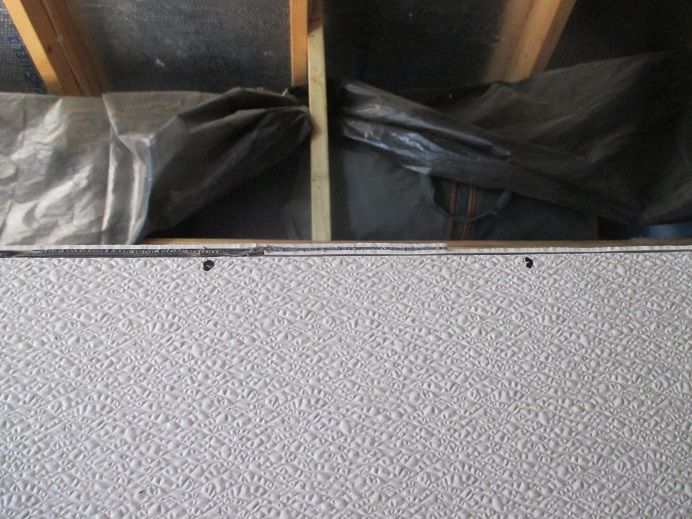
The FRP roof is laid over 1/8" Thermo Ply for maintaining the front radius. The Thermo Ply is laid over carpet to cushion the 3/4" EMT spars. The carpet and Thermo Ply are stapled along the top edge of the sidewall. The FRP is bonded to the Thermo Ply along the top edge of the sidewalls and laterally over each spar with medium duty VHB tape. The expansion rate of the Thermo Ply and FRP is essentially the same and the whole roof floats. The spars are spaced 12" on center
The FRP was stapled to the top edge of the sidewall. I have not gotten around to installing a trim piece yet but all is holding solid and watertight after several extended road trips in 100+ degree weather.
The single seam in the roof was made by overlapping the FRP 3 inches and sealing with the VHB tape. I placed the seam over a spar in case I need to reinforce later with rivets or screws but so far had no separation.
I would recommend scuff sanding the shiny back side of the FRP when using the glue and cement but not for the VHB tape.
This was a quick build to test the FRP for a future project but plan to use the same techniques except substituting the plywood for sandwiched rigid foam walls and rigid foam on the roof over and between the spars.
As for possible UV issues with the FRP I had planned to paint a darker shade of gray anyway.
The FRP is bonded to the 5/8" plywood sidewalls with Tite Bond III and to the doors with contact cement. The sidewall is additionally secured by the outer window flange, The door edges are trimmed with C channel. I have not seen any oil canning or bubbles.
The FRP roof is laid over 1/8" Thermo Ply for maintaining the front radius. The Thermo Ply is laid over carpet to cushion the 3/4" EMT spars. The carpet and Thermo Ply are stapled along the top edge of the sidewall. The FRP is bonded to the Thermo Ply along the top edge of the sidewalls and laterally over each spar with medium duty VHB tape. The expansion rate of the Thermo Ply and FRP is essentially the same and the whole roof floats. The spars are spaced 12" on center
The FRP was stapled to the top edge of the sidewall. I have not gotten around to installing a trim piece yet but all is holding solid and watertight after several extended road trips in 100+ degree weather.
The single seam in the roof was made by overlapping the FRP 3 inches and sealing with the VHB tape. I placed the seam over a spar in case I need to reinforce later with rivets or screws but so far had no separation.
I would recommend scuff sanding the shiny back side of the FRP when using the glue and cement but not for the VHB tape.
This was a quick build to test the FRP for a future project but plan to use the same techniques except substituting the plywood for sandwiched rigid foam walls and rigid foam on the roof over and between the spars.
As for possible UV issues with the FRP I had planned to paint a darker shade of gray anyway.
-
M C Toyer - The 300 Club
- Posts: 363
- Images: 11
- Joined: Thu May 31, 2012 8:59 pm
- Location: Pilot Point (Denton County) Texas