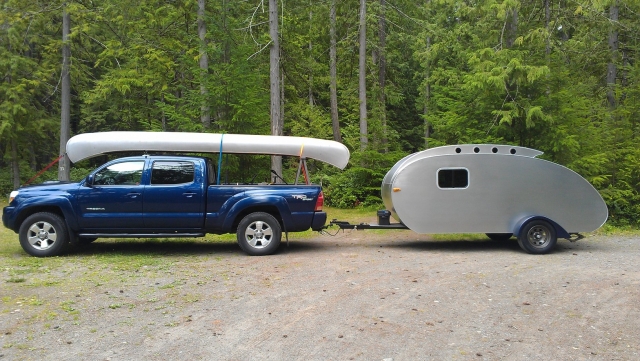
SkookumAJ wrote:Well I finally finished my first build; It got a bit obsessive towards the end, aiming to have her ready for use this summer.. I joined tnttt last august and lurked about for a month, researching the vast info and clarifying what I wanted to build.. and settled on a Modernistic style cabin stretched out to 12' long, to have an extra mini-bed for my 3 yr old daughter. Oh yea, and a trolleytop..
In mid september 2013 I found a trailer that was the size that I wanted. It didn't look great but the steel was good and the price was right..
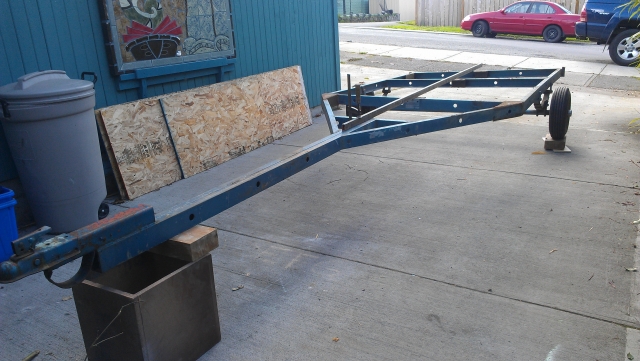
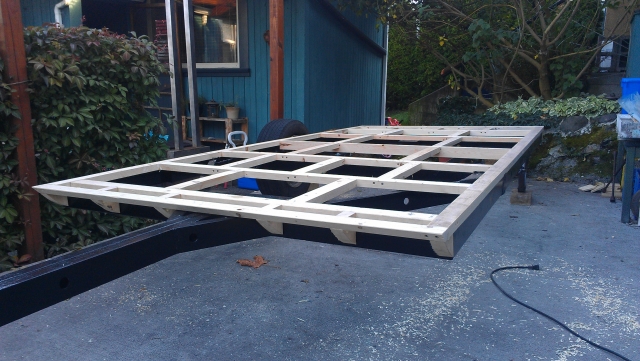
I stripped all the boat stuff off, welded some corners on the front to make the deck 10'x5'.
Tossed the axle and crappy little wheels and installed torsion axles and put on some 15" wheels. Welded on stabilizer jacks also..
And voila, we are on our way
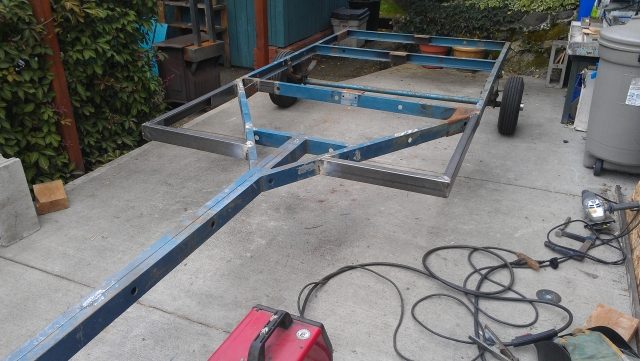
So it looks like I made some kind of frame for the deck, I think I was trying to line up the sticks to where my benches in the cabin would sit..
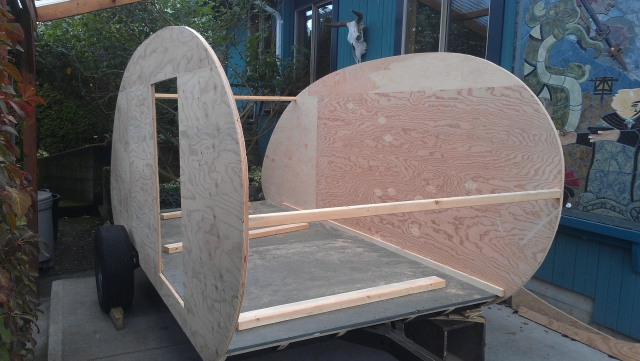
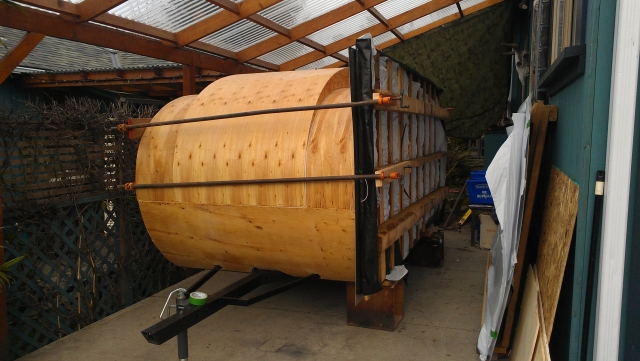
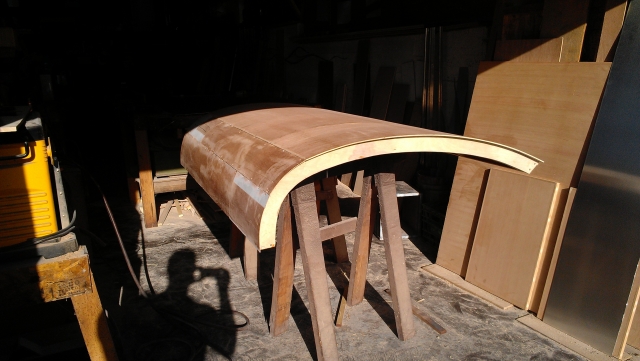
With the ply floor on, and the deck bolted to the frame.. onto walls! My profile was entirely hand drawn, no CAD, no cnc, no compass or math; just drawing on ply, step back to review, and repeat a bizillion times to dial it in...
With spars installed, this thing is taking shape...
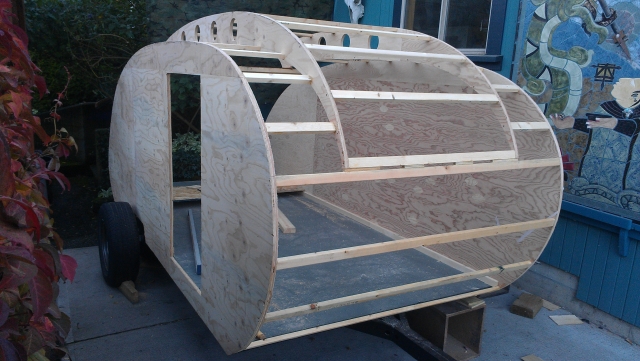
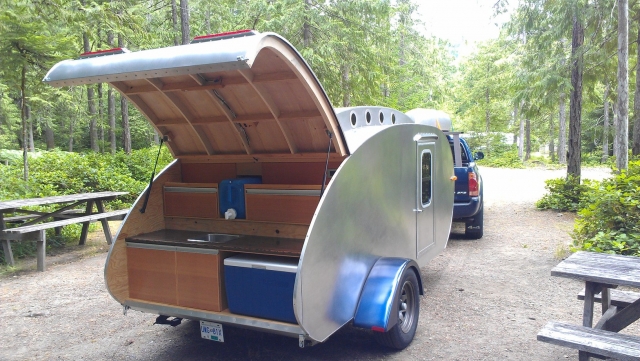
I skinned the inside with 1/4" fir ply, then started on forming the galley..
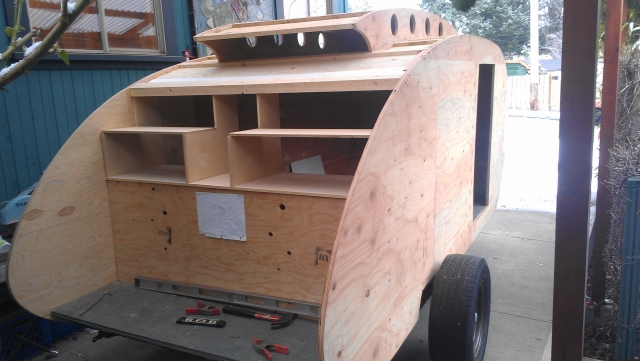
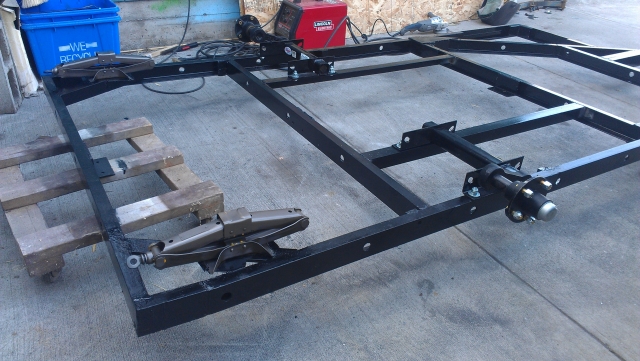
It was around this point that I realized that the (former boat trailer) tongue was really long! So I lopped a couple feet off of that..
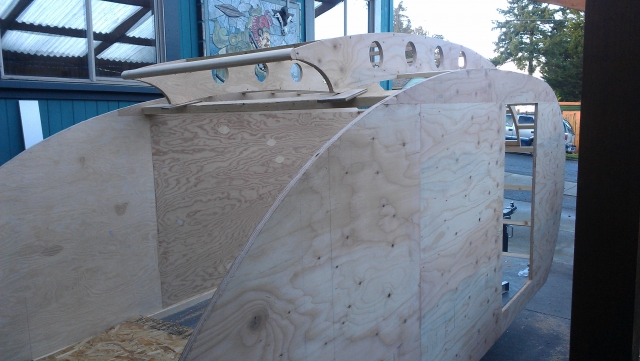
I guess it's time to run wire for lights, etc.. Pulled wire up both sides of the front/top, then slapped some hard foam insulation in between the spars..
Also added some 'wings' onto the tongue, as I would probably need to mount something out front someday...
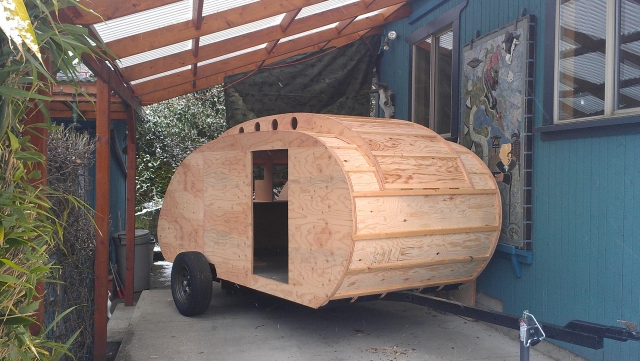
I skinned the outside with 3/16" el cheapo ply, then sealed that with polyurathane. And it looks like the galley is moving along all right; My countertop is an old board of VG Fir salvaged for lord-knows-where.. Ran it through the planer, she cleaned up real nice. Stained it black and 4 coats of poly- I wonder how long it'll stand up to the wifes abuses.. heh..
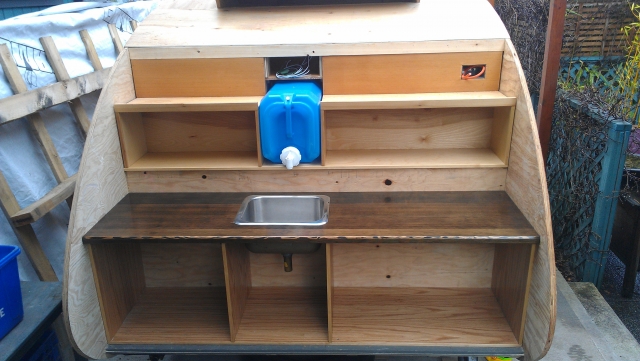
As for plumbing, this being my first trailer build, I wanted to keep things simple in that department for now.. so I opted for a 5 gal jug situated above a small sink, with a catch basin below. it works all right; I can always upgrade later...
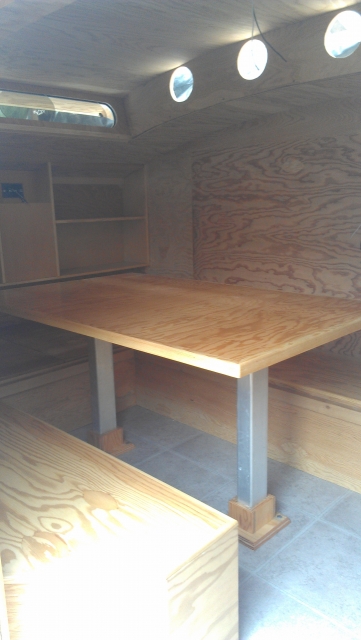
The interior is moving along too; here we have a full queen-size bed on storage benches, and the center piece can pop up to make a table and booth seating..
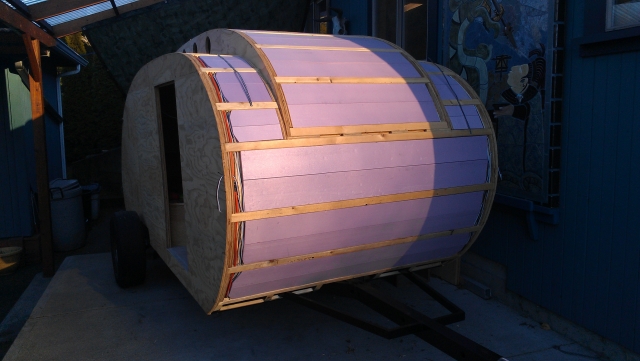
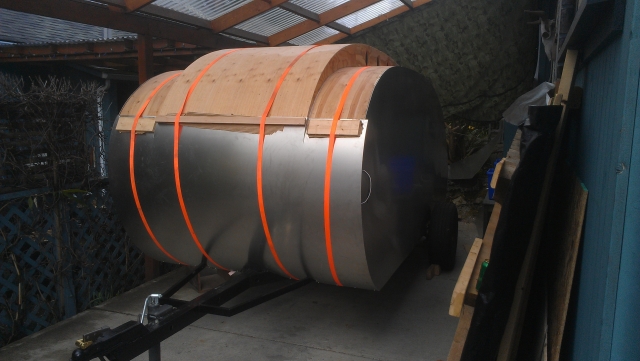
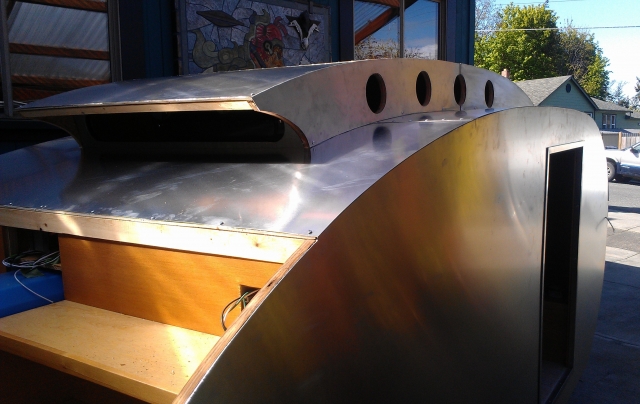
Ok, so I guess we are onto aluminum skinning! Now I know that we want to float aluminum for expansion, but since I would not be having my edge molding for another month and I gotta get skinning, I elected to glue the alum onto the cabin for the building period.. So I used the 5'x12' shipping pallet that the alum came on to clamp it to the cabin:
I glued the full 5'x12' sheet to the side wall, then cut out the profile, which was SO FUN! Then used a flush bit on a laminate trimmer to clean that hot mess up; worked pretty not bad...
then onto the front and roof:
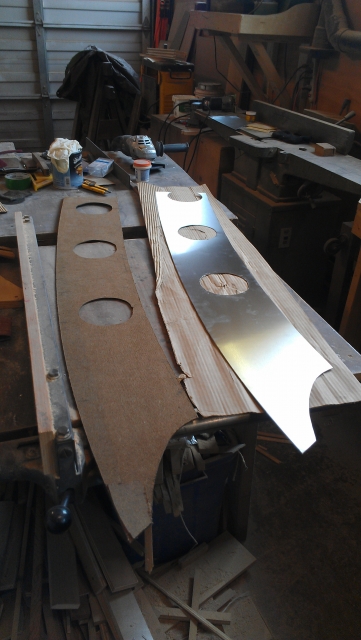
Here's one of the templates to do the trolleytop sides:
If anything, this just shows how in my obsession with building a teardrop, I allowed my shop to descend into shear depraved chaos.. it's just embarrassing..
But worth it I suppose..
Time to bust a move on the galley hatch..
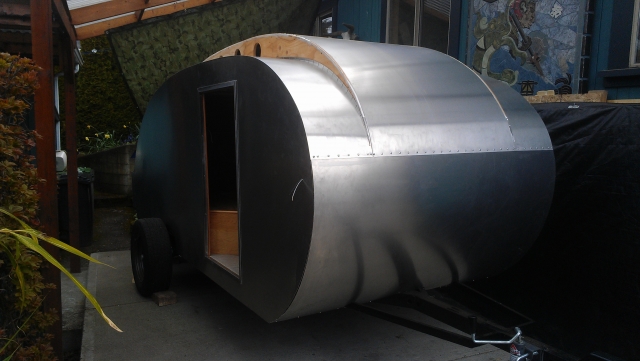
And presto, bango, and galley door! You can see the floppy alum siding here. I was at the point of doing the edge molding, so I was un-adhering the glued alum so that it would be floating.. It came off pretty easy, having oil-canned a few times already

My order of edge molding, windows, door handles and various specialty parts came in, very exciting, aside from the punishing postage for stuff sent from US to Canada... But now I can assemble the finishing touches!
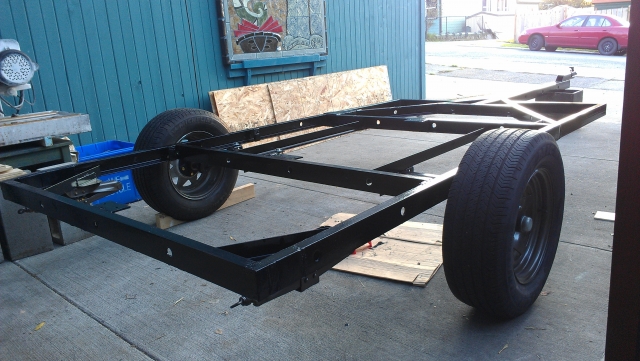
The first road test; just a bandit cruise around the block to make sure that it didn't cartwheel sideways off the road, or simply break in two haha..

All good!
Here's how the edge molding tapered out at the front of the trolleytop:
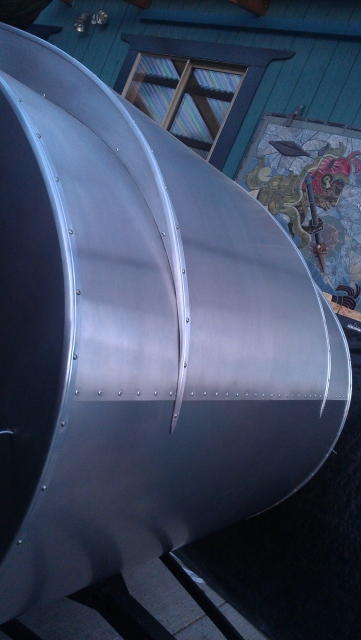
And here's how it ended at the rear:
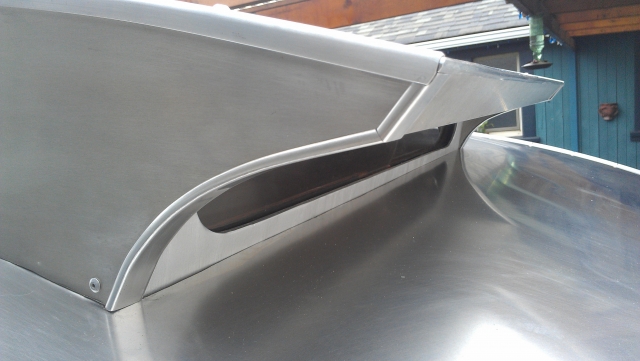
That was a load of fun getting all that to fit tight and right, tell you what..
So then there's installing and connecting the lights, apparently not photoworthy.. same goes for cabinet doors and drawers; Sorry! I'm a woodworker by trade and I guess that cabinet doors and drawers barely register on my radar these days, y'all know what I mean?
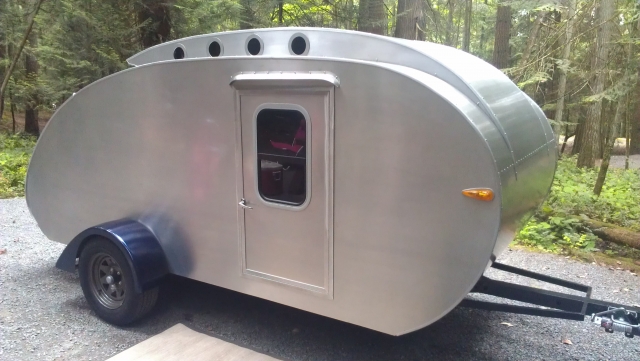
What does register is getting my porthole windows sorted out. it wasn't in my budget to order 8 @$20 plus shipping to Canada (double that $$, for real), and i didn't relish making them out of wood. Lo and behold, the universe provided and I met a fellow living one block away from me, who has a 3-D printer and was open to a little project. I drew the part on Autocad, and he printed 8 trimrings for me (for a trade, bit o woodwork for him):
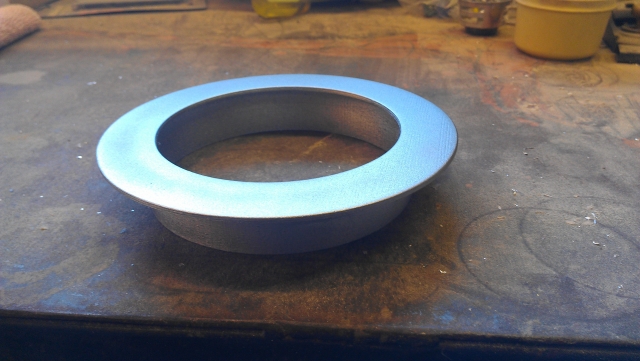
They came white plastic. I paint them 'stainless steel' and siliconed a tinted plexi disc in there, then silcone that into the openings in my trolleytop, and I'm very happy!
Heck we must be getting close.. fenders came in, painted them to match the truck.. Gas props dialed in after much screwing around... You know what, I'm done.. Let's go camping already!!