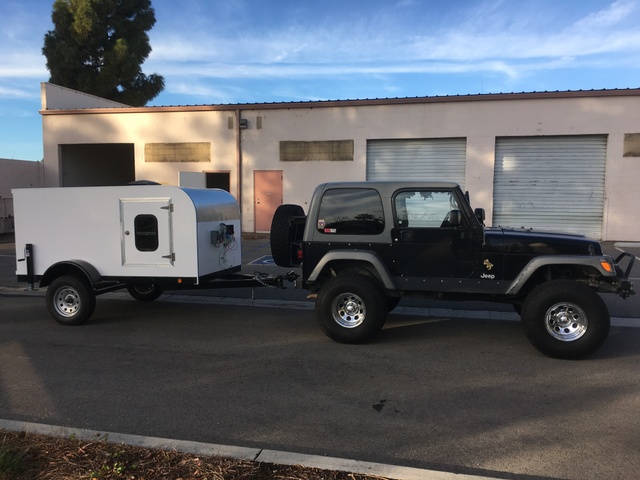
Using Cabinet Vision to design my first camper. It's a CAD based program that links to a CNC. I have been designing and building cabinetry for over 20 years and figured it's just a box with more boxes in it. I created scaled objects like a propane tank, cooler and bed so you could see how things fit and relate to one another. My design needed to be robust and short as the camper will be towed behind a Jeep and taken to remote locations where tree limbs are never cut higher than the roof of a Jeep. Being in remote locations the design had to incorporate elements to make it self sufficient and able to be out for up to two weeks with no outside contact. The finished camper will have the following: 200 watts of solar power, 2 Trojan 145+ 6v batteries wired in a series, solar controller, fuse box, solar monitor in cabin, LED lighting, 12v outlets, 12v water pump, 12v stereo system, cabin and kitchen speakers, 65 qt cooler, 18 gallon tank bolted to bottom for shower water, Triton instant hot shower unit, 10 20 gal propane tank, 2) 5 gal military grade water cans, 1) 5 gallon military grade gas can and possibly a couple 120v outlets for shore power. After considerable research I decided to use 3/4" 13 ply baltic birch with exterior grade glue as my sides, decks, kitchen cabinetry and bulkhead, 1/2 baltic birch 9 ply as my bottom, top and drawer construction., bamboo for cabin cabinetry and ceiling and luan and 1/8" birch bendy boards for curved areas. I also used solid white oak for ceiling joists and floor joists. I ran electrical thru the floor and through the ceiling. In hindsight I would probably do a 3/4" floor and run all electrical through ceiling on my next build to simplify matters. I do like the double floor construction for strength and rigidity. It also gives you air gaps to insulate if you so choose. The trailer was purchased from MCT trailers in Ventura and built to my specifications. Lights were flush mounted to frame, electric brakes added, axle was 40" from rear to center and no wood, angle iron cross members were welded flush to frame top and axle moved to bottom of leaf springs for added ground clearance. I carefully measured the trailer and created a CAD replica to design the camper on. Another consideration was the camper had to be secure as I like to explore and hike around looking for photo ops. I used Schlage deadbolts on the doors with double deadbolt no turn latch on the interior and kept the window small and for ventilation purposes. In the bottom photo you can see the trailer is almost complete. YEAAAAA! The majority of the parts were cut out on CNC and dados were used wherever possible for added strength and ease of assembly. As is often the case with projects like this the design was fluid and apt to change during the build to make things better or easier to construct.


 Are you going to tease us by only showing us one picture of your completed teardrop?


