
Yes, OP. I am really starting to feel like I have the hang of it. Not an expert, but getting it done in reasonable fashion.
Stay tuned, today's exploits are coming right up.
Teardrops n Tiny Travel Trailersor t n ttt for short (tnttt.com) |
The Poet Creek Express - Foamie Hybrid
Moderator: eaglesdare
Re: The Poet Creek Express - Foamie Hybrid
![]() by KCStudly » Sun Mar 13, 2016 12:31 am
by KCStudly » Sun Mar 13, 2016 12:31 am
KC
My Build: The Poet Creek Express Hybrid Foamie
Poet Creek Or Bust
Engineering the TLAR way - "That Looks About Right"
TnTTT ORIGINAL 200A LANTERN CLUB = "The 200A Gang"
Green Lantern Corpsmen
My Build: The Poet Creek Express Hybrid Foamie
Poet Creek Or Bust
Engineering the TLAR way - "That Looks About Right"
TnTTT ORIGINAL 200A LANTERN CLUB = "The 200A Gang"
Green Lantern Corpsmen
-

KCStudly - Donating Member
- Posts: 9640
- Images: 8169
- Joined: Mon Feb 06, 2012 10:18 pm
- Location: Southeastern CT, USA
Re: The Poet Creek Express - Foamie Hybrid
![]() by KCStudly » Sun Mar 13, 2016 1:00 am
by KCStudly » Sun Mar 13, 2016 1:00 am
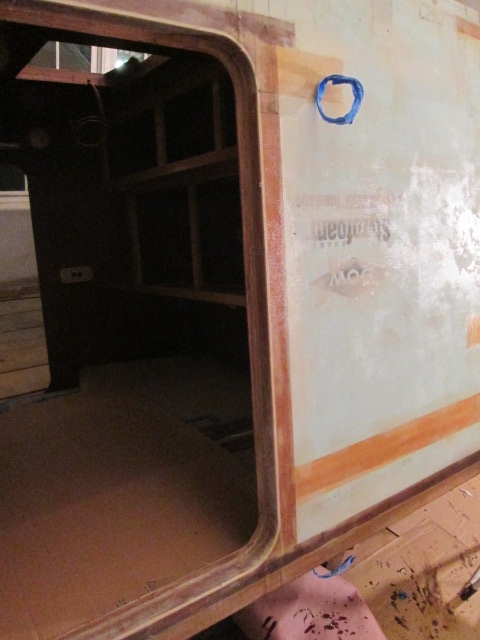
Last night I trimmed up and washed the cured street side door sill glass.
Under door area.
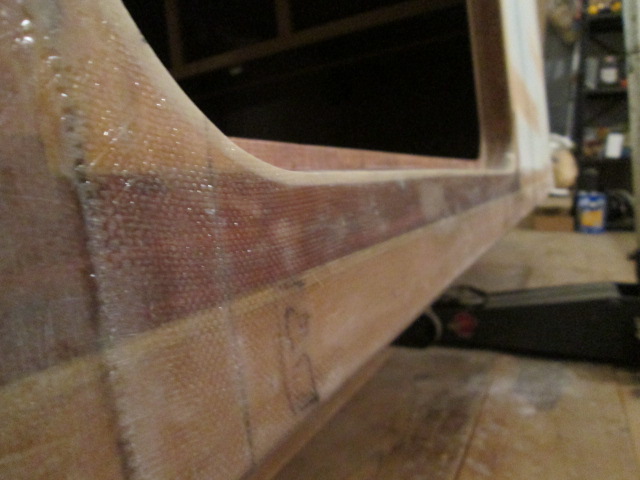
Flox corner.
Under floor wrap.
Then I cut the large pieces of glass cloth for the remainder of the street side wall. Because of the limited size of the table I had to get creative. I marked some reference marks on the plastic; rolled out the glass and squared it up to the table; made marks on both edges of the cloth; pulled more cloth off the roll draping it back over itself until the first marks came to the edge of the table; and then marked and cut the desired lengths. I should have marked the 3 inch reference line for the floor under wrap at the same time, but didn’t think of that until I had already rolled them up for the night.
This morning I scuffed the areas on the sill layup that will be overlapped by the glass for the rear portion of the wall, and gave the wall a good once over with the vacuum cleaner and foxtail broom.
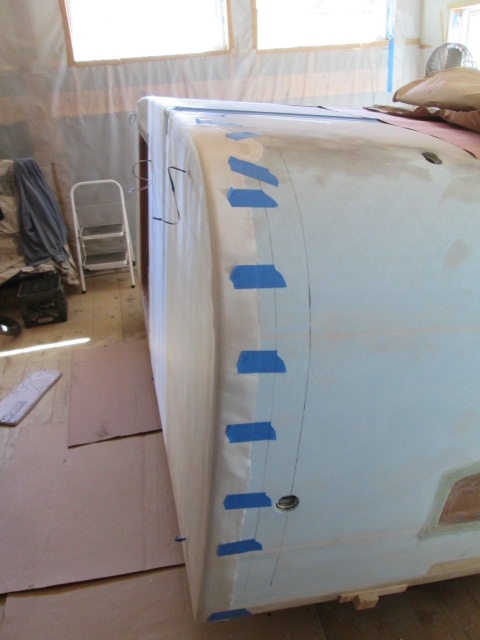
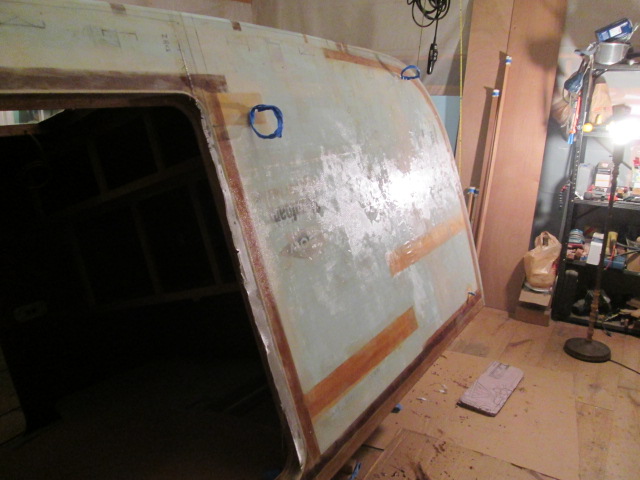
Then I added the reference line to the first ply and started getting it taped up into position.
It would have been easier if I had a reference line to work to at the top and could have just let gravity hang the rest of the sheet down, but the top curved line would have been impossible to predict and cut accurately prior to installation. Instead, I marked the 3 inch under wrap and just went back and forth adjusting the tape along the top and brushing the glass down until it hung relatively true.
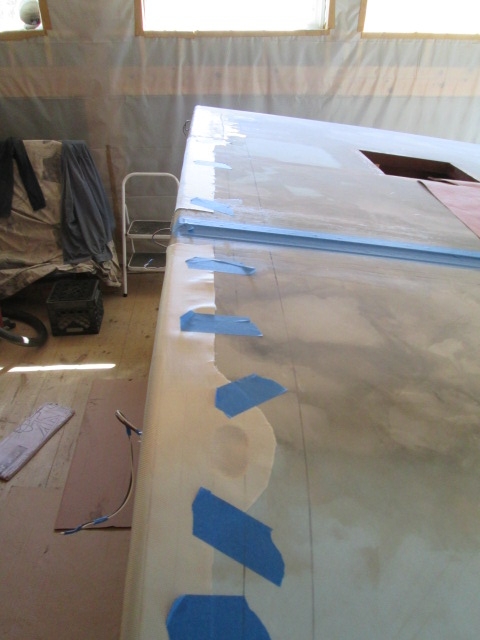
Here’s what the top looked like prior to trimming to the lap line.
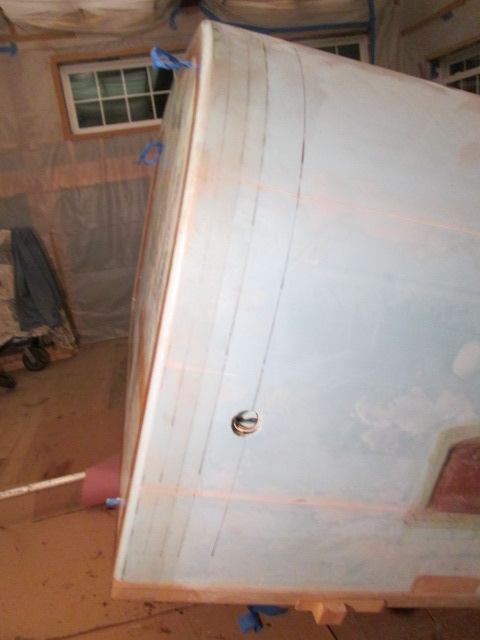
From there I trimmed to the layout line for the first ply, brushing the cloth out better and adding more tape.
Rather than half overlapping the left clearance light recess on the hatch, I cut around leaving the glass to straddle the recess.
At the hinge cut I made sure that the first wall ply overlapped the existing layups, but left enough of a gap for the second ply to stagger.
It was looking much tauter now.
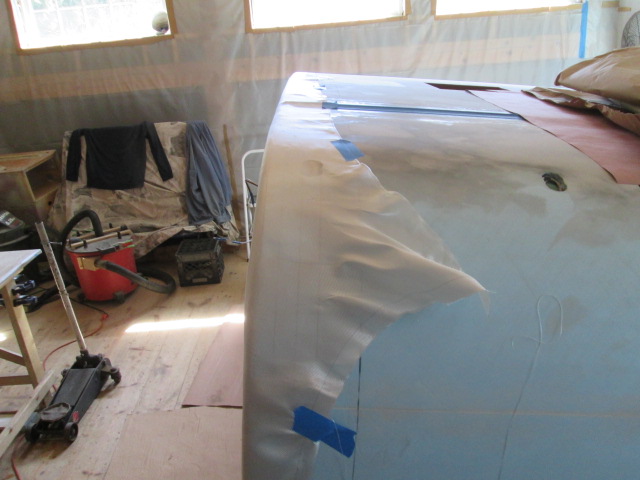
Looking up under the hatch bumper I made a slit so that the floor under wrap would end in the gap, then trimmed the hatch portion short so that it could be folded under. At first I thought I would just leave this hanging, wet to the edge of the radius and sand to blend after the cure; but you will see later that I ended up wetting it out, adding a little more armor to the corner of the already glassed hatch bumper.
I struggled for a while trying to decide how to do such a big layup while maintaining a wet edge, and still wrap the flap under the floor in one step. If I worked down the wall in sections, by the time I got to the end of the wall and started folding the under wrap up the fast hardener would likely have started to get leathery at the beginning areas. If I worked down the wall in sections and folded the flap up as I went, I expected to have problems getting the brush up under the flap to “paint” the next section. This all got further complicated by the fact that when it came time to drape the second ply I would be fighting with the wires poking out. I envisioned a big gooey wad getting tangled and perhaps falling on the floor.
I also considered using the slow hardener to buy more wet time, but really liked having used the fast stuff because it goes quicker and the layup gets more stable quicker; meaning you are less likely to drag things out of position as you go, and corners are less likely to spring back up, etc. The weather was on my side for the fast hardener, as the temp’s were holding right around 60 deg F.
The solution seemed to be fitting the second ply dry, as well, and wetting them both out as one. That way I could get everything situated before it got sticky. This also meant that I could tape both under wrap plies up in advance, and not have to worry so much about keeping that wet edge moving.
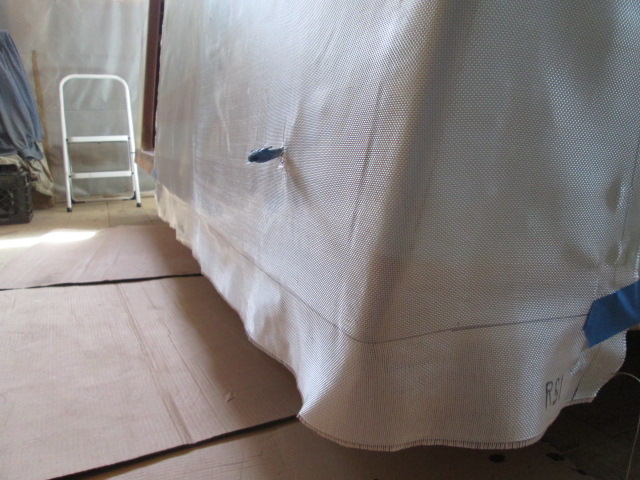
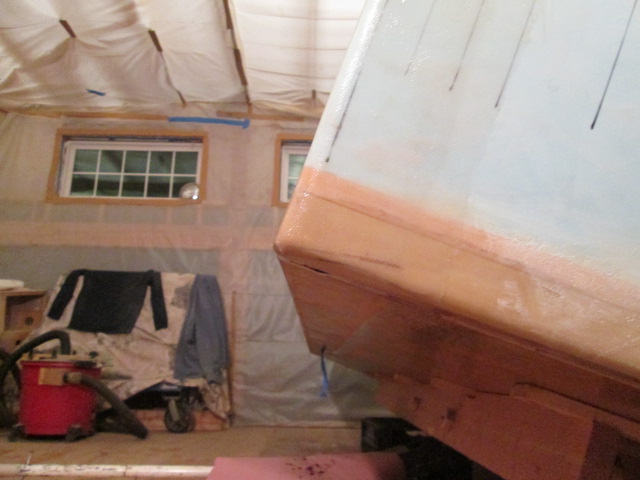
You can see the first ply under wrapping the floor here.
The snips for the wires to pull thru end up a little jagged. You can see that here at the rear side clearance light recess and porch light, respectively…
… and here again at the cured front clearance light.
I thought I might put an extra little swatch of cloth over these areas and even cut a couple of small pieces, but then decided to just touch them up with filler later during the body working phase.
While I was still deciding about the second ply, I worked on setup and prep for the wet out. It occurred to me that Karl had bought a small paper cutter at one of the tractor swap meets and it just might be a more efficient and better way to chop down the bristles on the chip brushes. It worked pretty well despite being dull and requiring repeated cuts to get thru all of the bristles. The results were much straighter and more even than what I had been doing with the scissors. I put the empty paper towel box underneath the edge of the bench to catch most of the cut bristles. I prepped six brushes and used them all. Later I found that I still had a few of those little blister pops, so decided that they were probably from having mixed air into the epoxy, and not from cleaning brushes midstream using the acetone. Next time I will go back to using fewer brushes and cleaning them on the fly.
Reassured by previous advice that I should be able to wet out the two plies all dry on dry, I decided to go that way and put the second ply on dry. This was a little more difficult doing it by myself than the first ply because it wanted to slip right off; whereas the first ply had some friction with the foam and held up better while getting the tape started. Anyway, I got it up there; got it aligned along the bottom; and got it cut and taped.
You can see here how the second ply overlaps the jamb and prior layups by about 1-1/2 inches.
Second ply bottom wrap all taped up along with extra tape on all of the wires. These are the porch foot light wires hanging down.
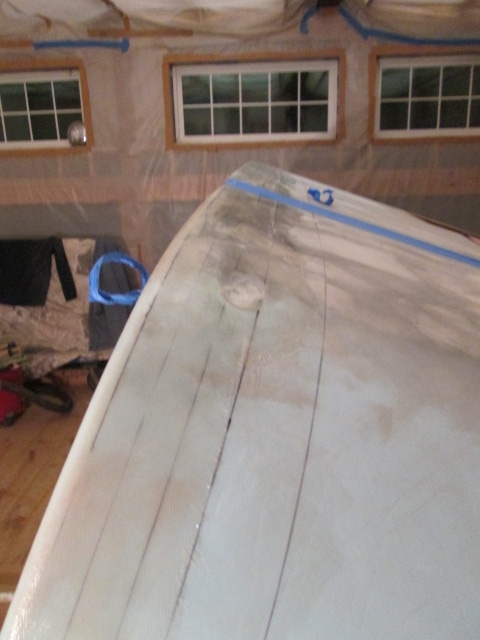
You can see how the plies are staggered around the hinge cutout.
Okay, that took from about 11:30am up to about 3:30pm. I guess I’m feeling ambitious and wanting to keep things moving. Time to step out back for a little weed abatement before starting to mix up the epoxy. This may sound like TMI, but you need to keep things moving during a layup and the last thing you want to think about is dancing up and down on one leg while trying to hold it thru ‘til the end.
Once I got a good portion of the main panel wet out it was sticky enough that I could peel off the tape around the edges in stages. On previous layups I had trouble getting a hold of the tape edges with gloved fingers. So for each piece of tape I folded one corner under on itself and placed that end of the tape on the glass side of the joint. That way it was easier to get a hold of and pull in the direction that did not tend to lift the edge of the glass.
On the floor under wrap, I waffled back and forth between trying to wet it thru, and peeling it down to brush wet onto the floor to make it go quicker with less slopping. Neither technique was ideal, but it all got done w/o any catastrophe.
I had calculated that it would take about 32oz of resin, plus hardener, to wet out the cut cloth, not including allowance for saturating the foam and wood, or deducting for the areas of glass that were trimmed off at the profile line. In the end I had mixed 8 batches at 5 pumps and two batches at 4 pumps for a total of 34oz of resin. Some got lost to the cups and brushes and some hit the cardboard drop cloths, so I figure I got pretty close on the ratio. There were a few slightly wet areas, but not too bad.
By the time that was all done, and I had gone around trimming loose strands and chasing any drips, the door jamb had set up to the “leathery” stage. It was tough enough to cut with the utility knife w/o messing up the adhesion along the flox edge, but so much easier to cut clean in one pass than it would be to do later after the full cure. Wish it was this easy every time.

Unfortunately the hatch gap had not reached that stage yet, and at 7:30pm, after 8 hrs I was ready to go home.
After getting this all done, having learned what I learned today on this, my largest layup, I figure I probably could have done the whole wall as one big layup. It would have meant getting both plies of glass all taped and trimmed into position in one prep session, and then doing the wet out in a marathon session. The cloth in the door openings would most likely have gone to waste, but if I was concerned about ultimate strength, that is how I would do it now that I have the experience.
Still, I am very happy with the progress today, having proven my chosen technique and reaching another mini milestone.
Under door area.
Flox corner.
Under floor wrap.
Then I cut the large pieces of glass cloth for the remainder of the street side wall. Because of the limited size of the table I had to get creative. I marked some reference marks on the plastic; rolled out the glass and squared it up to the table; made marks on both edges of the cloth; pulled more cloth off the roll draping it back over itself until the first marks came to the edge of the table; and then marked and cut the desired lengths. I should have marked the 3 inch reference line for the floor under wrap at the same time, but didn’t think of that until I had already rolled them up for the night.
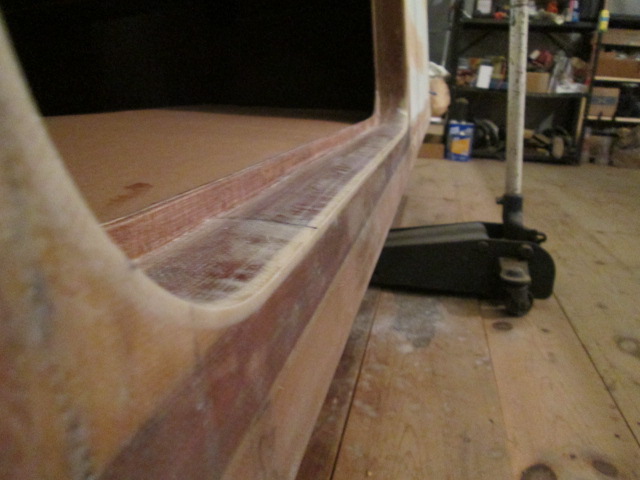
This morning I scuffed the areas on the sill layup that will be overlapped by the glass for the rear portion of the wall, and gave the wall a good once over with the vacuum cleaner and foxtail broom.
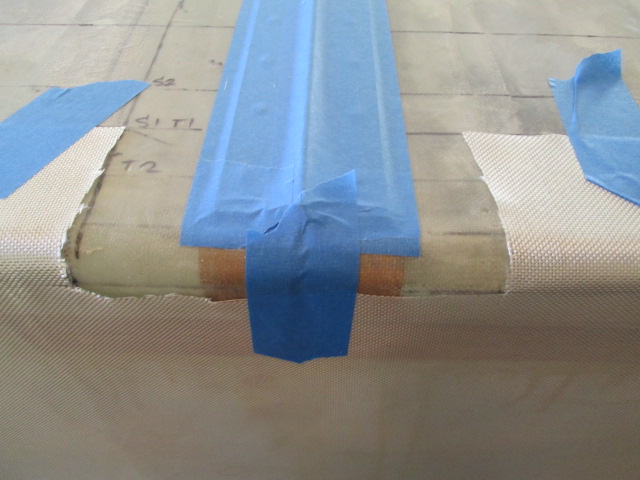
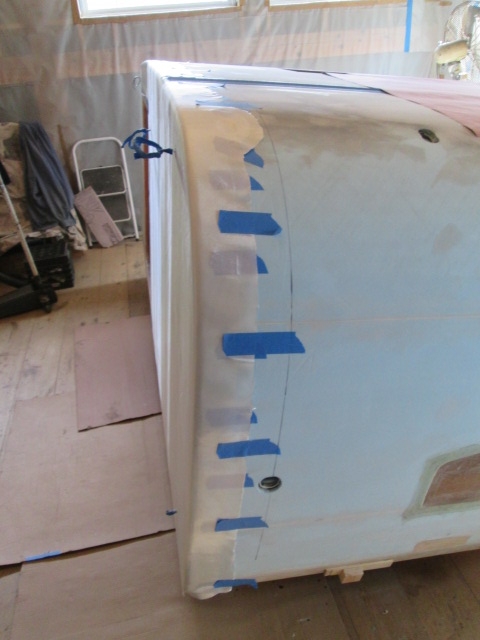
Then I added the reference line to the first ply and started getting it taped up into position.
It would have been easier if I had a reference line to work to at the top and could have just let gravity hang the rest of the sheet down, but the top curved line would have been impossible to predict and cut accurately prior to installation. Instead, I marked the 3 inch under wrap and just went back and forth adjusting the tape along the top and brushing the glass down until it hung relatively true.
Here’s what the top looked like prior to trimming to the lap line.
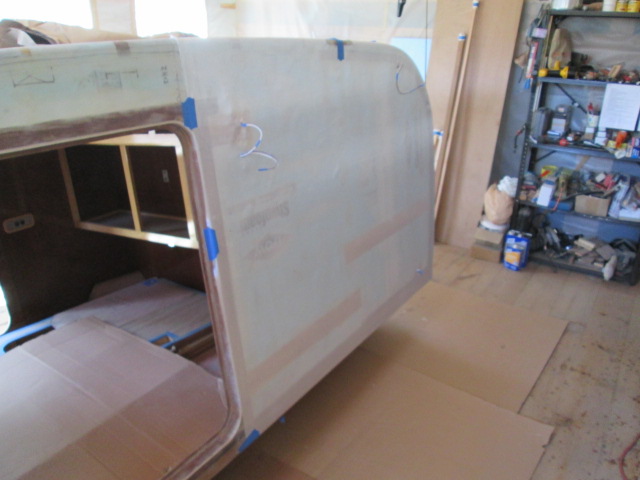
From there I trimmed to the layout line for the first ply, brushing the cloth out better and adding more tape.
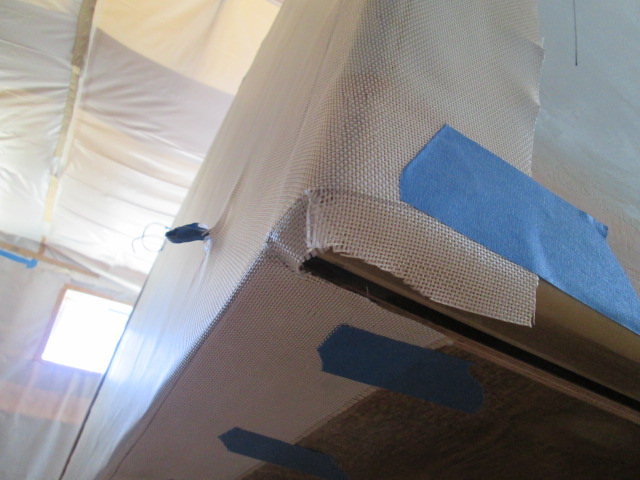
Rather than half overlapping the left clearance light recess on the hatch, I cut around leaving the glass to straddle the recess.
At the hinge cut I made sure that the first wall ply overlapped the existing layups, but left enough of a gap for the second ply to stagger.
It was looking much tauter now.
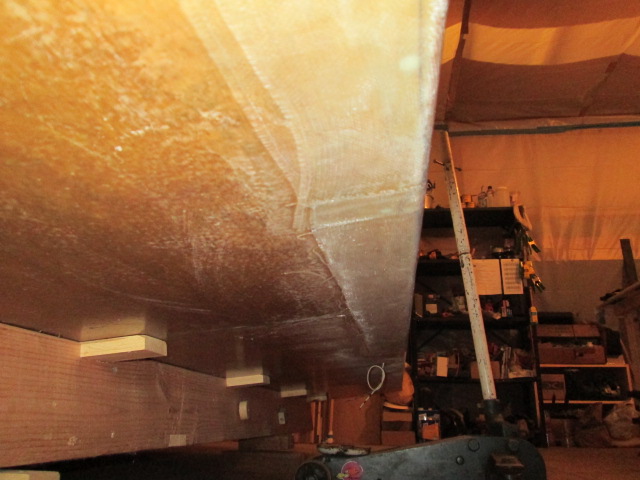
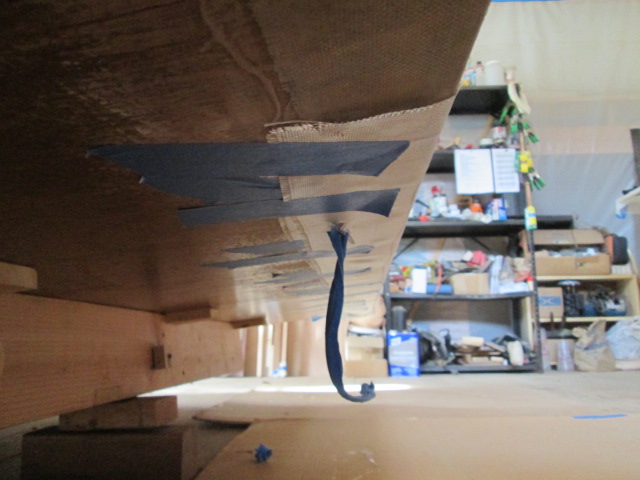
Looking up under the hatch bumper I made a slit so that the floor under wrap would end in the gap, then trimmed the hatch portion short so that it could be folded under. At first I thought I would just leave this hanging, wet to the edge of the radius and sand to blend after the cure; but you will see later that I ended up wetting it out, adding a little more armor to the corner of the already glassed hatch bumper.
I struggled for a while trying to decide how to do such a big layup while maintaining a wet edge, and still wrap the flap under the floor in one step. If I worked down the wall in sections, by the time I got to the end of the wall and started folding the under wrap up the fast hardener would likely have started to get leathery at the beginning areas. If I worked down the wall in sections and folded the flap up as I went, I expected to have problems getting the brush up under the flap to “paint” the next section. This all got further complicated by the fact that when it came time to drape the second ply I would be fighting with the wires poking out. I envisioned a big gooey wad getting tangled and perhaps falling on the floor.
I also considered using the slow hardener to buy more wet time, but really liked having used the fast stuff because it goes quicker and the layup gets more stable quicker; meaning you are less likely to drag things out of position as you go, and corners are less likely to spring back up, etc. The weather was on my side for the fast hardener, as the temp’s were holding right around 60 deg F.
The solution seemed to be fitting the second ply dry, as well, and wetting them both out as one. That way I could get everything situated before it got sticky. This also meant that I could tape both under wrap plies up in advance, and not have to worry so much about keeping that wet edge moving.
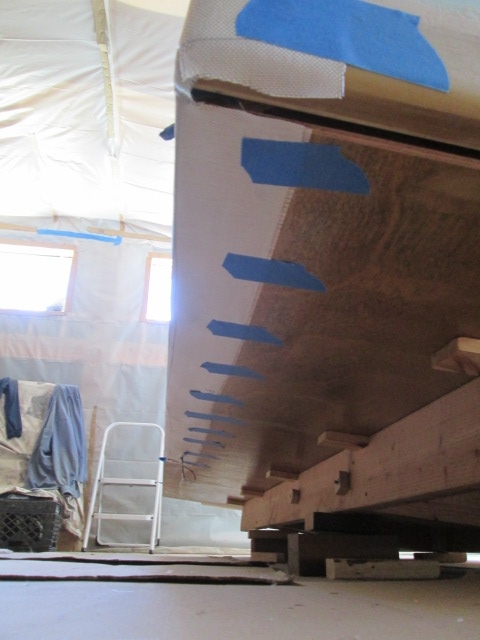
You can see the first ply under wrapping the floor here.
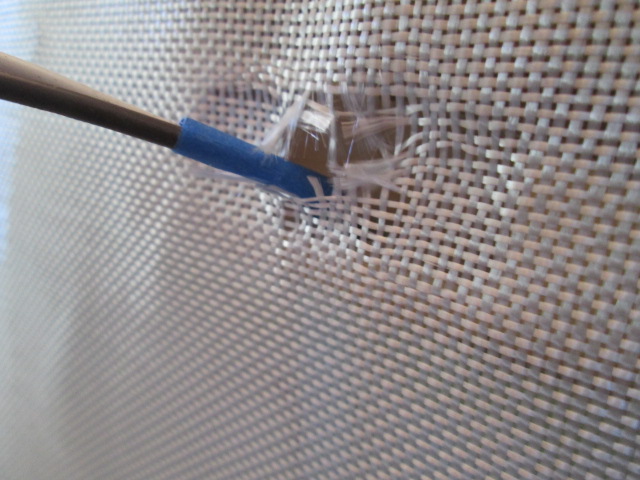
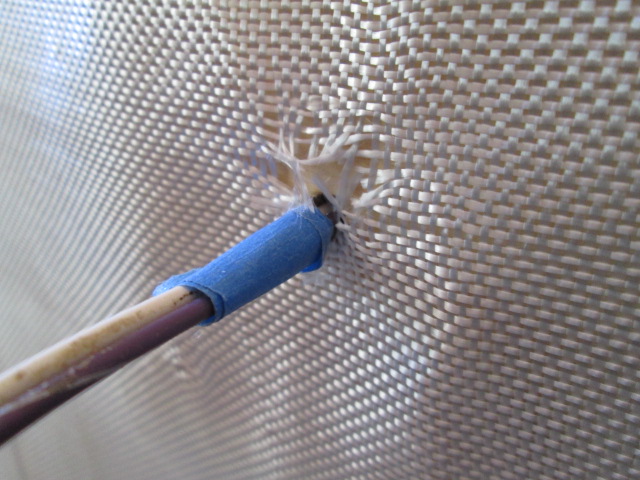
The snips for the wires to pull thru end up a little jagged. You can see that here at the rear side clearance light recess and porch light, respectively…
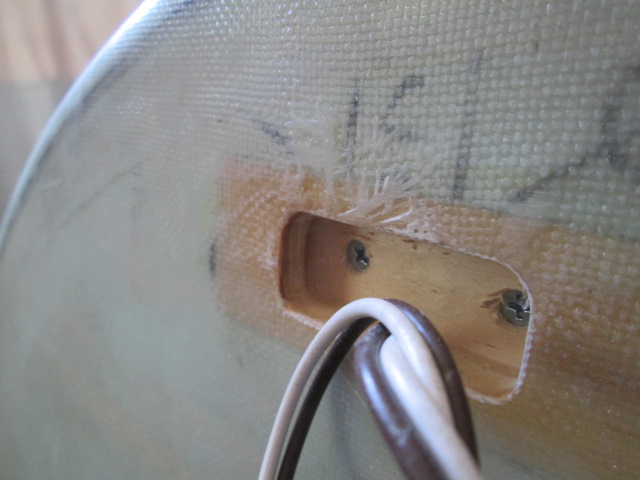
… and here again at the cured front clearance light.
I thought I might put an extra little swatch of cloth over these areas and even cut a couple of small pieces, but then decided to just touch them up with filler later during the body working phase.
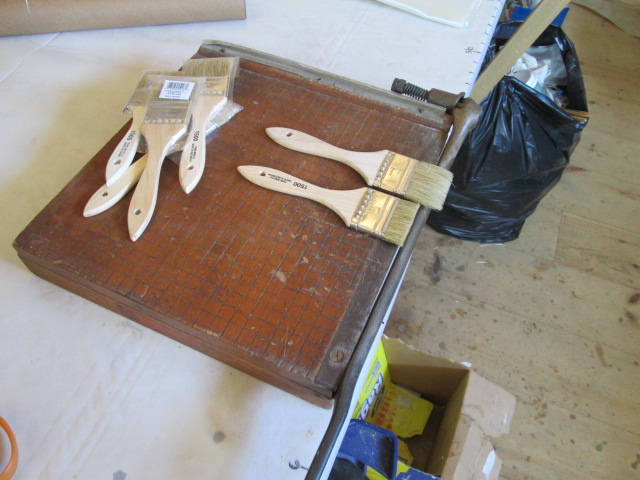
While I was still deciding about the second ply, I worked on setup and prep for the wet out. It occurred to me that Karl had bought a small paper cutter at one of the tractor swap meets and it just might be a more efficient and better way to chop down the bristles on the chip brushes. It worked pretty well despite being dull and requiring repeated cuts to get thru all of the bristles. The results were much straighter and more even than what I had been doing with the scissors. I put the empty paper towel box underneath the edge of the bench to catch most of the cut bristles. I prepped six brushes and used them all. Later I found that I still had a few of those little blister pops, so decided that they were probably from having mixed air into the epoxy, and not from cleaning brushes midstream using the acetone. Next time I will go back to using fewer brushes and cleaning them on the fly.
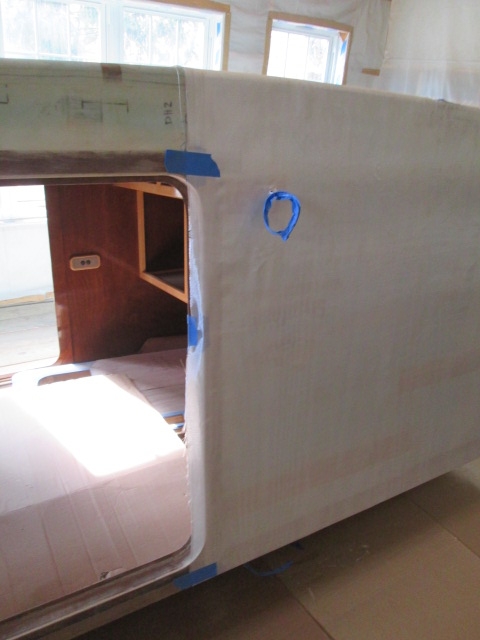
Reassured by previous advice that I should be able to wet out the two plies all dry on dry, I decided to go that way and put the second ply on dry. This was a little more difficult doing it by myself than the first ply because it wanted to slip right off; whereas the first ply had some friction with the foam and held up better while getting the tape started. Anyway, I got it up there; got it aligned along the bottom; and got it cut and taped.
You can see here how the second ply overlaps the jamb and prior layups by about 1-1/2 inches.
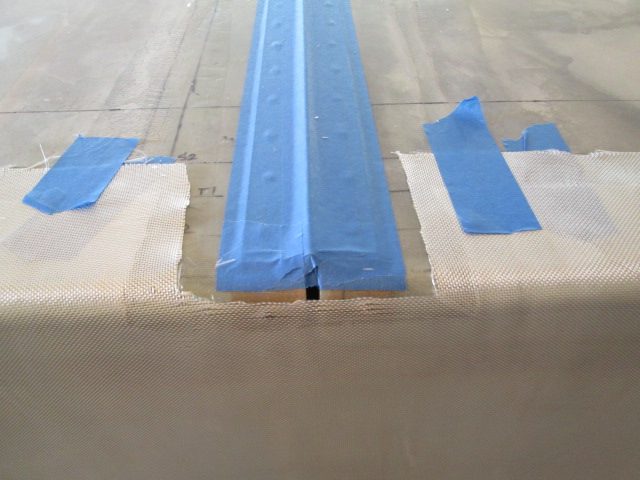
Second ply bottom wrap all taped up along with extra tape on all of the wires. These are the porch foot light wires hanging down.
You can see how the plies are staggered around the hinge cutout.
Okay, that took from about 11:30am up to about 3:30pm. I guess I’m feeling ambitious and wanting to keep things moving. Time to step out back for a little weed abatement before starting to mix up the epoxy. This may sound like TMI, but you need to keep things moving during a layup and the last thing you want to think about is dancing up and down on one leg while trying to hold it thru ‘til the end.
Once I got a good portion of the main panel wet out it was sticky enough that I could peel off the tape around the edges in stages. On previous layups I had trouble getting a hold of the tape edges with gloved fingers. So for each piece of tape I folded one corner under on itself and placed that end of the tape on the glass side of the joint. That way it was easier to get a hold of and pull in the direction that did not tend to lift the edge of the glass.
On the floor under wrap, I waffled back and forth between trying to wet it thru, and peeling it down to brush wet onto the floor to make it go quicker with less slopping. Neither technique was ideal, but it all got done w/o any catastrophe.
I had calculated that it would take about 32oz of resin, plus hardener, to wet out the cut cloth, not including allowance for saturating the foam and wood, or deducting for the areas of glass that were trimmed off at the profile line. In the end I had mixed 8 batches at 5 pumps and two batches at 4 pumps for a total of 34oz of resin. Some got lost to the cups and brushes and some hit the cardboard drop cloths, so I figure I got pretty close on the ratio. There were a few slightly wet areas, but not too bad.
By the time that was all done, and I had gone around trimming loose strands and chasing any drips, the door jamb had set up to the “leathery” stage. It was tough enough to cut with the utility knife w/o messing up the adhesion along the flox edge, but so much easier to cut clean in one pass than it would be to do later after the full cure. Wish it was this easy every time.
Unfortunately the hatch gap had not reached that stage yet, and at 7:30pm, after 8 hrs I was ready to go home.
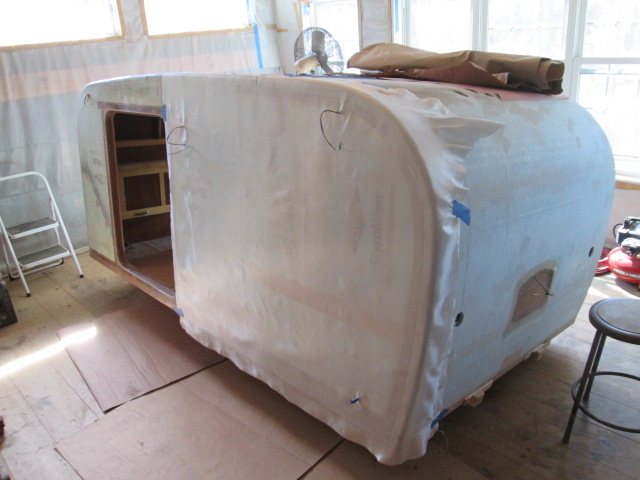
After getting this all done, having learned what I learned today on this, my largest layup, I figure I probably could have done the whole wall as one big layup. It would have meant getting both plies of glass all taped and trimmed into position in one prep session, and then doing the wet out in a marathon session. The cloth in the door openings would most likely have gone to waste, but if I was concerned about ultimate strength, that is how I would do it now that I have the experience.
Still, I am very happy with the progress today, having proven my chosen technique and reaching another mini milestone.
Last edited by KCStudly on Sat Aug 15, 2020 7:02 pm, edited 1 time in total.
KC
My Build: The Poet Creek Express Hybrid Foamie
Poet Creek Or Bust
Engineering the TLAR way - "That Looks About Right"
TnTTT ORIGINAL 200A LANTERN CLUB = "The 200A Gang"
Green Lantern Corpsmen
My Build: The Poet Creek Express Hybrid Foamie
Poet Creek Or Bust
Engineering the TLAR way - "That Looks About Right"
TnTTT ORIGINAL 200A LANTERN CLUB = "The 200A Gang"
Green Lantern Corpsmen
-
KCStudly - Donating Member
- Posts: 9640
- Images: 8169
- Joined: Mon Feb 06, 2012 10:18 pm
- Location: Southeastern CT, USA


