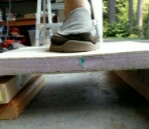
Got both walls up. Temporary gussets and temporary roof sports are holding it in place as the PL adhesive dries.
Ran into an issue. The passenger side wall bottom was not straight. It had a sizable curve to it bowing up in the middle. Of course I noticed after I had applied the PL adhesive and stapled the side ply into the floor. Douh. Screwing down didn't bringing it in much (the walls don't flex in that direction, i guess there is something to the "I beam" analogy) so I unscrewed all the pocket hole screws, then injected as much PL Premium as I could get into the gap. Then I sunk in the pocket hole screws and it cinched down a just a bit, some adhesive good out all along the joint, so at least I have that...
Silly mistake that made for a less strong joint and a bunch of corrections. Now I am letting it set for the full 24 hour cure time before I touch it. Maybe even linger seeing how much adhesive I gooed in there.
It should all come out okay, I caught it with some time to make adjustments, but I wish I would have dry-fit so that I would have caught it, and fixed it, before I attached the wall...
Oh well, she looks like the start of a tear and aught to be plenty strong once I get the ceikinf/roof installed and she us all braced up .
Starting to look like a teardrop!
The "SJ Cruiser" , a 5x10 benroy in the PNW
Re: The "SJ Cruiser" a 5x10 Benroy in the PNW
![]() by yrock87 » Mon May 02, 2016 11:09 pm
by yrock87 » Mon May 02, 2016 11:09 pm
- Attachments
-
- IMG_20160501_124248430-640x480.jpg (72.91 KiB) Viewed 2649 times
-
- IMG_20160501_124237570-640x480.jpg (73.49 KiB) Viewed 2649 times
-
- IMG_20160501_125809817-640x480.jpg (59.95 KiB) Viewed 2649 times
Last edited by yrock87 on Thu Jun 02, 2016 9:42 am, edited 1 time in total.
The SJ Cruiser, my 5x10 Benroy build http://www.tnttt.com/viewtopic.php?f=50&t=64944
-
yrock87 - Teardrop Master
- Posts: 286
- Images: 97
- Joined: Sat Oct 31, 2015 2:32 pm
Re: as of yet unnammed 5x10 Benroy in the PNW
![]() by yrock87 » Mon May 02, 2016 11:20 pm
by yrock87 » Mon May 02, 2016 11:20 pm
Made some progress on the bulkhead today. Decided to fully insulate it. I figure MO reason to skimp now. Plus I hate cold feet.
I choose to not run wire inside the bulkhead. I will just run chase in the cabinets for my roof wiring and hatch wiring. Adding the wired to the floor was a bit if a pita. I will do it for the roof, but no need to go to the trouble where it isn't necessary.
. I did add a spar 18 inches up (not pictured) to allow me to screw the counter in on both side walls and at the bulkhead for added strength.
- Attachments
-
- IMG_20160514_144857026-640x480.jpg (64.13 KiB) Viewed 2520 times
Last edited by yrock87 on Sat May 14, 2016 11:22 pm, edited 2 times in total.
The SJ Cruiser, my 5x10 Benroy build http://www.tnttt.com/viewtopic.php?f=50&t=64944
-
yrock87 - Teardrop Master
- Posts: 286
- Images: 97
- Joined: Sat Oct 31, 2015 2:32 pm
