It has been awhile since I updated this post for my CT. Too many home projects in place to prepare my home for sale.
HACKED AC UNIT FAILIn "Deceivers" thread about AC hacking, I mentioned a problem I think I had for my "hacked AC". If you recall, this is what I tried to make work.
(Deceiver's thread
http://tnttt.com/viewtopic.php?f=42&t=6 ... r&start=60)
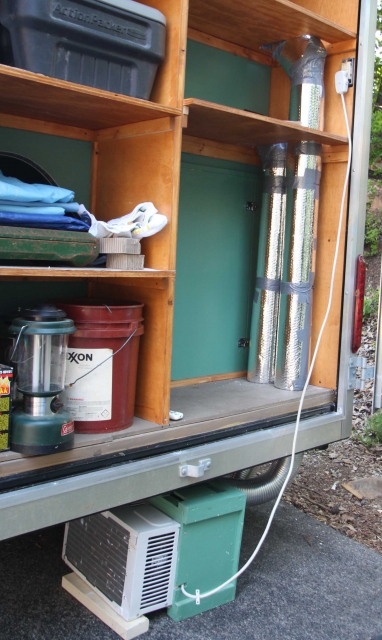
It was not cooling my trailer enough and I had freeze up of the coils, so I add 120V fans to each duct. That helped some, but not perfect.
During a TJ camping trip to Fort Chiswell, several weeks ago, while it did work, it just would not get the CT cool enough for my wife's and my liking.
Then right after we returned home, my wife developed a serious cough and her chest hurt. The doctor hinted that our unit could be a culprit because of mold, mildew and what not. I did not buy that, but I am not a doctor of course. Lynn's lung issue is still there and is being treated with steroids and antibiotics and is getting better.
But her health is paramount and I decided to go back to basics and eliminate any possibility for future issues. Lynn's lungs have always been susceptible to issues.
I tore apart my AC hacked unit and found no mold or mildew, but did find way too much "bad stuff" for our liking. This is stuff, along with bugs, that came into the back part of the unit while sitting on the ground.
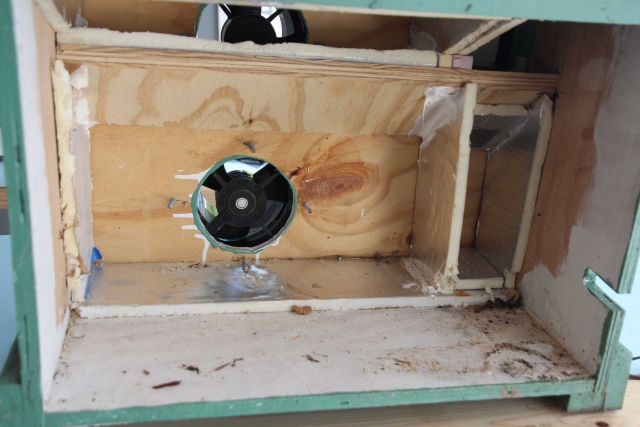
So I scrapped this whole effort, rebuilt my 5000 BTU window unit and mounted it in the false back wall ahead of the barn door.
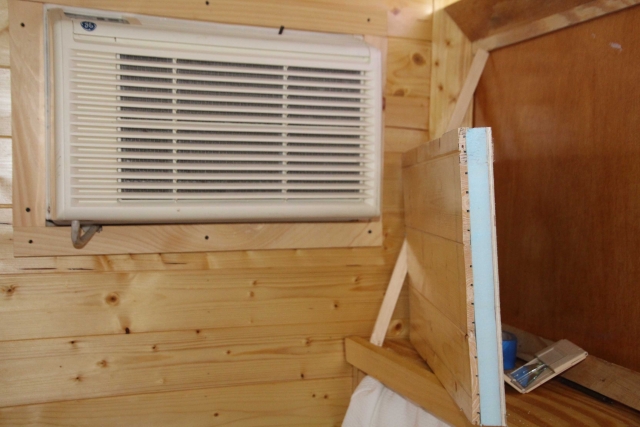
Almost immediately the cooling effectiveness worked much better then before (go figure). I will just have to leave the left side back barn door open enough for the air to circulate around the back cooling fins.
Notice the foam layed wall section. The glues held the foam very well to the thin out wall sections. I am impressed with this process.
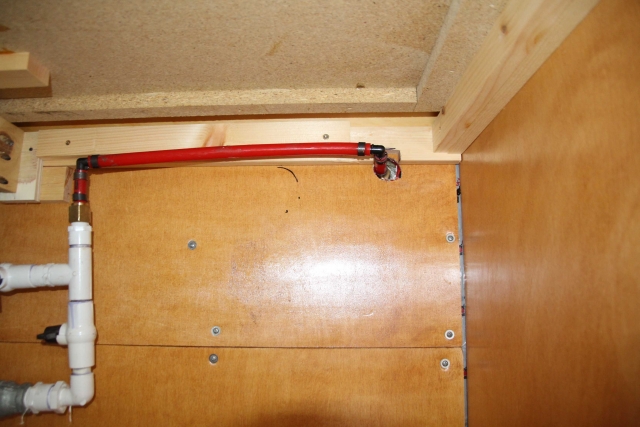
PIPE BURSTAt the last camp out, my incoming water line burst from too much campground water pressure. I had a section connected with clear plastic tubing and radiator clamps.
My first attempt to repair it was to replace the tube with PEX. In this photo the failed tubing is laying on top of the PEX repair.
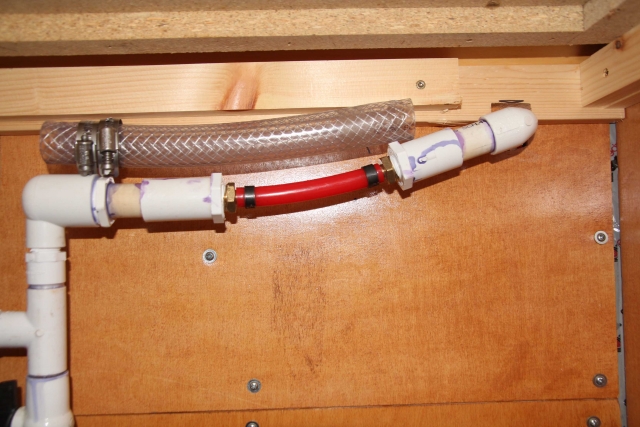
Then my cemented PVC joint failed with my house pressure. So I pulled all the PVC out of the line from that point up stream and replaced that with PEX. As future failures occur, I will replace the plumbing with PEX.
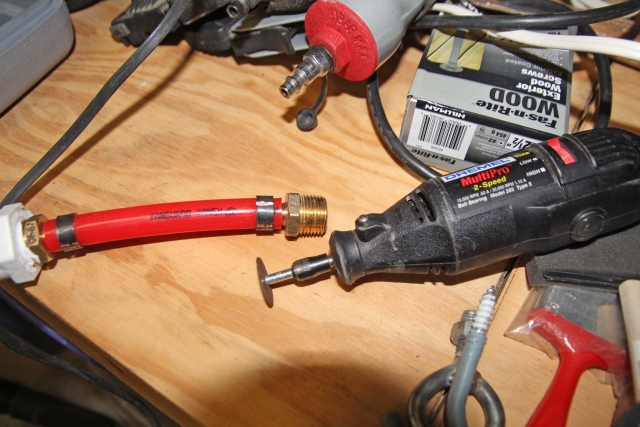
 DREMEL USED TO REMOVE PEX CLAMPS
I really like using PEX with the clamps. I did purchase one of the crimpers for my house radiant system installation and it came in handy before. At first removal of the clamps was concerning, but I learned how to use a Dremel tool to cut through them. They are nothing more then copper fittings. You cut very slowly and at the very end, the stress will cause the crimp to snap open, thereby not hurting the tubing very much.

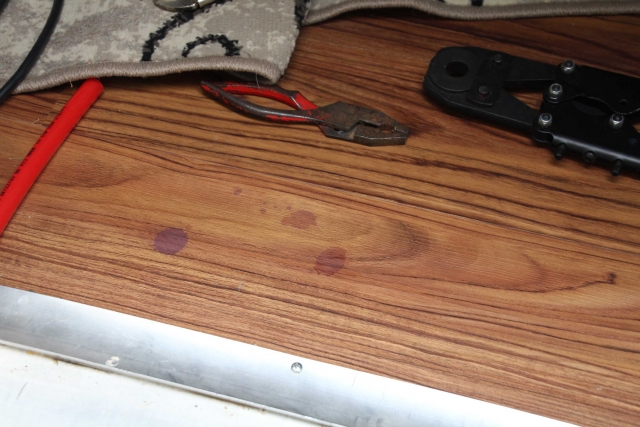
But while you are using primers and glues for PVC, be careful not to spill the purple primer onto anything good. I was not careful and now have stains on my floor. Fortunate for me, these are the last sections applied to the floor and will be easy to replace.
 LED LIGHTING
My LED lighting for the ceiling cornors was very bright and did not look that great without some covering. So I am trying to go "indirect" with them and built this 45 degree corner moulding. Here are my attempts.
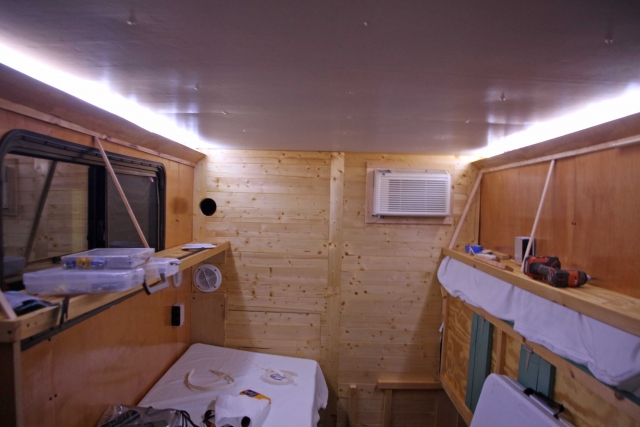
And here the side reading LED lamps are on also. The whole thing is quite bright.
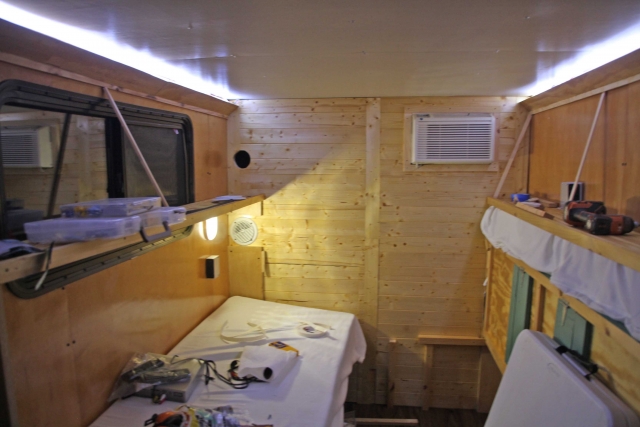
But my workmanship is not that great. It was hard to hold the right angles and measurements. Now that I know it works, I am going to build new ones using 90 degree (right angles instead of 45 degrees). It will simpler to build and will produce the same results. Now I need to make a decision for the colors to stain and paint them. I am thinking glossy white for the insides where the LED strips go and stain the exposed surfaces with the same stain as is on the walls.
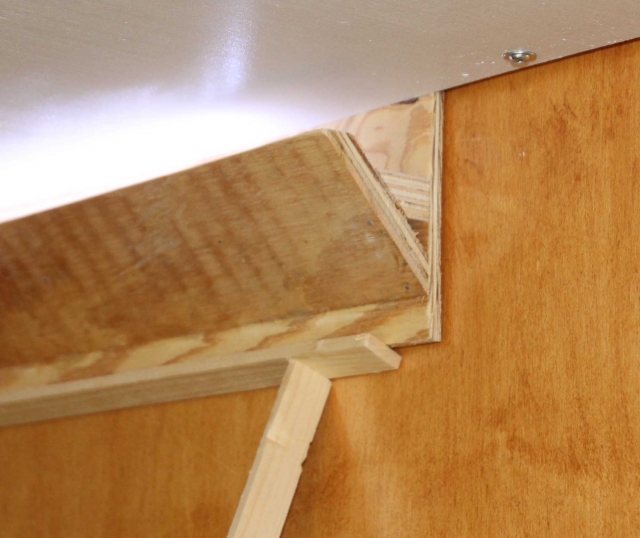
The thin vertical sticks are just to hold the moulding up while testing things out.