It's been a few weeks, and... more progress!
I finished skinning the cabin, cut the skin flush with a router, sanded all of BOB, and applied two coats of CPES over all of the exterior. It's not much for pictures, but it took a bit of time.

I also got a chance to get to some of the galley cabinetry during the week. The lower cabinet doors won't have a fancy insert, but they're functional. And even though the handles don't actually latch to anything (I wanted the cabinet pulls in the middle of the door) I wanted to keep the same pull style throughout the galley, so I have black latches that don't latch to anything. The hinges provide some force to keep the doors closed, but if it turns out to not be enough I'll rethink my latch situation.

I had to bevel the edges of the doors to get them to open properly:

And this is what the hinge setup looks like. I had to add a few spacers to get everything to open properly. Different hinges would've been better, but I used what was available locally.

Some cabinet doors!

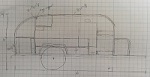
Next up was a trip to pick up some more wood, trim, and aluminum for skinning. I read in a thread elsewhere that Rockwell American sold some pretty long trim... and they did! 21' long trim. But how to get 21' long trim back home when my utility trailer is only 8'? Looking back, I probably could've rented a 16' trailer and made it work, but I picked up a 26' truck, took a day off work, and made the rounds to collect supplies:

So empty... yet so necessary?

My brother keeps suggesting I dress this up as a rocket ship for halloween. I might if it's still around! It's 8' wide .040 aluminum from a local trailer repair shop. I'm not impressed with the quality of the aluminum given what I paid for it. It's severely gouged around the edges so I'll need to make some long straight cuts to make it work (any suggestions on making a straight 12' cut? I'm thinking a jigsaw against a straight edge maybe?). It's also scratched to hell so I may need to do some creative buffing if the inside of the roll doesn't look better than the outside. I did order 10' extra than I anticipated needing so hopefully I can make it work.

This past weekend we set to work on the hatch. We started by routing a master rib in place against the galley wall:

And then using the excess as a template to make a corresponding inside curve:

Then we copy/pasted five more ribs:

Started putting the ribs in place and making a hatch skeleton:

Mocked up the lights to determine where blocking needed to go:

Made a home for the hatch latch. Missing a hole for the handle you say? Yes, we realized that after we made this. Luckily we were able to measure and drill a hole in the right place for it.

Then we skinned the hatch. We attempted to do it in place as many builds suggest is the best approach, but it proved to be pretty difficult. We wound up tacking it in place with some brad nails and then removing it to place some screws and 1/8" plywood strips to clamp it, then set the hatch back in place to dry overnight. It worked out - the hatch wound up straight without any warping.

The next day we routed the skin to shape:

And started insulating and wiring it:

We took more care with kerfing the insulation so it would sit flat against the skin and the fastbond worked much better this time:

A little sanding some high insulation spots:

And it was time to skin the inside of the hatch... with every clamp imaginable:

The big steel bar we used across the seam of the skin wound up sticking a little, which was not the best. A little wood putty and no one will know the difference.

I also got a little crooked with the router when routing the inside skin, but it just adds more character, right?

A little polyurethane and that's where we are now. Oh, we also cut the inside bunk at some point and that is getting polyurethane too.

Next up... skinning with aluminum!