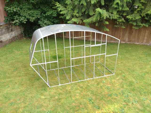
Hope some of you lurkers liked that ^ treat hehe - the bike was actually a test to see if it would high side when offloading (which it just barely didn't, and the driveway was a slope, and the bike is lowered from stock), where the wheels would be and where tie downs would go. Bike weighs about 275lbs wet so it was also a test of the floor. Ok, ok, funs over.
Its time to button her all up. Session 1 went pretty well, was still slow to start but happy with how much got done, if I can get most of the rest done in about a day or day and a half. Pretty much it all worked out as planned, I expected some minor gaps and some 'stick out' spots, which are of no worry for now. When the interior gets finished that will all be taken care of. For example in the first picture those panels on the right actually fit really well, they are just sticking out a bit - a bit of velcro on the back should do the trick, plus you'll notice there are cuts for the third batten in the ceiling along the center. Going to need it to make the ceiling insulation really really toight in there.
The real point is... it works dang nab it! On deck is the wiring! If you look closely in the pics you can see the pigtails for the LED lights. I will run them all to the interior through the insulation for now, so all the wiring can be done 'in the comfort and warmth of the trailer' as she gets all insulated up, and it gets colder. Its going to be a plug and play wiring harness I make, so it as well is completely removable.
Yesterday night it rained for over 10 hours - the first time in what seems like months. The good news is there was only 1 noticeable leak through a 'hollow' rivet. I got on the roof and inspected all the rivets, and then continued to the sides. All in all I found 5 hollow rivets, so drilled them out and replaced them. Super easy if you drill really slow to start and get a nice centered hole on the rivet. For those wondering about the un-sealed clamshell, it let in about a quart of water that pooled in the first sealed rectangle of the floor. The second closest floor panel to the clamshell only got some splashover from droplets and the third panel had none. So I'll leave some rear insulation panels off until the clamshell gets weather gasketted.
After this mornings rivet re-work I just started piecing it all together, finally! Like I said all these panels at the front
have to be installed in a
specific order, and thus need to be removed in the opposite order. Other than that its all removable! I'm setting all the machine screws with the same torque as a standard. Can't wait to see how far I get tomorrow. Over and out, here are todays pics:
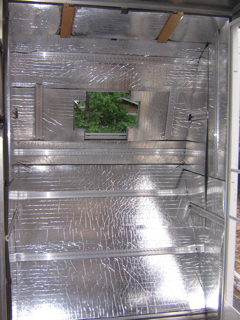
- woah dude! shiny! see the led pigtails?
- tnttt_102.jpg (127.15 KiB) Viewed 2469 times
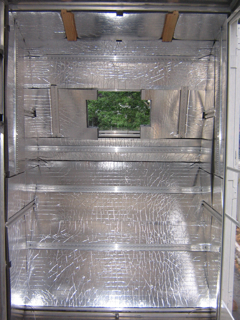
- view centered on. super happy with the overall accuracy and precision
- tnttt_103.jpg (124.25 KiB) Viewed 2469 times
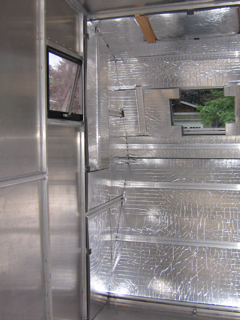
- view to the port. it all just blends together so well, so much aluminum makes the wood pop out methinks
- tnttt_104.jpg (113.97 KiB) Viewed 2469 times