Well.
It's been a minute.
I've been plugging away on the World's Slowest Teardrop Build, but I haven't been very good about documenting. So chagrined. I'll use this post to catch up.
In my last post, I had just gotten the 12V system to work, which still manages to amaze and delight me to this day. This process also included a preliminary installed of the MaxxAir fan--can't remember if I mentioned that or not.
Then we applied Poor Man's Fiberglass to the interior. (I know this is an odd choice, but I wanted a covering that would be water resistant and would smooth over any bumpiness in the surface of the wall. Which sort of worked. Unfortunately, I only got a
wallpaper smoothing tool (a flat trapezoidal piece of plastic)
after we put up the first wall. Strong recommendation: slather on the glue very thickly, use dry, ironed canvas, and smooth it out with the wallpaper tool as soon as it's mounted. I also hammered in brads to hold the canvas in shape.
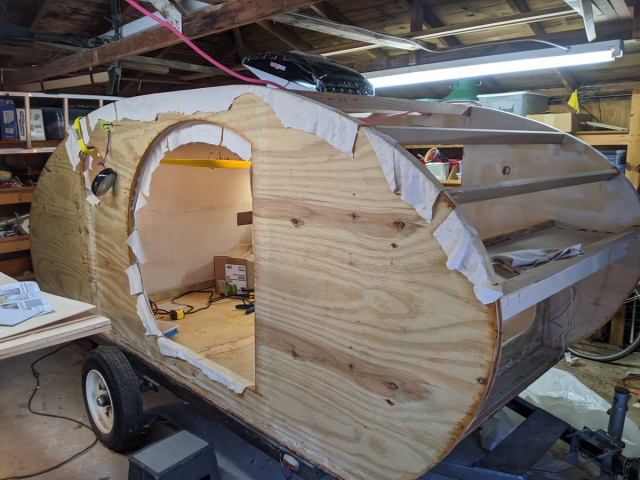
IIRC, my next step was to put the roof on. Interior skin first, then insulation panels + puffy foam, then exterior skin. I got the whole thing installed except for the nose, because I ran out of plywood. So this pic is actually one of the most recent, but it shows roughly how I installed the others back in March-ish.
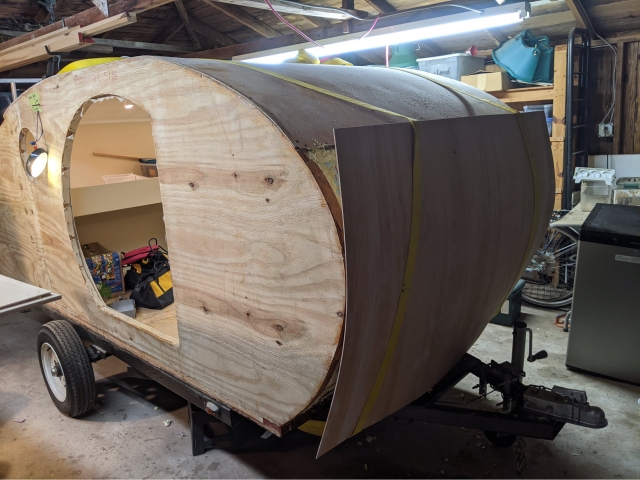
I used straps to hold it in place, screwed it down for fit, then uninstalled, applied construction adhesive, and re-screwed.
Back on the interior, I installed the luggage shelf that goes over our feet, painted the walls, and installed ceiling tiles and "crown molding":
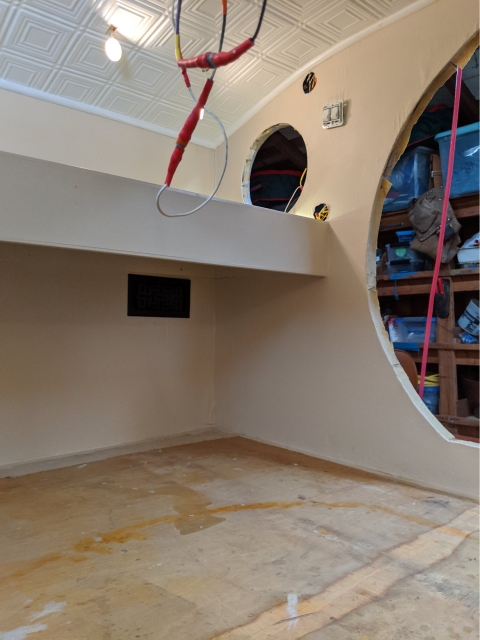
I used that fakey PVC trim for the molding on the grounds that it would be more flexible than wood. It is, but even so, some of the curves were too much for it, and it snapped in a couple of spots. Eh, well--that's what wood filler is for. The dome lights are hooked up, but not yet re-installed on the ceiling in this pic.
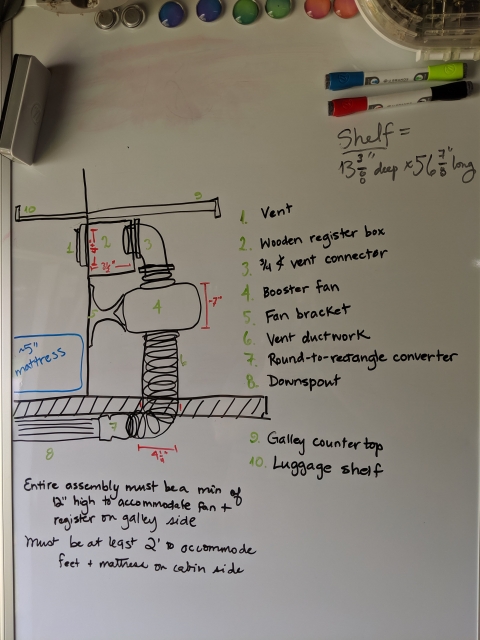
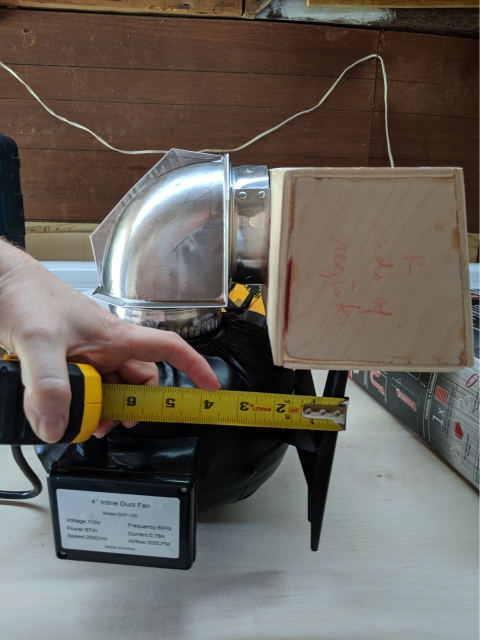
Next step was to prep the A/C air return system--a register, booster fan, and ductwork. Unfortunately, I just learned that the manufacturer has discontinued my A/C unit of choice, so some re-jiggering of plans may be required. Hoping this back-end work can remain as is, though.
Here's the plan:
Here's me testing the concept:
And here's the finished product. It had to be installed before the shelving in the galley because the other way around... would be madness.
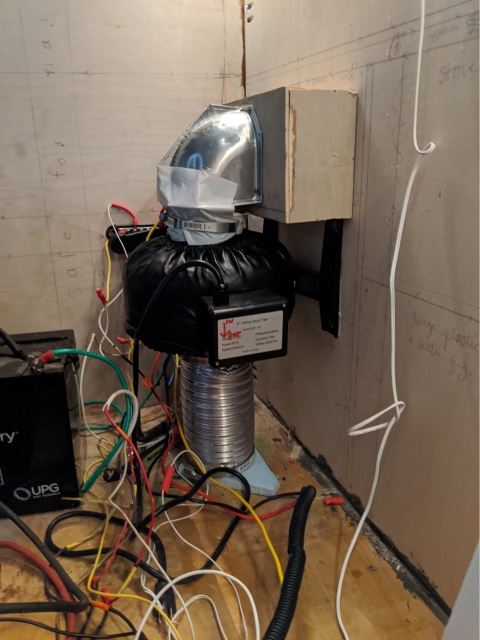
I had to cut a giant hole in my floor to accommodate the ductwork. I hated that SO. MUCH.
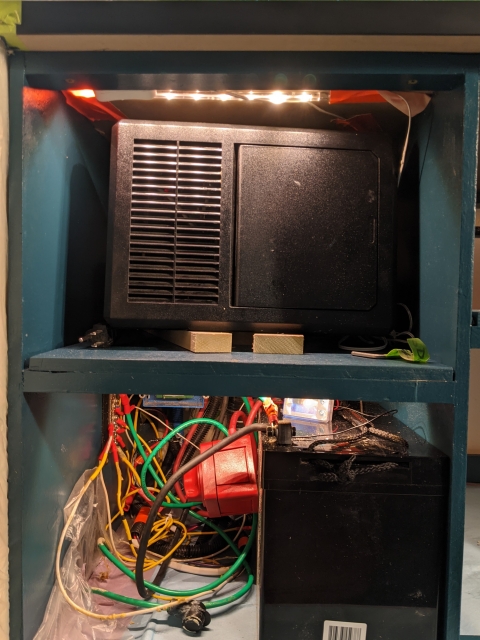
The pic unfortunately provides a closeup of my wires--
so many wires. Since then, I've applied more split loom in an attempt to tidy them up, but I think wire management will always defeat me, as you will see below.
A/C return system in place, I started work on the rest of the galley. I PMF'd the walls and installed more of the ceiling tiles as a backsplash.
(For the curious, I ordered the ceiling tiles from Home Depot: Global Specialty Products Dimensions 2 ft. x 4 ft. Glue Up Tin Ceiling Tile in Matte White
https://www.homedepot.com/p/Global-Specialty-Products-Dimensions-2-ft-x-4-ft-Glue-Up-Tin-Ceiling-Tile-in-Matte-White-204-50/205223390. It's made of "styrene," which I found to be nicely flexible and fairly easy to work with. I never was able to hide the seams as well as I would have liked, though.)
I also installed a fiberglass/linoleum flooring, which is covered in protective paper in the image below. (Lowes: Mohawk 6-ft W Cut-to-Length Kinsley Square Marble Decorative Low-Gloss Finish Sheet Vinyl
https://www.lowes.com/pd/Mohawk-6-ft-W-x-Cut-to-Length-Kinsley-Square-Marble-Decorative-Low-Gloss-Finish/1001210420 )
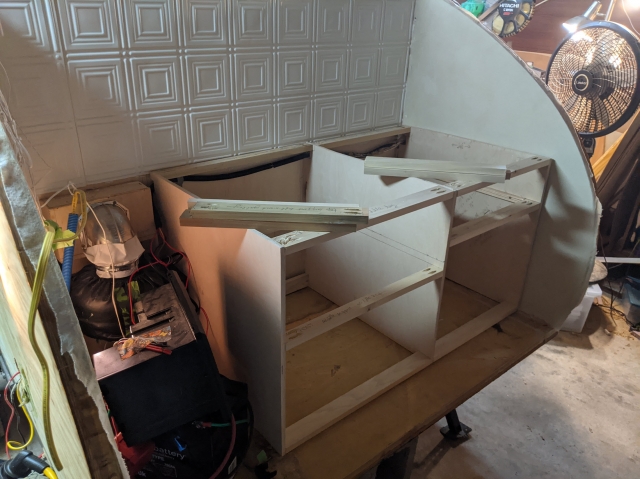
Then I started assembling the shelves. I'm keeping these--like the cabin luggage shelf--super-simple. Partly because the exactitude needed for cabinetry isn't my forte, and partly to keep weight down. It will be filled with plastic boxes held in place with webbing in the end--no drawers, no cabinet doors. Plane Jane. The only cabinet-like component--a countertop box to hold my Dutch oven--I'm actually ordering from Etsy.
Here I'm dry-fitting the first two bays of the shelves:
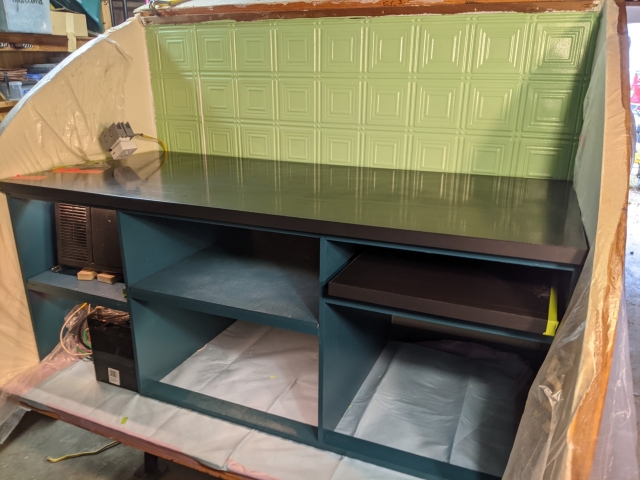
And here, gloriously, is the finished shelving unit. Not yet screwed in, but wrestled into its final location with much labor by Mr P & me:
The countertop came from IKEA: EKBACKEN countertop, matte anthracite/laminate74x1 1/8 " (
https://www.ikea.com/us/en/p/ekbacken-countertop-matte-anthracite-laminate-30409021/ ). It's a standard size, which I cut to fit with a circular saw. This went surprisingly well. Per the instruction booklet, I covered the area that I would be cutting with painters tape to help keep the cut neat.
This was a fair bit of work and anxiety, so I'm including a second beauty shot just to luxuriate in it:

In case you were wondering, the plastic film over the side walls was to protect them during the installation of the shelving--not a permanent feature.
As you can see, though, the wires remain a mess. I'm not sure what, if anything I can do about them--all attempts at organization fail. There are just too many wires going in too many different directions--some to the passenger wall, some to the driver wall, some up to the countertop, some down through the floor, and some into other cabinets. Ug. Also, the PD4045 isn't yet permanently installed--it's just resting in its future home. I have more thinking about how to do that best.
However, the wires remind me of a happy thing--In this same period, I also (mostly) successfully installed my 110 system! Holy cow, the blasted thing works (mostly)!
I've got an outlet in the cabin and two in the galley--and two of the three work. The one that doesn't, of course, is the one I installed solely to service the booster fan, and it's buried in the darkest depths of the electrical bay. I'm hoping I'll be able to uninstall it with the help of a very long-handled screwdriver and a lot of profanity, but I'll be damned if I reinstall it back in there. Either it comes out permanently (and the booster will have to consume one of my precious countertop outlets) or I find some other home for it.
Nevertheless. I installed two 110 outlets without setting anything on fire and they worked on almost the first try! What the heck!?
And I had to uninstall and re-install the battery, battery kill switch, and ground bus while working on the galley, and they also successfully returned to life. In fact, you can sort of see that four of the cubbies in the shelving unit have under-cabinet lighting (though not permanently installed--more mocked up in location). So chi-chi! The other two cubbies will get dolled up when I have the budget for more lights from IKEA.
So progress is getting made. I'm sure I'm not alone in saying that coronavirus gave me a new impetus (and time!) to work on this project. Travel to outdoor locations in our own tiny self-contained micro-hotel sounds really good to me these days.