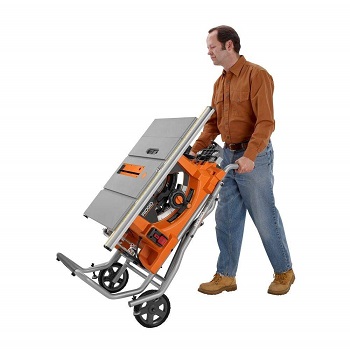
I thought about the rear load thing too. I think I've got a very workable solution for it too. The biggest item to get in and out of the tear is the portable table saw. I have this one below.
- 61+6AZz9e3L._SL1000_a.jpg (29.63 KiB) Viewed 4219 times
I think I can wheel it to the back of the tear, back it up to the hatch opening and lay the handles on the opening. Then come around and lift it up by the bottom handle and slide it into the tear. I'm even considering having the floor drop down an couple inches or two. I want to create a pocket or bay to help keep the saw in place while traveling. So it kind of drops into it's pocket and stays put. Removing it would just be lifting it by that large lower handle over the pocket lip. Then sliding it out and down till the wheels touch down. Plus it's really not that heavy a saw. Has a cast aluminum table. It's more bulky than heavy.
About the only things to go in and out the rear door would be the table saw and miter saw. The miter saw is only 30lbs and not too awkward. I think I can create a pocket for it above the table saw that is accessed from the rear. The rest of the tools are small. I plan to go in/out the side door with that stuff.
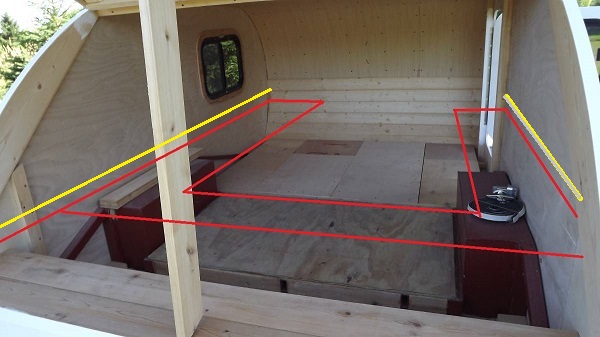
First rough draft of tool box interior layout below.
- tool2.jpg (65.58 KiB) Viewed 4219 times
The sketch is crude and rear cross over is too far back. But you can get the idea from it. I plan a U shaped layout.
The height of the saw surface when in it's rear pocket, would dictate the height off the floor of all the red lines in the photo. The red lines indicate maximum height of lower shelves, and fixtures. The top surface of everything stored or installed, would be in the same plane of that red line, all around the tear.
The yellow line would be about six inches up from the red line. It too would stay in plane all around the tear. Any shelves, fixtures, cabinets etc. would go either above the yellow line or below the red line.
That would leave me an open pocket of space between the red and yellow lines, the full length and width of the tear. I could now use that space to transport sheet goods and lumber to the job site. I could slide full 4x8 sheets into that pocket. Same thing with 2x4's or other dimensional lumber. Not talking huge amounts. At most a couple sheets of ply or drywall if needed. These sheets would be supported by and lay on top of the lower cabinet frames in red. Again the photo is not accurate. Space between the 2 legs of the lower U shape would be about 24". Not as wide as the space looks in the pic.
So that's the first rough draft of intended layout. I welcome any thoughts or comments.