KCStudly wrote:I'm sorry, it's my fault. Yesterday I almost posted to remind you to be sure to make opposite hand parts, but I figured, nah, that's too easy, he doesn't need to be reminded. It is so easy to 'just make two' and forget to flip for the mirror image.
Thanks KC... How'd you know I was looking for someone to blame?

I'm definitely open to reminders. Won't hurt my feelings one bit! I do the S. Fredrick inside out method and wanted to rough out the interior skin to eliminate as much material I could so routing out the rabbit/dado (whatever it's called) would not be so stressful on my router. It's actually a good thing it happened. I took the time this morning to sit back and go through my next steps to avoid making too many mistakes and be a little more efficient.
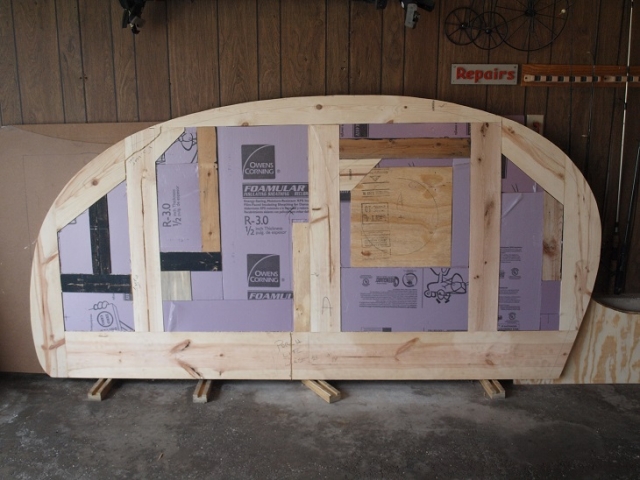
Insulation installed and wire troughs cut for clearance lights and porch light switch. My clearance light wiring as well as all navigation lighting is strung through the roof instead of along the trailer frame. The brake lights are mounted in the hatch, so, as long as I'm going through the hinge area on the hatch I might as well continue through the roof spars to the tongue.

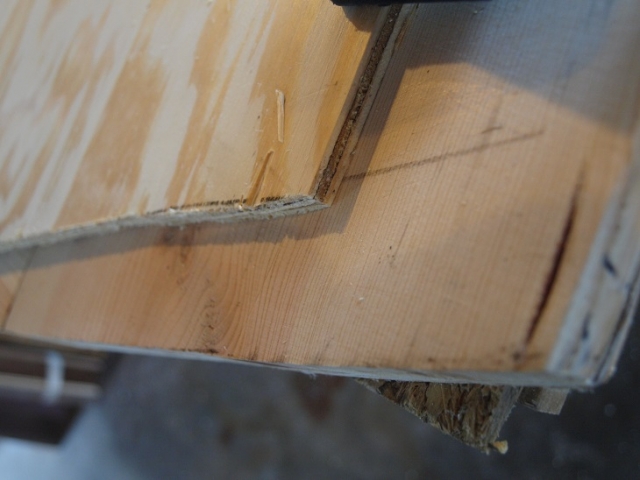
More for the benefit of those who said "What?" in reference to what I was trying to accomplish above, roughing out the interior skin so I wouldn't have to stress the router as much. I'll be routing the inside-out dado into the framing about 1/4". The pencil mark is the finished depth. That's 3/8" interior plywood skin plus the 1/4" into the frame for a total of 5/8" leaving about 7/8" of meat on the wall to attach spars and roof sheathing.
The void on the bottom edge of my wall shown in this view will be filled with 3/8" BCX, same as the rest of the wall. My wall height is 54" requiring a splice on the bottom of my walls to finish them off. The seam is hidden by the mattress when installed.

