Unfortunately, two of the four roof panels had issues. I'm not sure what happened to one panel, but the last panel was by far the worst because my vacuum pump quit shortly after the infusion.
The result was not pretty and I was torn between infusing a new panel (cost of ordering more cloth, using more epoxy and consumables), or trying to fix the two messed up panels (time, time time...). In the end, I thought I'd try to fix the panels first - then re-make them if need be.
Here's a shot of the ugliest side of the ugliest panel (vacuum pump failure). Basically the carbon fiber wasn't pulled tight around the frame with some serious bridging where the "skin" meets the frame.
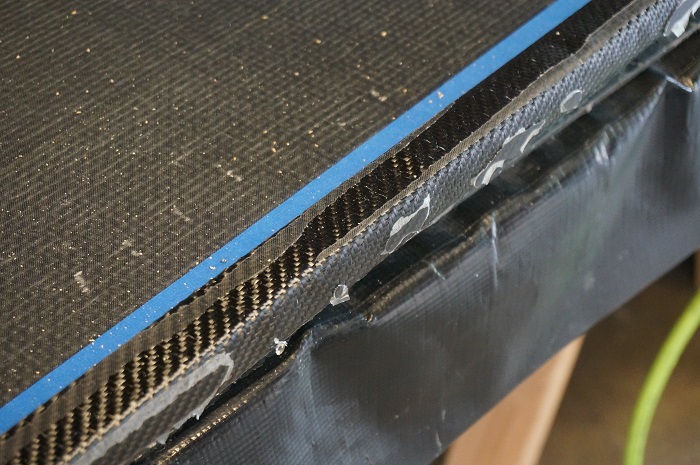
- DSC00334.JPG (179.22 KiB) Viewed 3670 times
So, I drilled a bunch of really small holes, clamped a straight edge along the outside and injected epoxy into the cavity between the wood frame and the carbon fiber.
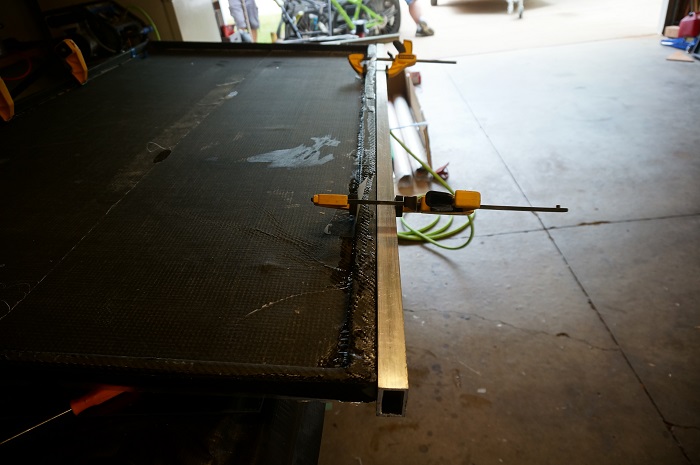
- DSC00336.JPG (123.18 KiB) Viewed 3670 times
Once the outside edge and top were done, I drilled holes along the skin/frame transition and again used a syringe to inject epoxy into the cavity.
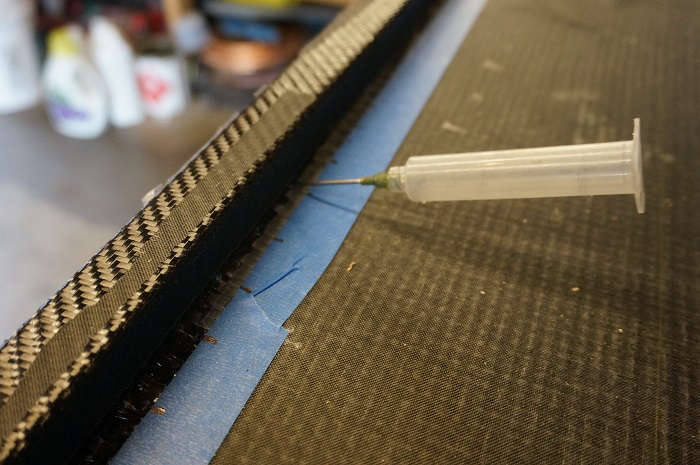
- DSC00335.JPG (158.2 KiB) Viewed 3670 times
Surprisingly, this worked great! These two panels are just as solid as all of the other panels. They look a little messy in certain spots, but no where that will be visible after their assembled.
One thing I forgot to mention, and take a picture of, was the clear coat for the panels above. Once the epoxy was injected and cured the edge was wavy, uneven and well - didn't have clear coat on it. So, I set the panel vertically on it's side and put blue tape around the top edge creating a sort of dam. I then used a syringe to lay down a layer of clear to make an even (as possible) edge. It sounds easy, but in reality, it took several layers of building up, filing down and filling in the low spots. But in the end, it looks good.
Oh, and if I didn't mention this earlier, the roof panels all have an extra layer of really heavy (18oz) fiberglass cloth to (hopefully) prevent hail damage and so on.