It's been a while since I've updated. There's nothing really big to report

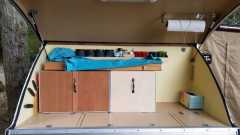
I added another box to the galley to help with organizing. I also made a shelf to hold our cups and a couple of of other small misc things that tend to get lost. Oh, and I made a knife holder. All of the additions were made with that I had lying around in the leftover project pile. Here's what my galley is looking like now:
We've been using the trailer fairly regularly around my work schedule and the kiddo's school schedule. We spent almost a week checking out areas of Puget Sound that were new to us. We spent two nights at Ft Ebey on Whidbey Island. The gun battery was a big hit with the kiddos, as were the parasailors, passing ships, and tons of trails in the woods. The only downside was that our first night was pretty stormy with rain & hail. Nothing too bad, but our campsite didn't have good drainage so we started off the trip with a bunch of muddy clothes.
We took the ferry across to Port Townsend and headed west out to Salt Creek county park. The spots were tiiiiiiight. I had to disconnect and slightly overlap the truck and trailer to get out of the road. The views and tide pools were totally worth it though. We had a blast.
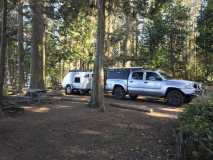
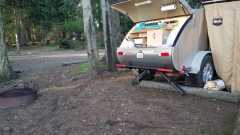
The only gripe about the camp was that our neighbor was literally right on top of us. How close? Well... here's his fire ring in relation to my trailer before he showed up:
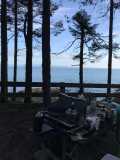
I wound up using our picnic table to do all of our cooking on, partly to give our neighbor some privacy, partly because I could better enjoy the view. An unexpected perk was getting to see a ship that I've worked on sail past while I was making breakfast. It's the white smudge above the fence post:
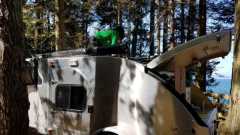
My oldest has also been given an additional campsite job... solar panel cleaner:
After Salt Creek we headed back across the sound and spent one night at Bayview State Park. It's smallish but nice. We went with a site that had hookups, which wound up being a bit of a blessing in disguise. The sites that didn't have hookups were definitely not set up for trailers. We would have had to hope that we'd gotten a site that was wide enough to park the truck next to the trailer, and there were only a couple of those. The partial hookup site we had (water & electrical) was sandwiched between an out of commission site and a giant RV bus thing. We only saw the people in there twice. We went on home after that fifth night.
We did another one nighter at Ft Ebey with some friends who were borrowing a Scamp. That was a good visit that I wish could have lasted another couple of nights.
I gave the trailer a good going over after that trip and realized that my bedliner repair on the nose had failed.

The area that had come loose was bigger and had taken a rock or two that had caused it to crack and chip. I figured that I had just enough good weather to try and fix it. And by fix it, I mean start over from scratch. I peeled and scraped off all of the bedliner. It was a job. I tried a scraper attachment on a reciprocating saw, but that dug into the aluminum too easily and wasn't effective. I tried sanding it off, which likely would have worked eventually (and messily). I finally settled on using a sharpened paint scraper. I could get it under the bedliner a little and then wiggle it from side to side while pushing it ahead and it worked very well, though my hands were tired at the end. Also, if you do this, wear good leather gloves. It'll save your knuckles from the little aluminum burs that will get kicked up every now and then.
I sanded the entire area after scraping with 80 grit on a random orbital for the big areas and an oscillating tool for the corners and tight spots.
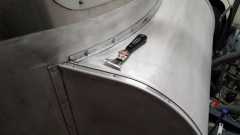
Here's what it looked like at the end of sanding. That's the scraper I used to get the bedliner off:
After that it was time to break out the mineral spirits to get it all cleaned up. I had a day and a half of nice weather. This time around I wasn't taking any chances. I did three thin coats of metal etching primer followed by two coats of adhesion promoter. It felt like it took forever for all that to dry between coats. I followed those with three coats of bedliner. I made sure to keep my coats light and didn't linger anywhere. I mixed all of my batches by weight, which I think is the best way to go and it let me keep the color consistent between coats.
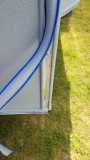
One area that is a challenge is masking the trim insert slots. On the bottom trim it wasn't a big deal since I didn't bedline the bottom edge, so I could just slip the masking tape into the top groove. On the vertical parts of the tongue box I wrapped the vinyl in masking tape and then installed it. That worked well and I can recommend that method
When I finished, I just pulled the trim insert out and took the masking tape off.
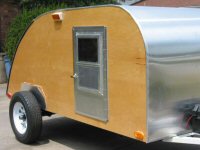
So, here she is again:
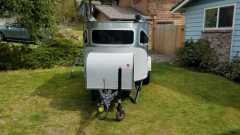
I also finally painted my tongue jockey wheel. I also painted the front of my coupler with some key-lime green spray paint to make it more visible in my backup camera.
I'm hopeful that I don't have the issues with the bedliner again. Looking back, I think that my problems may have been related to the primer I used on the first two attempts. It was a Rustoleum product designed for aluminum, but I'm just not confident that it worked properly. In some areas it didn't bond to the aluminum, in other areas the bedliner didn't bond to it. I didn't want to take chances this time, so I used a metal etching primer and adhesive promoter from the same company that makes the bedliner kit, U-Pol Raptor Liner.
FWIW, I've had zero issues with the Raptor Liner on my fenders. That's sprayed on top of Rustoleum enamel paint.
Oh, and I picked up a wireless motorcycle tire pressure monitor system for cheap off the internet. It was a bit of a hassle to get set up, but it shows pressure and temperature of the tire via a replacement valve cap. I'd rather have something internal to the wheel but I couldn't find anything aftermarket that would work with stock sensors without a lot of hoopla. I'll update after I get a chance to use it for a bit.