Wow it's been long time since I've been able to get back here for an update. Long story short it's 2020 and COVID living has greatly reduced the amount of personal time available to me. Since September I've been not only stay at home dad, but preschool teacher to my 4yo and virtual para-educator for my second grader. Anyway enough of the excuses.
A lot has happened to this project since August! As it sits today I'm about 85% complete. There are only 2 big projects left. The floor! I need to insulate the bottom and lay the floor now that the e-track layout is finalized. I still plan to flush mount the etrack by raising the floor 1/2".
OK I'll do my best to put this in a logical order here we go.
The last installment ended with me fixing my misplaced water fill hole.


I spend some more time on the cabinets. I don't know if I pointed this out before but it will add some context to my build. I'm 6'6" tall and I am building this trailer so it fits me. The counter height is 41" It's a great working height for me, and makes lots of space in the cabinets. At this point I am not building drawers. I may add some inside the cabinets later but for now cabinet doors are simpler to build.

This was my first attempt at any sort of cabinet building. The Kreg pocket hole jig makes things so easy. These cabinet doors took me maybe 2 hours to build. Since I was building this myself I did a few unconventional things. Both cabinets that flank the door open from 2 sides. From inside as normal as well as a hidden door that opens from the doorway so I can access these cabinet while standing outside reaching through the doorway.
Since I am offsetting the cabinets to the V walls I only have right angles facing toward the street wall. I am also using salvaged wall cabinets. Add these 2 factors together and I get to cut the wall cabinets to fit the odd angles. It worked out pretty well thankfully. My cuts were true but the walls unfortunately aren't so my finished gaps are not as clean as I'd like it to be. This meant I also needed to cut the shelves and drill shelf peg holes into the wall.

After too many hours debating colors I landed on a blue that is surprisingly close to the color of blue painters tape. I guess I was inspired by all the hour staring at the tape mockups. For the bathroom wall I decided to use a single sheet of 1/2" sanded plywood with a 1x3 laminated to either side of the outside edge for rigidity.

The pieces of masking tape you see on the ceiling are my solution to not installing furring strips that line up with the edges of my luan sheets. I pulled the edges down and added some strips 7/16x2 hemlock trim boards and stapled the adjacent luan edges together to eliminate the gaps. A literal stop gap measure, but better than ripping it out and starting over.
For counter top I wanted something light, inexpensive, and slid so I can have an under-mount sink. I landed on solid wood flooring, unfinished maple to be exact. I got a 20-ish sqft bundle from lumber liquidators for about $90. It was enough for the 2 countertops I need. I had some challenges to overcome like getting all the angles right. Since it is flooring it is machined on the back with beads that run the length of each board as well as being T&G. So exposed edges need some fill work.


My biggest motivation for an undermount sink was to reclaim counter space. It's so easy to save the plug and finish it so I can be an inset.


Early August was also my change to install the Awning. I originally planned to save the awning for phase 2, but As I discovered the budget was only a suggestion and delaying things to spend less means it's harder to deal with later. I went with an Aleko awning because they are affordable and most importantly their US HQ is an hours drive from me so if all goes wrong I can show up on their doorstep and force them to deal with me. I watched several videos and read many build threads. I figured out the solution to some of the common awning installation issues. First don't try to "thread" the fabric into the anchor rail. Here was my process. flop the fabric upside down onto the roof. Use the included plastic pusher to push the end of the fabric into the anchor slot. Cut the plastic anchor rod end at an angle. You want to be careful not to make a sharp point. I cut it twice to make a ^ point. This allowed me to twist the ride to get past wrinkles as I fed it through without poking any holes in the fabric. Then feed the rod through the mount hardware into the anchor track.


I'm happy to say my bed lift design works pretty darn well. My goals were minimal stack height. I have 90" interior height so I have a max of 11" for me to still be able to walk under the bed when raised. I built the bedframe like one I built a few years ago. We use it nightly and it hasn't failed in more than 5 years. I used 2x8's for the framing so the mattress can be suspended within the frame instead of sitting on top of the frame. I found an Ikea bedframe for almost free on craigslist and I used the cross slats and center support. It was worth the hassle as the slats have lots of wood waste and the metal center support beam is stronger than wood of the same size.

I used the tried and true unistrut for track, but I did not use and wheeled fittings. After reading FLboy's binding issues I took his advise to build some slop into the system. I also didn't want any exposed cables. Taking design cues from the racor storage lift, I used a work drive gearbox for a simple selflocking winch. I ran my 2 cables from the top anchor on one unistrut through the winch shaft, under the mattress and to the top of the opposite unistrut. This way the shift winds the cable from the middle-ish and the bed raises more or less evenly without binding. For hardware I used 2" angle iron holding a pulley between them. The pulley is mounted with a sex bolt that also keep the fitting inside the strut. I had binding issues from the walls not being sqaure to each other. I decided the easiest way to deal with this was to allow the pulley hardware on the winch side to float by adding some longer bolts and extra jam nuts. You can see the bolt heads don't sit right on the board in the second photo. The lift is operated with a cordless drill for simplicity.


I need to go back and take more detail photos of this build. Let me know if there's something specific you want to see.
My eletrical system turned out pretty well. I ended up buying 4 150ah LiFePo4 cells on Aliexpress they arrived in about 6 weeks time. Now I only had to wait 5 weeks for the Eletrodacus BMS. I can't say enough good things about the Eletrodacus the design is great and the support is above and beyond anything I expected. I really like how it uses external controls to deal with switching. Think of it as a small network of devices vs a single device that can go bad. It has a built in solar controller too. I'm using a 100A Victron smart battery protect as the discharge control and a 65A battery protect as the charge control. For the DC converter/charger I'm using a Meanwell RSP-15-500. It can be adjusted to 14.5 volts and puts out 41A. It's very efficient drawing only 6 amps from shore power. This works great as I have 3 other battery chargers running off my EU2000i for out electric motorcycles. I'm pulling 10-12 amps when everything is charging. I decided to conceal the electrical system with a panel that matches my cabinet doors but instead of hinges it's held on with magnets. I also didn't what the BMS front and center so I mounted it inside the cabinet next to the eletrical system. While the info if good to have I don't need to be geeking out over it while on "vacation".
Since everything is in pretty tight quarters I decided to use triple and double runs of 8AWG wire for my larger loads instead of the larger less flexible 4awg. it ends up 3x8awg is equal to 3AWG. As you can see for the main battery cables the triple runs are terminated with 2AWG copper crimp connectors. I discovered that you get what you pay for with the cheap 12v breakers on Amazon. I orignally ordered a 50A breaker for my charge circuit figuring it would be fine for a 40a load. Well after 10 minutes it would trip. I tried a 60a of the same design it lasted 12 minutes. These breakers are significantly under rated. I ended up using an 80A for a 40A load seems crazy to have to double rating for it to work. I suppose it's safer than the other way around.


This little cabinet houses the water system. It will also be the base for the 12v fridge. I had 2 extra hinges left from the cabinets so decieded at the last minute to make my life a little easier if I ever need to work on the water pump or accumulator. It's held in place in the front edge by 2 screw. 20 seconds and I can access everything from 3 sides if needed.


We ended up getting a great deal on an ICECO VL45 fridge. Amazon had a $115 off coupon around prime day and we had some credit card reward points we could use. Out of pocket was $250. I had planned to get the 60 liter version but in my excitement over the coupon I got the 45l instead. I think we will be fine. I'm looking forward to not having to deal with ice and soggy food.
Labor Day weekend we took it on a one night shake down trip an hour from home. Everything went pretty well, no major issues. My outdoor kitchen concept worked well, but we discovered we lacked enough light outside to cook before sunup or cleaning up after sunset. Not an issue in the summer but fall and spring a real pain. I got a 5m waterproof LED strip and adhered it to the channel in the awning anchor. We now have so much light I needed to add a dimmer for it.

We also discovered that we really did need windows at the back of the trailer. I had 2 12x20 window planned for that area but wanted to see if they were needed. With the ramp closed there was lots of still air around our bed. We had one more camping trip planned for October 17th so the next weekend those windows went in. I also had time to get the overhead cabinets in and I decided to add a Chinese knockoff diesel heater. With a mid fall camping trip at higher elevation I know overnight lows would dip into the 30's, and for the cost of a buddy heater I can get a permanently installed heater with a thermostat control. The heater combustion air is all plumbed outside so it's safe for an enclosed space. So far we've used it on 2 cold mornings and It' worked out great. Picking a mounting location was a bit of a challenge. I decided to extent the street side wheel well to contain the heater. It's a tight fit but it works well. I've mounted the fuel tank on the nose and ran the fuel line up the frame rail. Not bad for $100. Now the wheel wells are insulated and finished to boot.


Our last camping trip of the season was our longest tow and first multi night trip. My 3.0L diesel ram half ton did well pulling from sea level over a 4500' pass in 100 miles. There were a couple slower climbs, but they were by choice. No need to make the truck work hard to save 20 minutes of travel time. I'm pulling a barn on wheels no land speed records will be set. The trailer feels pretty balanced, not drama. I hit the scales since they were close and available to play on for a few minutes. 5000lbs loaded with half a tank of water with 600lbs tongue weight. I thought I would need a WD hitch but I was pleasantly surprised how well it towed. I'm keeping my eye out for a good deal on an Anderson hitch, better safe than sorry. Why risk a $15k trailer build to save $500 on a hitch.
Loaded up and ready to head out. Plenty of space for more stuff. It's nice to have some extra room. A few more trips and we will figure out the best loading method, hopefully.

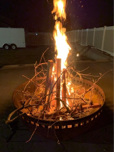
Great camp location


Early on we decided to go with disco beds for the flexibility, but he setup and tear down each time is a PITA. I came up with a solution. I over did it on ordering etrack so I had some extra piece and this makes life so much easier. takes 90 second to setup now.