No pictures today but the actual progress has been very slow, we are topping out over 100f daily. Working in the garage is tough.
I have most of the roof spars installed and the vent hole framed. I'm ready to work on the rear bulkhead and wall this weekend. If that goes quickly I may even get the ceiling and insulation installed.
Going in to this I put lots of thought in to my plan, drew drafts etc but I know the way I work is a matter of iterative evolution. Things change as I go and this project i no different. I have dropped the 1' extension on the rear and opted for an external air conditioner. Both of these items changed to simplify the build and make future needs easier for example when the air fails it will need to be replaced, what a job if it is built in. I looked in to it and building a baffle box is very easy. I found inline vent fans at a good price also.
I am going to wait until everything is done before I decide specifically where the spare and batteries will go. I want to confirm balance, tongue weight etc first.
"Big Tiny" Build
34 posts
• Page 2 of 3 • 1, 2, 3
Re: Starting a new build "Big Tiny"
![]() by philpom » Thu Aug 13, 2020 12:39 pm
by philpom » Thu Aug 13, 2020 12:39 pm
- philpom
- Teardrop Master
- Posts: 252
- Images: 121
- Joined: Sun Jun 21, 2020 4:53 am
Re: Starting a new build "Big Tiny"
![]() by philpom » Sun Aug 23, 2020 10:47 am
by philpom » Sun Aug 23, 2020 10:47 am
Almost ready to start installing the ceiling. I have the rear bulkhead framed and ready to attach, all 4 walls up and ceiling spars all in except 1. I opted for 1/4" maple for the ceiling and found some "Pink Panther" 1/2" foam board for insulation. I have a 1.5" cavity so 3 layers and R10-R11 will be my final insulation value. I'll use low expanding great stuff to seal the insulation in and an exterior grade 1/4" ply for the roof. This will later be covered with FRP.
The trunk will be mostly for the items that belong to the camper (chairs, tables, cook stove, fuel, screen tent etc) and after getting it together looks like it will be plenty big for that purpose. The final cabin space now measures 61" wide and 81" long.

The rear bulkhead framing. The trunk stops at this level, the remaining space will be cabin storage.
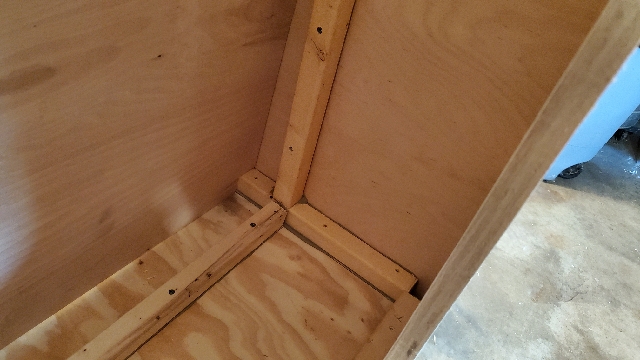
Additional trunk detail with the rear bulkhead almost fully in position.
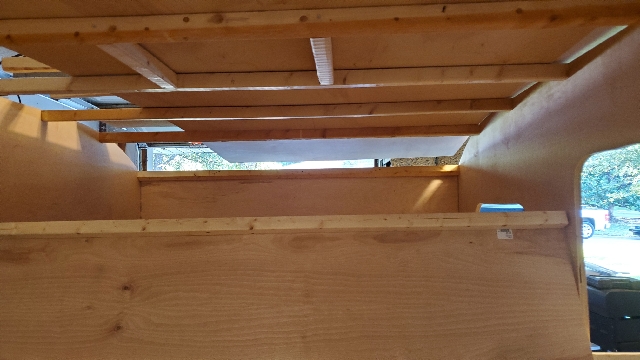
Ceiling framed and you can see where the fan will go.
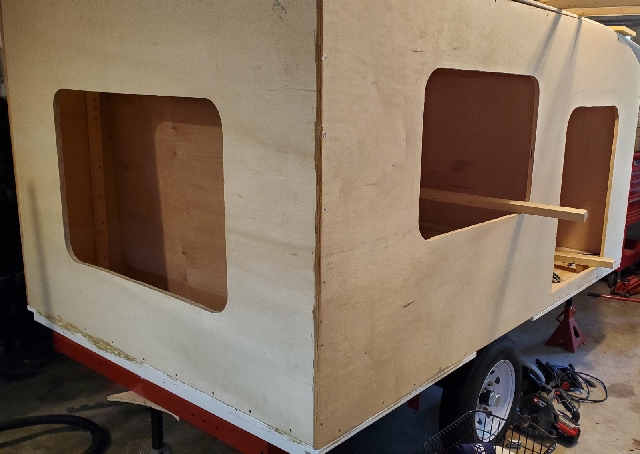
All walls up! As soon as I complete the ceiling/roof and cut a few misc access holes I'll be ready to start the exterior finish. I also still need to accomplish the following:
Wheel wells
Window/Door/Hatch mount rings
Interior shelving
Power and lighting wiring
Seems I have a fighting chance to get it done (well 99%) in 2020. They are never really complete right?
The trunk will be mostly for the items that belong to the camper (chairs, tables, cook stove, fuel, screen tent etc) and after getting it together looks like it will be plenty big for that purpose. The final cabin space now measures 61" wide and 81" long.
The rear bulkhead framing. The trunk stops at this level, the remaining space will be cabin storage.
Additional trunk detail with the rear bulkhead almost fully in position.
Ceiling framed and you can see where the fan will go.
All walls up! As soon as I complete the ceiling/roof and cut a few misc access holes I'll be ready to start the exterior finish. I also still need to accomplish the following:
Wheel wells
Window/Door/Hatch mount rings
Interior shelving
Power and lighting wiring
Seems I have a fighting chance to get it done (well 99%) in 2020. They are never really complete right?
- philpom
- Teardrop Master
- Posts: 252
- Images: 121
- Joined: Sun Jun 21, 2020 4:53 am


 Those are the only 3 times so maybe I learned my lesson! It's our 32" door now.


