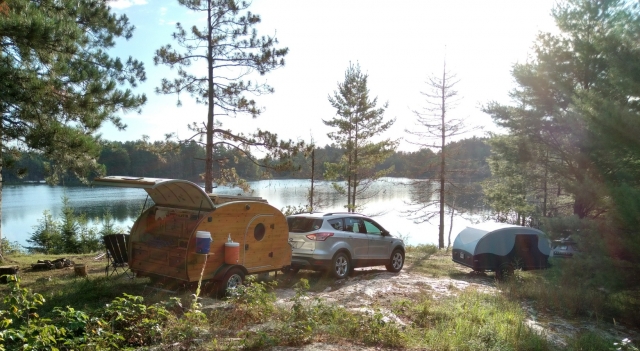
Hi All,
My name's David, and I joined the tnttt site to plan and build a small teardrop. Last year I started going on a lot of weekend outdoor rock climbing trips. Camping in a tent works fine, but Kentucky humidity makes my sleeping bag wet and it is quite cold in fall and spring... I would like the convenience of not having to remember to pack everything I need to sleep and camp every single weekend. Having a nice bed, fixed lighting, a cooking area, and more cargo space all sound real nice, too. Specially considering I drive a two door jeep!
Anyway, the goal for my build is simple and affordable while not skimping on essentials. I have a loose budget of 2,000$ - 3,000$ and am keeping a spreadsheet with all my purchases. I am not very tall so a 4x8 size seems fine, and will allow me to avoid seams and extending the footprint over the trailer. I want a Benroy-esque shape, simple galley with pull out ice box, maybe some drawers, and a PMF exterior.
So far I have purchased a HF 1720lb trailer off craigslist. It was brand new, never even hooked up to a ball, but pre-assembled! I paid $370 for it. Without the 20% off coupons I figured that would be a good price. I have a fan-tastic vent, a window, two doors off ebay, fuse block, wiring, connectors, a ceiling light, led light strip, 110 hookup plug, usb outlets, cooler, stove... I'm about $1,600 in so far. Only need plywood, insulation, hardware, battery, canvas and glue and paint, and misc. items.
Right now I am cleaning and packing the bearings with good grease. I will post soon with progress on this step.
One issue I see coming up is when building the floor, some protruding bolt heads might get in the way. I could remove them and weld the spots, or try to drill recessed holes for the heads to sit in... But that might not work with the 1/8'' plywood I plan to skin the floor frame with, and the PMF I will use to protect it with...
Teardrops n Tiny Travel Trailersor t n ttt for short (tnttt.com) |
Climber's Teardrop Build
26 posts
• Page 1 of 2 • 1, 2
Climber's Teardrop Build
![]() by dvdpeiro » Tue Apr 27, 2021 9:44 am
by dvdpeiro » Tue Apr 27, 2021 9:44 am
-

dvdpeiro - Teardrop Inspector
- Posts: 17
- Images: 228
- Joined: Wed Mar 31, 2021 3:47 am
- Location: Cincinnati, OH
Re: Climber's Teardrop Build
![]() by TimC » Tue Apr 27, 2021 12:07 pm
by TimC » Tue Apr 27, 2021 12:07 pm
dvdpeiro wrote:Hi All, ...
One issue I see coming up is when building the floor, some protruding bolt heads might get in the way. I could remove them and weld the spots, or try to drill recessed holes for the heads to sit in... But that might not work with the 1/8'' plywood I plan to skin the floor frame with, and the PMF I will use to protect it with...
On my woodie TD's floor it was framed with 1x4s and 1x6s and the road side was skinned with 1/8" lauan. I dry fit the floor on the frame (clamped) and with a small sledge hammer I gave a whack to mark the head spots. At the same time I drilled holes through the trailer frame and floor for 5/16" carriage bolts. The topside of the floor was countersunk just enough to keep the carriage bolt heads below the floor surface. I was then able to countersink the bottom of the floor at the frame bolt spots to accommodate the bolt heads.
I also made thin strips to go on each cross frame steel to support the floor at the same height of the outside trailer frame members which sit proud of the cross members due to the design on my Northern Tool trailer (I'm assuming the construction of the HF is similar).
After the bolt countersinks were finished and before anchoring the floor I put two good coats of black jack (roofing tar) on the entire floor and into the countersinks. To keep the floor from permanently being stuck to the frame I put light plastic strips across the frame members. I was sure I would need to remove the floor at some point. After six years I never have, but ya never know.
Good luck on your build...
Tim
Tim
Niagara, WI
My First Benroy Teardrop Build Thread - A 5x8 Woodie - http://www.tnttt.com/viewtopic.php?f=50&t=63575
My Second Teardrop (partial) Build Thread - Started August '16 - http://www.tnttt.com/viewtopic.php?f=50&t=66939
#3 My son's Benroy Foamie team build - Started July '20 - http://www.tnttt.com/viewtopic.php?f=50&t=72877
-

TimC - Gold Donating Member
- Posts: 1439
- Images: 751
- Joined: Sat May 23, 2015 4:15 am
- Location: WI/MI border