The Poet Creek Express - Foamie Hybrid
Moderator: eaglesdare
Re: The Poet Creek Express - Foamie Hybrid
Understood, will do. You, too!
KC
My Build: The Poet Creek Express Hybrid Foamie
Poet Creek Or Bust
Engineering the TLAR way - "That Looks About Right"
TnTTT ORIGINAL 200A LANTERN CLUB = "The 200A Gang"
Green Lantern Corpsmen
My Build: The Poet Creek Express Hybrid Foamie
Poet Creek Or Bust
Engineering the TLAR way - "That Looks About Right"
TnTTT ORIGINAL 200A LANTERN CLUB = "The 200A Gang"
Green Lantern Corpsmen
-

KCStudly - Donating Member
- Posts: 9640
- Images: 8169
- Joined: Mon Feb 06, 2012 10:18 pm
- Location: Southeastern CT, USA
Re: The Poet Creek Express - Foamie Hybrid
How disappointing!
But, Thank You!
I just finished reading your 296 page diary titled, “The Poet Creek Express – Foamie Hybrid”. To say I felt a bit let down would be a major understatement. But you have clarified some things for me and for that I am truly grateful.
Let me explain further:
We are much alike, in so many ways, that it is almost scary. We share many interests and characteristics. I caught that you have a chopped truck, and enjoy drag racing. You don’t care much about lawn work and you have a hard time finishing projects. Something more interesting or challenging comes along and you are off on another adventure.
I have many unfinished projects. The major ones are cars, 1956 Chevrolet Sedan Delivery, 1937 Chevrolet hot rod with a 292 six cylinder and a yet to be determined hot rod roadster that I keep buying parts for. I have a fairly complete machine shop with a lathe and mill, lots of tools and a nice place to work.
I love building stuff and am very detail oriented. I first started reading your thread because the idea of a foamy intrigues me. Right away, I could see that your desire to do something to the best of your ability was paramount. You made a point early on that you have seen too many builds get stalled and disappear from the board. I got sucked in because you promised that you would be different. I was looking for inspiration and possibly the key to finishing a project with ALL the details completed.
As you went along, I could see that this was going to be a long but thorough build. As you approached each item, you analyzed everything to the point that even I was saying, “Get on with it, already.” Looking at the page count, and comparing it to where you were in the process, I could see that it was going to take me some time to wade through it all. But, I didn’t skip ahead. I will admit to skimming through some of the side trips as I was particularly interested in the skinning.
Now, you don’t know me from Adam, but I feel as if I know you through this thread. As I reflect on my own life I see myself having done a lot of amazing things. (amazing to me at least) What I have learned through doing them is that the journey is the most fun. But, the few times I have completed tasks to the very end were the most rewarding. So, I’m chastising you and myself when I say, “Get off your ass and finish it!”
If you have given up because you hate body work, get someone else to do it. There is no shame in farming out jobs that you are either not good at or just plain hate. Will they do it the way you would have? No, but they will do it. You haven’t done it in all this time.
I think that the PCE got off track when the finish of the fiberglass did not meet your expectations. Then punkin chunkin, jeep axles, and shooting pool became a higher priority than the camper. More fun, more challenging.
Several folks on the board have attempted to reinvigorate your enthusiasm. The one I thought would push you over the top was Tony with his trips and pics of Poet Creek. After all, that was the inspiration for the build in the first place. Is that going to be the one item on your bucket list that doesn’t get done? I think I can feel your frustration with that. You had a dream of recreating the childhood trips. You put yourself in the dream as the creator of the perfect camper to make this trek. EVERYTHING would be perfect. The galley, the gun case, the ax and shovel, the trailer coupler, the windows, the doors. Now that the skin isn’t perfect, you can’t continue with the dream. You can’t sell what you have, because then you will be letting go of the dream. Financially, it would be a big hit. Someone else would get the benefit of all your hard work and you would be lucky to get 25 cents on the dollar of your investment. But, the biggest thing is that they wouldn’t finish it to your standards.
You owe it to yourself to finish it. I think that you also owe it to Karl. He has given you the shop space, the tools and even some of the materials. For God’s sake, the man cut your grass so you would have time to work on the dream.
Do it for your Mom, do it for your Dad, do it for all the folks that have cheered you on through it all. But, DO IT!
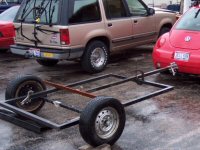
Your thread and the resultant unfinished project has given me motivation and direction for myself. I have a trailer frame that I would build a foamie on. But, I won’t start it until I have caught up on my other projects. If they are not going to get done, I’ll sell them off. I’m 73 and I won’t get to everything. But, no more loose ends!
Bruce
"My rear end is louder than yours"
-

Bruce Schneider - Teardrop Inspector
- Posts: 7
- Joined: Mon Oct 19, 2015 3:12 pm
- Location: Davisburg, MI

 ), and got a pneumatic "filer" (long board air sander) for my recent b-day, so hopefully things will start moving faster again.


 ), so I hope the rest of it will go easier. And there is a learning curve with any process.