 Then details come in, every bolt position matters. I'm going to have the wheels on the frame as quickly as I can. Then it's big (real) task of building the cabin.
Learning to build a 5x8 square drop
66 posts
• Page 3 of 5 • 1, 2, 3, 4, 5
Re: Learning to build a 5x8 square drop
DrewsBrews, thanks for the encouragement! The overall goal sounds very simple: just build a teardrop trailer  Then details come in, every bolt position matters. I'm going to have the wheels on the frame as quickly as I can. Then it's big (real) task of building the cabin.
 Then details come in, every bolt position matters. I'm going to have the wheels on the frame as quickly as I can. Then it's big (real) task of building the cabin.
- DesertApprentice
- Teardrop Advisor
- Posts: 67
- Images: 28
- Joined: Sun Dec 06, 2020 3:51 am
- Location: Arizona
Re: Learning to build a 5x8 square drop
It has been a long time. It has been an extraordinary learning experience for me every step of the way!! From overall design to a simple screw size selection, I posted many questions here, I watched numerous youtube videos. I want to thank everyone here for your help and encouragement!
I'm still long way from being done. I wanted to post some update here. The photos also show the major steps and the lessons learned. some lingering questions still haunt me even to date.
0. Overall camper dimensions
Frame: 5x8
Cabin: 5x8-8" (plywood extends 8" beyond the frame at the back)
Exterior cabin height: from frame metal to the roof (external) ~53.5".
Interior cabin height: ~49"
Ground to the top of the frame (including 2" frame tubing): ~21".
1 - Timbren suspension:
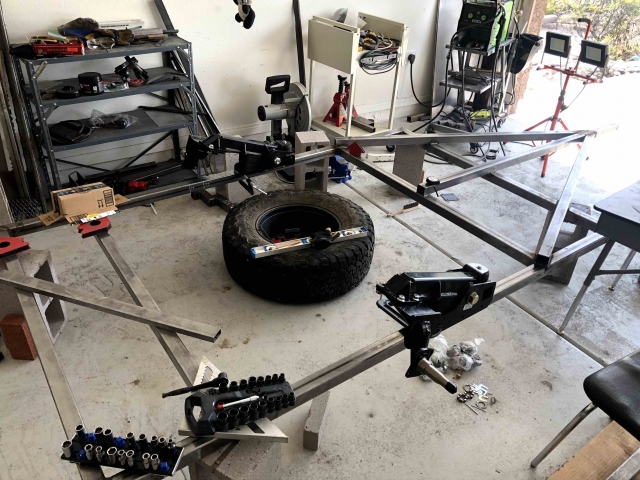
I selected 1-ton Heavy Duty ASR1THDS09, because it has the a longer spindle for big tires. A few things to pay attention: if you use off-roading tires, double check the tire clearance to the frame! I welded the assembly to the frame. If you decide to weld it on, don't weld all the way around. I hope I didn't burn that rubber too bad, fingers crossed I won't have problems down the road.
2 - Hub-brake
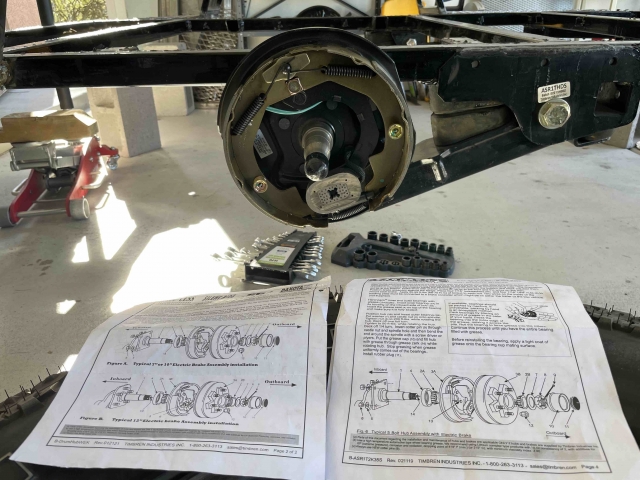
I also selected the compatible hub/brake 94550PR. Beware when they say the hub fits Jeep JL/JK wheels. The only thing this hub "fits" JK/JL wheel is the 5x5 (5x127) bolt pattern. My JL OEM wheels do NOT fit on the hub at all! Also the hub size is 65mm, good luck finding any hub-centric wheels for that. I see my wheel cambers are way off. I still need to address that yet. No regret selecting Timbren though. They do have good customer support.
Another scary story: since it was my first time ever worked on trailer hub, i forgot I need to put in the cotter pins for the castle nuts I dragged the trailer a few times across the town searching for the right wheels for the trailer. I noticed my tires were wobbling badly. I found out the castle nuts were loose. After checking the instruction again, I found out about the cotter pins! An angle must have been watching me.
3 - Tongue
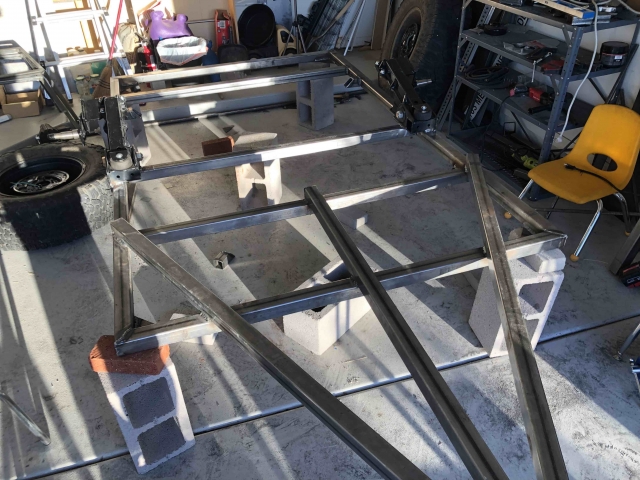 ,
,
only thing worth noting, I selected 50 degree for the triangle. I don't know there is any science with the angle, it appears to be very common with trailers.
4 - POR-15
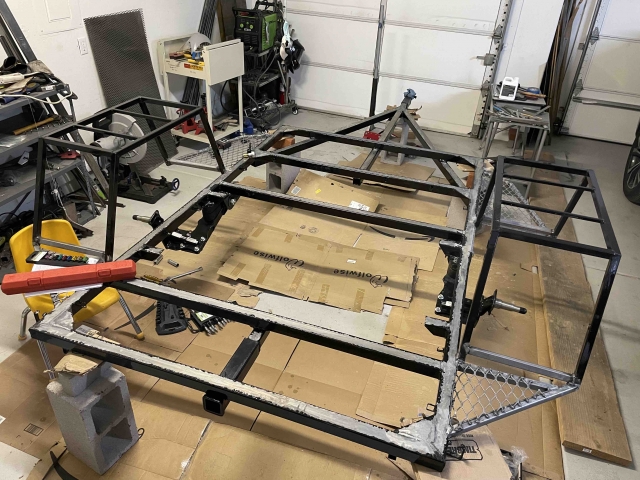
I believe POR-15 is good stuff. If I do it again, I may select a simpler solution. I followed that 3-step process for POR-15. I'm not sure if that's even necessary for clean steel. Also, beware, you still have to apply UV protection coating where POR-15 is exposed to the Sun.
5 - Brake controller
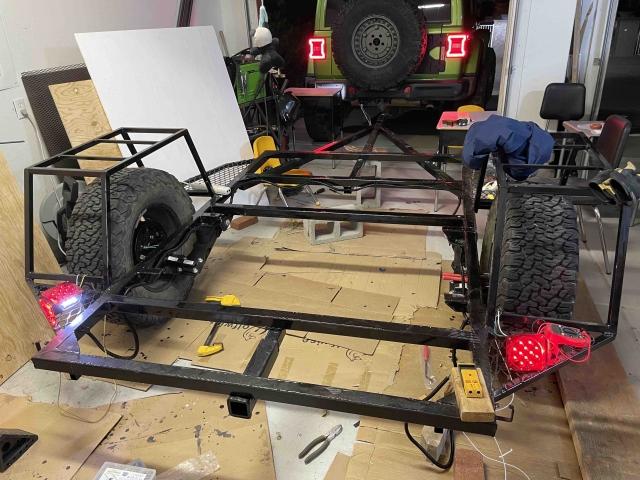
I selected Curt Echo wireless controller.
6 - Floor build
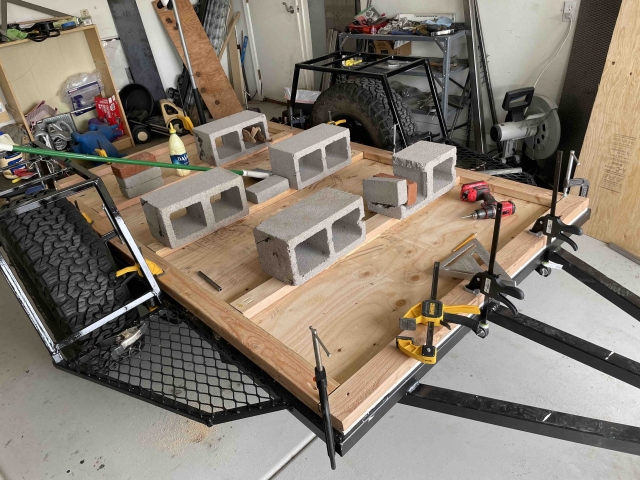
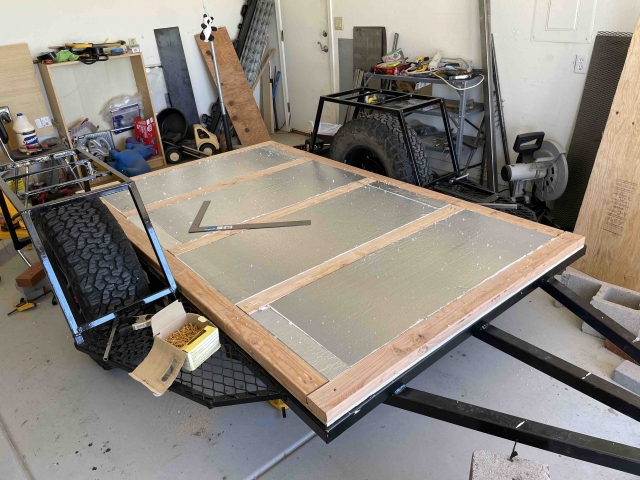
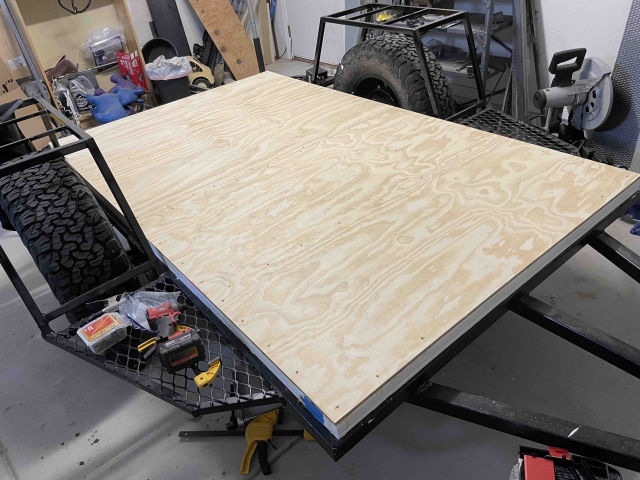
I used 10 carriage bolts fastened the floor to the frame (i pre-welded some gussets to receive those bolts).
I have 2x4 sandwiched between two 1/2" plywoods with 1.5" insulation filling the middle. It is heavy!
7 - Side walls cut-out dry-fit
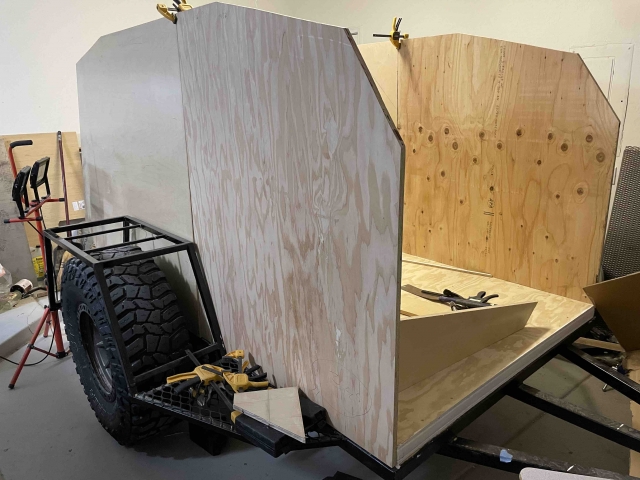
8 - tire selection
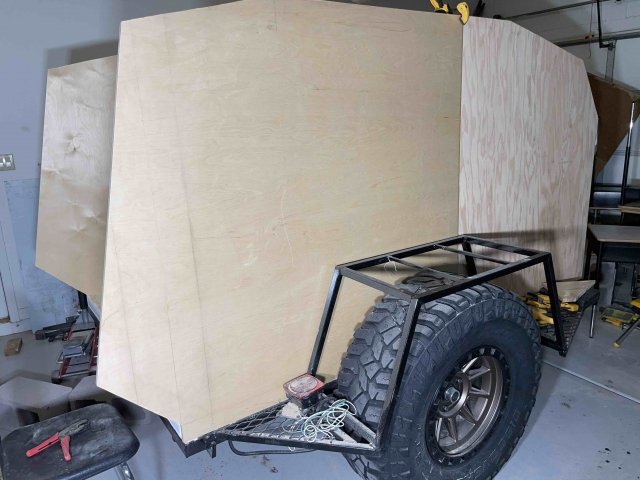
I ended up using two 37" tires. I know it is ridiculous the tires take half the size of the whole camper. The advantage is I can share the same spare tire with my Jeep. I struggled trying to design a good spot for the tiny off-roading camper to carry a spare tire.
9 - Next steps: here I am. A lot needs be done!
I don't have a detailed design. So I'm designing (changing) it as I go.
I plan to first finish the exterior walls and skin the outside with aluminum. This way, I can use the camper as I'm building the interior. I understand the challenges I'll face working inside the enclosed camper. I hope I'm not making a huge mistake. I'm counting on the full size hatch gate to make it a bit easier for me.
I'm still long way from being done. I wanted to post some update here. The photos also show the major steps and the lessons learned. some lingering questions still haunt me even to date.
0. Overall camper dimensions
Frame: 5x8
Cabin: 5x8-8" (plywood extends 8" beyond the frame at the back)
Exterior cabin height: from frame metal to the roof (external) ~53.5".
Interior cabin height: ~49"
Ground to the top of the frame (including 2" frame tubing): ~21".
1 - Timbren suspension:
I selected 1-ton Heavy Duty ASR1THDS09, because it has the a longer spindle for big tires. A few things to pay attention: if you use off-roading tires, double check the tire clearance to the frame! I welded the assembly to the frame. If you decide to weld it on, don't weld all the way around. I hope I didn't burn that rubber too bad, fingers crossed I won't have problems down the road.

2 - Hub-brake
I also selected the compatible hub/brake 94550PR. Beware when they say the hub fits Jeep JL/JK wheels. The only thing this hub "fits" JK/JL wheel is the 5x5 (5x127) bolt pattern. My JL OEM wheels do NOT fit on the hub at all! Also the hub size is 65mm, good luck finding any hub-centric wheels for that. I see my wheel cambers are way off. I still need to address that yet. No regret selecting Timbren though. They do have good customer support.
Another scary story: since it was my first time ever worked on trailer hub, i forgot I need to put in the cotter pins for the castle nuts
 I dragged the trailer a few times across the town searching for the right wheels for the trailer. I noticed my tires were wobbling badly. I found out the castle nuts were loose. After checking the instruction again, I found out about the cotter pins! An angle must have been watching me.
3 - Tongue
only thing worth noting, I selected 50 degree for the triangle. I don't know there is any science with the angle, it appears to be very common with trailers.
4 - POR-15
I believe POR-15 is good stuff. If I do it again, I may select a simpler solution. I followed that 3-step process for POR-15. I'm not sure if that's even necessary for clean steel. Also, beware, you still have to apply UV protection coating where POR-15 is exposed to the Sun.
5 - Brake controller
I selected Curt Echo wireless controller.
6 - Floor build
I used 10 carriage bolts fastened the floor to the frame (i pre-welded some gussets to receive those bolts).
I have 2x4 sandwiched between two 1/2" plywoods with 1.5" insulation filling the middle. It is heavy!
7 - Side walls cut-out dry-fit
8 - tire selection
I ended up using two 37" tires. I know it is ridiculous the tires take half the size of the whole camper. The advantage is I can share the same spare tire with my Jeep. I struggled trying to design a good spot for the tiny off-roading camper to carry a spare tire.
9 - Next steps: here I am. A lot needs be done!
I don't have a detailed design. So I'm designing (changing) it as I go.
I plan to first finish the exterior walls and skin the outside with aluminum. This way, I can use the camper as I'm building the interior. I understand the challenges I'll face working inside the enclosed camper. I hope I'm not making a huge mistake. I'm counting on the full size hatch gate to make it a bit easier for me.

- DesertApprentice
- Teardrop Advisor
- Posts: 67
- Images: 28
- Joined: Sun Dec 06, 2020 3:51 am
- Location: Arizona


