Decorative inlay strip almost done

Anything to do with mechanical, construction etc

Decorative inlay strip almost done

Postby AmyH » Mon Oct 23, 2006 10:00 pm

Between all the work around my house I have been doing, I found a few hours to work on the decorative strip that I will be inlaying into the plywood sides:

Image

Now I have the daunting task of resawing the strip on my bandsaw in order to get two strips. I think I am going to work on the sides for a bit before tackling the resawing. :lol: You can see more photos of the decorative inlay by checking out my Flickr album.
Amy
"...follow humbly whereever and to whatever abyss Nature leads, or else you shall learn nothing." T.H. Huxley

Photo Log
Camping Trips with the Tear
User avatar
AmyH
*The 300 Club
 
Posts: 624
Images: 4
Joined: Sat May 15, 2004 8:35 pm
Location: Shoreline, WA

Re: Decorative inlay strip almost done

Postby Micro469 » Mon Oct 23, 2006 10:22 pm

AmyH wrote:Between all the work around my house I have been doing, I found a few hours to work on the decorative strip that I will be inlaying into the plywood sides:

Image

Now I have the daunting task of resawing the strip on my bandsaw in order to get two strips. I think I am going to work on the sides for a bit before tackling the resawing. :lol: You can see more photos of the decorative inlay by checking out my Flickr album.


Amy that looks fantastic... Can you go into a little more detail on how you made that decorative strip??? Please? :thumbsup:
John
Image
User avatar
Micro469
Super Lifetime Member
 
Posts: 3185
Images: 382
Joined: Mon Nov 07, 2005 10:46 pm
Location: Brampton,Ontario,Canada

Postby peggyearlchris » Mon Oct 23, 2006 10:25 pm

8) :thumbsup: :thumbsup: That is so beautiful. Super job you go girl! :applause: :applause: Peg
User avatar
peggyearlchris
500 Club
 
Posts: 984
Images: 56
Joined: Mon May 29, 2006 8:49 pm
Location: corpus christi,texas
Top

Postby NightCap » Mon Oct 23, 2006 10:26 pm

Yep, very nice. Thanks for showing us.
Image
#1 - 100% Done #2 - 100% Done Thinking about #3
User avatar
NightCap
1000 Club
1000 Club
 
Posts: 1131
Images: 259
Joined: Sun Jul 02, 2006 9:28 pm
Location: Iowa, Dayton
Top

Postby mjg444 » Mon Oct 23, 2006 11:09 pm

That looks like great work! I'm impressed!
:applause:
Michele
User avatar
mjg444
Teardrop Advisor
 
Posts: 69
Images: 71
Joined: Thu Aug 17, 2006 10:27 pm
Location: Bellevue, WA
Top

Postby AmyH » Mon Oct 23, 2006 11:18 pm

The board is made of walnut edge strips, a hard maple field board, and a mahogany wave pattern. The larger circles were drilled out first, and they are 3" in diameter. The holes are spaced 4 1/2" apart (sum of the large circle and small circle). These were filled with the 3" mahogany plugs, which were then drilled out with a 1 1/2" forstner bit. The small maple plugs were then glued in. The whole board was then cut down the middle, and then the two halves are shifted and glued back together to form the wave. Then all that is left to do is resaw the board (on edge) with the bandsaw. This will give me the two boards (one for each side). I had a bit of a time with my small drill press, so in some areas the wave doesn't quite meet up perfectly. Overall though, I am very happy with how it turned out. Now I just have a bit of trepidation regarding the resawing. Oh, and the whole board is just about 6" wide and 10' long. That will be a doozy to cut on the bandsaw. :?
Amy
"...follow humbly whereever and to whatever abyss Nature leads, or else you shall learn nothing." T.H. Huxley

Photo Log
Camping Trips with the Tear
User avatar
AmyH
*The 300 Club
 
Posts: 624
Images: 4
Joined: Sat May 15, 2004 8:35 pm
Location: Shoreline, WA
Top

Postby Juneaudave » Mon Oct 23, 2006 11:18 pm

Amy....I'm impressed. That looks like a difficult pattern to do. Give us some details on how you did it!!!! You haven't built kayaks, have you? :applause: :applause: :applause:
User avatar
Juneaudave
Super Duper Lifetime Member
 
Posts: 3237
Images: 380
Joined: Sun Jul 03, 2005 12:11 pm
Location: Juneau, Alaska
Top

Postby AmyH » Mon Oct 23, 2006 11:26 pm

Juneaudave, I actually got the idea from a guy who runs Aeneas Originals. I ordered his plans just to get the information on how to do the decorative strips. Funny you should ask if I ever built kayaks. I haven't, yet. 8) I have plans for a Chesapeake Double, a Guillemot Little Auk, and a bunch of books on building them. Once I have finished up the teardrop trailer, and my house remodel, I plan to start by building either the Chesapeake Double or a Wee Lassie (Mac McCarthy design).

Thanks for the kudos everyone, it took a while to get it to this point.
Amy
"...follow humbly whereever and to whatever abyss Nature leads, or else you shall learn nothing." T.H. Huxley

Photo Log
Camping Trips with the Tear
User avatar
AmyH
*The 300 Club
 
Posts: 624
Images: 4
Joined: Sat May 15, 2004 8:35 pm
Location: Shoreline, WA
Top

Postby forestfrog » Tue Oct 24, 2006 12:15 am

Amy, that's amazing!! Excellent job! :applause: :thumbsup: :applause:
Kristi
Image
~*~Stand still and be awed by Nature...~*~
User avatar
forestfrog
Teardrop Master
 
Posts: 272
Images: 83
Joined: Mon Aug 21, 2006 11:50 pm
Location: Louisiana - the middle part
Top

Postby bledsoe3 » Tue Oct 24, 2006 2:31 am

Wow! That looks great. And even if I wasn't so easily impressed, I'd still be impressed. :R
If you do what you've always done, you'll get what you've always got.
User avatar
bledsoe3
3000 Club
3000 Club
 
Posts: 3694
Images: 112
Joined: Tue Jun 07, 2005 5:55 am
Location: Oregon, Portland
Top

Postby b.bodemer » Tue Oct 24, 2006 8:33 am

beautiful work Amy.

Barb
User avatar
b.bodemer
1000 Club
1000 Club
 
Posts: 1608
Images: 328
Joined: Mon May 08, 2006 5:43 pm
Location: Lakewood OH
Top

Postby halfdome, Danny » Tue Oct 24, 2006 9:17 am

Very nice Amy :applause: :thumbsup: . Your thinking deep :thinking: 
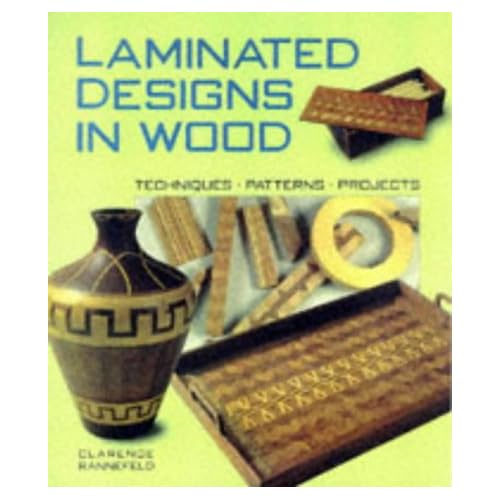
. I have a book you may enjoy called Laminated Designs In Wood by Clarence Rannefeld. Amazon wants $68 but you may find it at the library, I only paid $19.95 new at Borders a few years ago. It's a great book if you have the time to dive into all the intricate designs he gives instructions to produce. :) Danny
Image
ImageImage
"Conditions are never just right. People who delay action until all factors are favorable do nothing". William Feather
Don't accept "It's Good Enough" build to the best of your abilities.
Image
Teardroppers Of Oregon & WashingtonImage
User avatar
halfdome, Danny
*Happy Camper
 
Posts: 5894
Images: 252
Joined: Sun Aug 14, 2005 11:02 pm
Location: Washington , Pew-al-up
Top

Postby Mary K » Tue Oct 24, 2006 10:44 am

:shock: :shock: :shock:

That is Beautiful Amy. I can't wait too see the rest of your build.

:thumbsup: :applause: :thumbsup: :applause:

Mk
Mary K

I don't know half of you half as well as I should like; and I like less than half of you half as well as you deserve. Bilbo Baggins
User avatar
Mary K
6000 Club
6000 Club
 
Posts: 6425
Images: 44
Joined: Wed Aug 02, 2006 3:07 pm
Location: Florida, Pensacola
Top

Postby AmyH » Tue Oct 24, 2006 12:03 pm

Danny, that book looks great, I'll have to see if I can find a copy. Maybe the library carries it. :thinking:
Amy
"...follow humbly whereever and to whatever abyss Nature leads, or else you shall learn nothing." T.H. Huxley

Photo Log
Camping Trips with the Tear
User avatar
AmyH
*The 300 Club
 
Posts: 624
Images: 4
Joined: Sat May 15, 2004 8:35 pm
Location: Shoreline, WA
Top

Postby Ira » Tue Oct 24, 2006 1:42 pm

Amy:

I'd like to order two 8-foot lengths, 4 inches wide, inlaid with 5" crabs done in maple.

OUTSTANDING!!!
Here we go again!
User avatar
Ira
Forum Storyteller
 
Posts: 5652
Images: 118
Joined: Tue Nov 29, 2005 2:16 pm
Location: South Florida
Top

Next

Return to Teardrop Construction Tips & Techniques

Who is online

Users browsing this forum: No registered users and 2 guests