Latest Progress

Anything to do with mechanical, construction etc

Latest Progress

Postby SkipperSue » Sat Nov 11, 2006 4:49 pm

The floor assembly got attached to the trailer frame, using 3/8ths inch stainless steel bolts with flat washers and nylock nuts.

Image

I counter sunk the holes with a 7/8ths inch Forstner bit, drilled down just enough to let the bolt head be flush with the floor.

Image

I marked out all the dimensions for the first wall panel.

Image

I used the string compass to mark out the radii of the door and front and rear of the side wall.

Image

After cutting out the first side wall I flipped it over onto the second piece of wall plywood and made my marks using the first piece as the pattern.

Image

After I got the second wall cut out I matched all the ends and edges lined up and clamped them together. I then used the belt sander with a 50 grit belt to get both edges of the walls smooth and matching.

Image

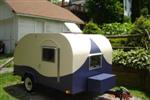
That's all for now, will prolly mess with it some more tomorrow. :D
Skipper
User avatar
SkipperSue
Gold Donating Member
 
Posts: 585
Images: 114
Joined: Thu Sep 14, 2006 7:12 am
Location: South Carolina, Table Rock

Postby Kens » Sat Nov 11, 2006 8:39 pm

Did you cut out your wheel wells?
Good day every day!
User avatar
Kens
500 Club
 
Posts: 580
Images: 26
Joined: Mon Aug 01, 2005 5:18 pm
Location: Valencia Pa.

Postby SkipperSue » Sat Nov 11, 2006 8:54 pm

Kens wrote:Did you cut out your wheel wells?


Not yet, that will be tomorrow prolly. If the trailer was a little bit wider I wouldn't have to do a cut out, as is I will have to make a small fender that sticks out a few inches.
Skipper
User avatar
SkipperSue
Gold Donating Member
 
Posts: 585
Images: 114
Joined: Thu Sep 14, 2006 7:12 am
Location: South Carolina, Table Rock
Top

Postby SkipperSue » Sun Nov 12, 2006 6:04 pm

I dry fitted the walls today. I had to mount one side to get the arc needed for the wheel wells. I got the arc using the string compass, from the center of the bearing cap I got my mark to the bottom of the floor. Worked great. :thumbsup:

Image

Image

It's starting to look like something now. :D
Skipper
User avatar
SkipperSue
Gold Donating Member
 
Posts: 585
Images: 114
Joined: Thu Sep 14, 2006 7:12 am
Location: South Carolina, Table Rock
Top

Postby peggyearlchris » Sun Nov 12, 2006 10:25 pm

8) It looks like it is coming along nicely. Good job. :applause: :applause: Peg
User avatar
peggyearlchris
500 Club
 
Posts: 984
Images: 56
Joined: Mon May 29, 2006 8:49 pm
Location: corpus christi,texas
Top

Postby b.bodemer » Mon Nov 13, 2006 9:48 am

looking good......... :thumbsup: :thumbsup:
Barb
User avatar
b.bodemer
1000 Club
1000 Club
 
Posts: 1608
Images: 328
Joined: Mon May 08, 2006 5:43 pm
Location: Lakewood OH
Top

Postby dwgriff1 » Mon Nov 13, 2006 10:23 am

Skip

How wide is your tear?

dave
User avatar
dwgriff1
500 Club
 
Posts: 947
Images: 4
Joined: Mon Jul 04, 2005 4:20 pm
Location: SW Idaho
Top

Postby Mary K » Mon Nov 13, 2006 11:07 am

Wow, good work. :thumbsup: :applause:

Yea, how wide is it? Did you use a 4' wide trailer?

Mk
Mary K

I don't know half of you half as well as I should like; and I like less than half of you half as well as you deserve. Bilbo Baggins
User avatar
Mary K
6000 Club
6000 Club
 
Posts: 6425
Images: 44
Joined: Wed Aug 02, 2006 3:07 pm
Location: Florida, Pensacola
Top

Postby SkipperSue » Mon Nov 13, 2006 5:06 pm

I used the 4x8 foot HF trailer. I have it 62 inches (5 foot 2 inches) wide. The wheels are almost all covered by the body.
Skipper
User avatar
SkipperSue
Gold Donating Member
 
Posts: 585
Images: 114
Joined: Thu Sep 14, 2006 7:12 am
Location: South Carolina, Table Rock
Top

Postby dwgriff1 » Mon Nov 13, 2006 10:53 pm

I like the idea of partly hidden wheels. It would allow some tiny little fenders, a couple inches wide.

dave
User avatar
dwgriff1
500 Club
 
Posts: 947
Images: 4
Joined: Mon Jul 04, 2005 4:20 pm
Location: SW Idaho
Top


Return to Teardrop Construction Tips & Techniques

Who is online

Users browsing this forum: No registered users and 0 guests