Thanks guys. You all have great suggestions. Worst part will be tearing it down and getting things cleaned up to reassemble and re-glue. I had a bulkhead in before I realized my problem. Tore it out and now on to the ceiling. Anyone have any suggestions for removing ribbons of remaining hardened PL-400 without tearing up the underlying wood?
I have a flat level floor in my shop and the trailer is on 4 jackstands and is level. Gerdo is correct it is now a trapazoid and needs to be corrected. I had not checked the square after I initally put up the walls and spars. When I did check I used a square not a level. I just need to check more often, I mistakedly thought that once the spars were on the walls would stay square. I won't have time to do anything before Sunday then the fun begins. Right now I have started polyurathaning new panels for the ceiling so they are ready when I get things squared up. Well I guess I'll be a world wide expert at squaring and installing ceilings by the time I get done.
Teardrops n Tiny Travel Trailersor t n ttt for short (tnttt.com) |
Major setback....Update, Pictures added
32 posts
• Page 2 of 3 • 1, 2, 3
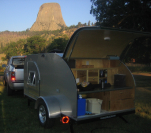
![]() by Miriam C. » Thu Nov 02, 2006 11:01 pm
by Miriam C. » Thu Nov 02, 2006 11:01 pm
Ah, sorry Tripmaker. That is tough break. 
Getting the glue off: sander or chisel. I don't know of a chemical.
Maybe the guys who work with it will chime in.
Getting the glue off: sander or chisel. I don't know of a chemical.
Maybe the guys who work with it will chime in.
“Forgiveness means giving up all hope for a better past.â€
-

Miriam C. - our Aunti M
- Posts: 19675
- Images: 148
- Joined: Wed Feb 15, 2006 3:14 pm
- Location: Southwest MO


 After a short recovery time Sunday morning it was time to get to work.
 After a lot of head scratching, we, that is my better half and I, determined that part of the problem was the floor and the other part was a slight warp to the walls. I temporarily installed my counter top and realized that when I screw ithe walls into it they will be pulled into line. I then glued and screwed the new bulkhead into place, installed a cabinet top/shelf, and a second shorter bulkhead offset to the rear. I'll get pictures of this posted to my gallery in a day or two so you can see what I'm talking about.


