Teardrops n Tiny Travel Trailersor t n ttt for short (tnttt.com) |
TD Walls bowed out -does my TD have gas?
18 posts
• Page 1 of 2 • 1, 2
TD Walls bowed out -does my TD have gas?
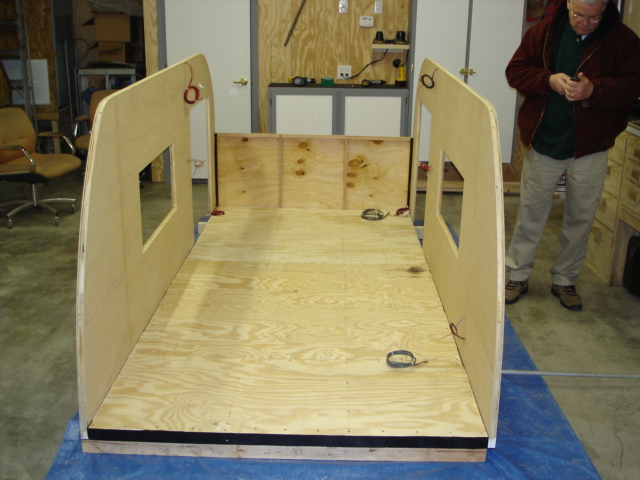
![]() by Keith B » Thu Feb 15, 2007 9:46 pm
by Keith B » Thu Feb 15, 2007 9:46 pm
Okay.. the drawing below is over exaggerated just to get the point across.. but basically... the measurement at the floor and the measurement at the top of the front bulk head and the measurement at the roof are all the same, 60".. however, in the middle of the wall both are bowed out 1/4". If you put a square on the floor it wont line up with the wall, and both side are bowed out. I checked square and it's right on - it's just simply like the TD has turned into a balloon, pushing out, so to speak. Is this one of those, "just gotta live with it" things. Typical plywood probably had a bow in it and the 1/2" interior framing just wasn't enough to keep it flat. Any suggestions? If this is just the way it is, well shucks, because it's going to be tough to get the doors to close flat too.

Last edited by Keith B on Thu Feb 15, 2007 11:31 pm, edited 2 times in total.
************
Keith
"Work and work and do your best! Paint and putty will do the rest!"
Keith
"Work and work and do your best! Paint and putty will do the rest!"
-

Keith B - Silver Donating Member
- Posts: 550
- Images: 148
- Joined: Mon Jan 29, 2007 3:54 pm
- Location: Wichita, KS
![]() by Dale M. » Thu Feb 15, 2007 10:40 pm
by Dale M. » Thu Feb 15, 2007 10:40 pm
Plywood will take a curve...
When you install sleeping compartment/galley wall you can probably pull the warp out of the plywood....
Dale
When you install sleeping compartment/galley wall you can probably pull the warp out of the plywood....
Dale
Lives his life vicariously through his own self.
Any statement made by me are strictly my own opinion.
You are free to ignore anything I say if you do not agree.

Any statement made by me are strictly my own opinion.
You are free to ignore anything I say if you do not agree.
-

Dale M. - 2000 Club

- Posts: 2693
- Images: 18
- Joined: Thu Jun 09, 2005 8:50 pm
- Location: Just a tiny bit west of Yosemite National Park

 Are you framing around the window too?


 At least they're both bowed out so it's all pretty even - see, gotta look for that silver lining. Thanks again everyone.