this is how they did the bend. Not quite as sharp.
Teardrops n Tiny Travel Trailersor t n ttt for short (tnttt.com) |
Bending for Curve how to?
34 posts
• Page 2 of 3 • 1, 2, 3
![]() by Miriam C. » Wed Mar 07, 2007 6:55 pm
by Miriam C. » Wed Mar 07, 2007 6:55 pm
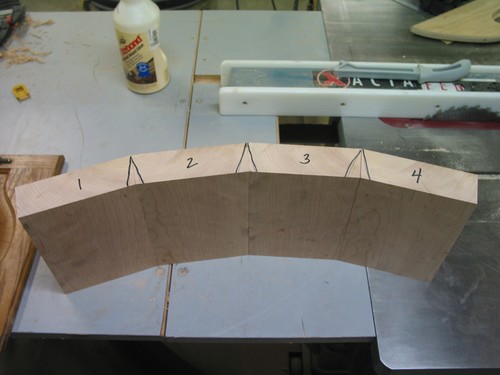
Hi Lynn, Don't know if you have seen Barbs pictures of her curve. This looks like what you are saying I think.
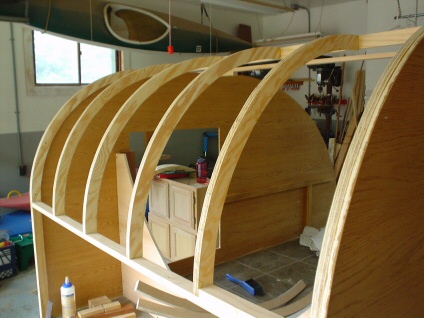
this is how they did the bend. Not quite as sharp.
this is how they did the bend. Not quite as sharp.
“Forgiveness means giving up all hope for a better past.â€
-

Miriam C. - our Aunti M
- Posts: 19675
- Images: 148
- Joined: Wed Feb 15, 2006 3:14 pm
- Location: Southwest MO
![]() by Keith B » Wed Mar 07, 2007 7:05 pm
by Keith B » Wed Mar 07, 2007 7:05 pm
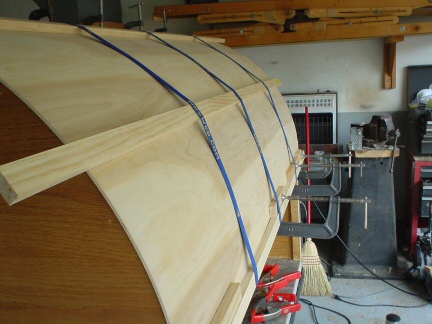
Lynn... don't forget.. you have an interior ceiling to install too, some like to do it before the roof, but in your case, you need to be able to find your "structure"... the glue surface is needed for both. Your idea will work, others have use it...IF it were me.. I'd add three more spars at least in the curve....then you know you have enough, it's easier to bend the ply inside and out and it's easier to find the spars to screw too, etc. when securing for the glue.....on the 1/4 in. cuts... you want to kerf the plywood, do I understand you correctly?... well, sometimes that works.. but if you do that, you're cutting through 1/8" of the ply anyway, so why not just put 1/8 on times two then have the full 1/4.. I tried the kerf method on my 7" curve, without success and steaming wasn't enough.. I think steaming would work on your curve though, looks about 12 or 16"?, if that's the route you chose listen to those who've had success with it and- go slow... Personally, I don't think TBIII is "enough" for this application.. the roof is what creates the torsion structure and holds your camper together and keeps it from wiggling, etc.. it's built like an egg, VERY strong.... I would use F26 or Liquid Nail, some guys like Gorilla Glue.. just use something strong.. TBIII is great stuff, but I know when I lay floors on homes we use F26 and they DO NOT ever come lose or squeak or anything.... personal opinion. Again, F26 is very similar to Liquid Nail which you can fine anywhere, F26 is just what I know, both have good "inital tack" and they don't "drip" like TBIII....90 percent of my work is with TBIII, but there's a purpose and use for different glues.
************
Keith
"Work and work and do your best! Paint and putty will do the rest!"
Keith
"Work and work and do your best! Paint and putty will do the rest!"
-

Keith B - Silver Donating Member
- Posts: 550
- Images: 148
- Joined: Mon Jan 29, 2007 3:54 pm
- Location: Wichita, KS