Rear Hatch started runners cut from oak plywood

Anything to do with mechanical, construction etc

Rear Hatch started runners cut from oak plywood

Postby legend lime » Mon Apr 16, 2007 8:46 pm

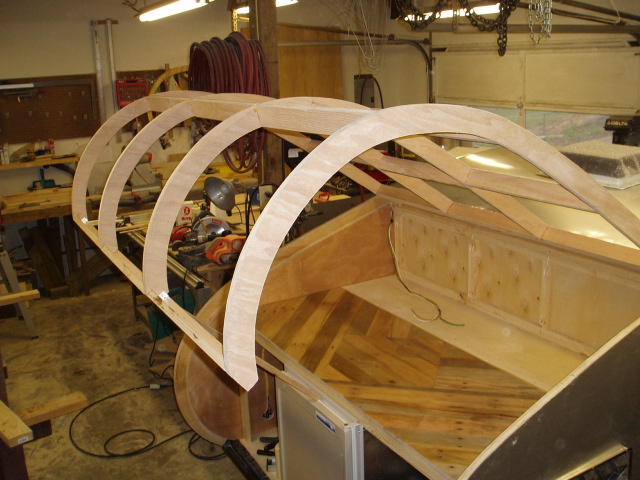
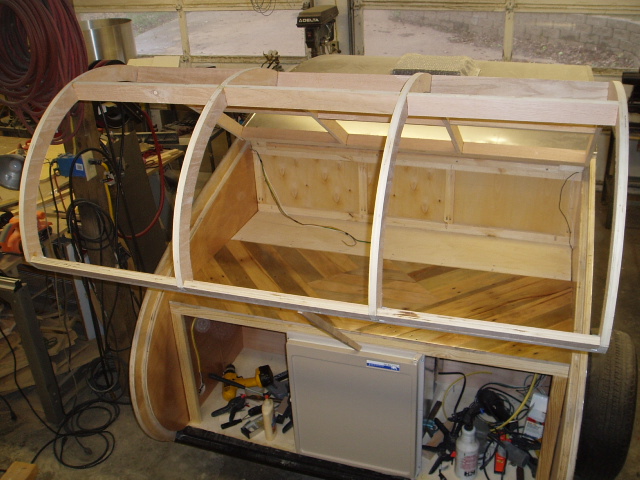
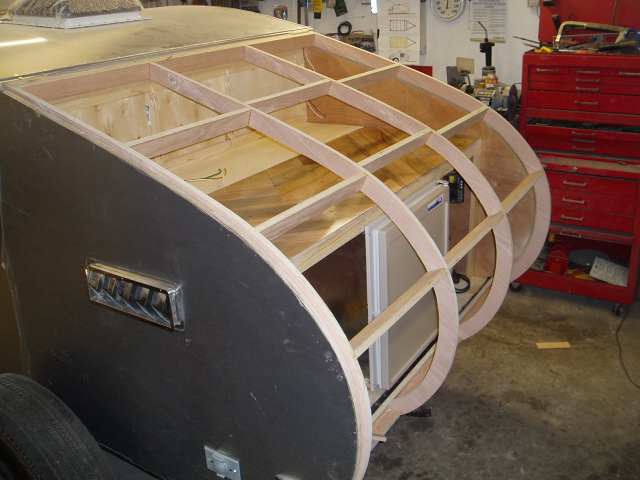
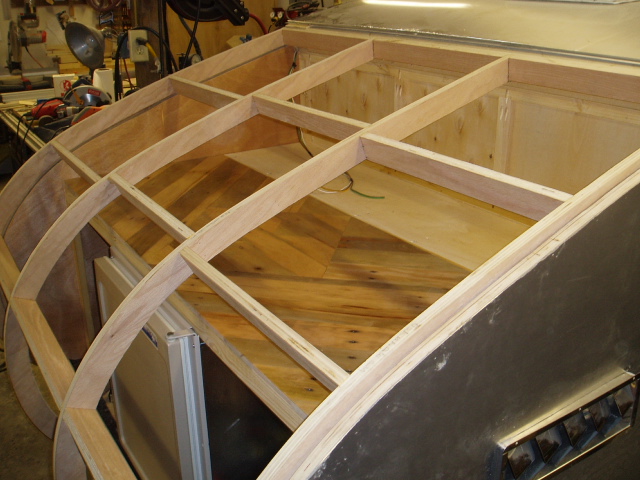
Her are some pics of the rear hatch; I started it last friday the 13th and I can't beleave nothing went wrong putting it togeather. My last experience with friday the 13th was 30 rounds of Ak-47 coming through the side of my helicopter with one round coming through the floor hitting the bottom of my boot, thank God for steel shanks. :worship: Thats why in the past I haven't done anything on fridy the 13th.


Image

Image

Image

Image[/img]
Legned Lime, Acworth, GA
User avatar
legend lime
Teardrop Master
 
Posts: 100
Images: 252
Joined: Sun Oct 29, 2006 7:51 pm
Location: Acworth, GA

Postby Mary K » Mon Apr 16, 2007 8:53 pm

:clapping hands: :clapping hands: :clapping hands: :clapping hands:

Yes!! That is SWEET!! You do some nice work Mr. Lime.

Mk
Mary K

I don't know half of you half as well as I should like; and I like less than half of you half as well as you deserve. Bilbo Baggins
User avatar
Mary K
6000 Club
6000 Club
 
Posts: 6425
Images: 44
Joined: Wed Aug 02, 2006 3:07 pm
Location: Florida, Pensacola

Postby Gage » Mon Apr 16, 2007 8:54 pm

That's looking real good. The way your building it, you shouldn't have any problems. It's good to see someone who listens to the right people. :thumbsup:

P.S. Did you allow any gap between the hatch and sides (each side).
Image Image Image
Remember 'Teardrop Time'.......Take your time, you don't have to have it finished NOW.
User avatar
Gage
8000 Club
8000 Club
 
Posts: 8321
Images: 28
Joined: Sat Apr 17, 2004 9:14 pm
Location: Palmdale, CA
Top

Postby Miriam C. » Mon Apr 16, 2007 9:24 pm

:P :woohoo: :beautiful: Boy, you really made a good one. :envious:
“Forgiveness means giving up all hope for a better past.â€
User avatar
Miriam C.
our Aunti M
 
Posts: 19675
Images: 148
Joined: Wed Feb 15, 2006 3:14 pm
Location: Southwest MO
Top

Postby Micro469 » Mon Apr 16, 2007 9:38 pm

Very Nice..... Wish I had that skill level.... :thumbsup:
John
Image
User avatar
Micro469
Super Lifetime Member
 
Posts: 3185
Images: 382
Joined: Mon Nov 07, 2005 10:46 pm
Location: Brampton,Ontario,Canada
Top

Postby Juneaudave » Mon Apr 16, 2007 10:46 pm

That does look very nice!!!! You've been doing some remarkable work!!!

:applause: :applause: :applause:
User avatar
Juneaudave
Super Duper Lifetime Member
 
Posts: 3237
Images: 380
Joined: Sun Jul 03, 2005 12:11 pm
Location: Juneau, Alaska
Top

Postby doug hodder » Mon Apr 16, 2007 10:57 pm

Good choice on the ply stringers, lots of strength in that profile in ply, and a nice looking profile to boot!!! Good job...and thanks for your service... :thumbsup: doug
doug hodder
*Snoop Dougie Doug
 
Posts: 12625
Images: 562
Joined: Tue Dec 14, 2004 11:20 pm
Top

Postby bledsoe3 » Tue Apr 17, 2007 3:15 am

My first and second hatch together don't near that good. :oops:
If you do what you've always done, you'll get what you've always got.
User avatar
bledsoe3
3000 Club
3000 Club
 
Posts: 3694
Images: 112
Joined: Tue Jun 07, 2005 5:55 am
Location: Oregon, Portland
Top

Postby toypusher » Tue Apr 17, 2007 2:57 pm

Great looking job there!! Very nice, indeed!
User avatar
toypusher
Site Admin
 
Posts: 43040
Images: 324
Joined: Fri Jan 28, 2005 12:21 pm
Location: York, PA Area
Top

Postby Jiminsav » Tue Apr 17, 2007 10:15 pm

Chief, thats a mighty fine set of ribs you got there..and Gage, it looks like he's got a RCH to play with there on the sides.. :D
Jim in Savannah
If you can read this bumper sticker, my camper fell off.
User avatar
Jiminsav
3000 Club
3000 Club
 
Posts: 3059
Images: 40
Joined: Sat Apr 17, 2004 8:49 pm
Location: Georgia, Savannah
Top

Postby Gage » Wed Apr 18, 2007 1:02 am

Jiminsav wrote:Chief, thats a mighty fine set of ribs you got there..and Gage, it looks like he's got a RCH to play with there on the sides.. :D

Yep, I saw that. :thumbsup: Still need some clearance to the side to prevent any interference on down the road.
Image Image Image
Remember 'Teardrop Time'.......Take your time, you don't have to have it finished NOW.
User avatar
Gage
8000 Club
8000 Club
 
Posts: 8321
Images: 28
Joined: Sat Apr 17, 2004 9:14 pm
Location: Palmdale, CA
Top

Postby legend lime » Wed Apr 18, 2007 10:16 am

Thanks guys
And Gage I allowed 1/4" on each side do you think it's going to be enough? :worship: theres no problems at this point opening and closing the lid, do you think there will be any after I install the two layers of 1/8" bendable plywood and the 0.50 alum skin. I am using the 1/8" due to the excessive bend at the bottom and I don't think I will be able to install 1/4" without some problems with it trying to pull the bottom up off of it's seat. Any comments on this is evry welcome, and again thanks.
Legned Lime, Acworth, GA
User avatar
legend lime
Teardrop Master
 
Posts: 100
Images: 252
Joined: Sun Oct 29, 2006 7:51 pm
Location: Acworth, GA
Top

Postby Gage » Wed Apr 18, 2007 11:41 am

Good gap. :thumbsup: I do believe you'll find that one layer of 1/8" will be plenty good. Think about it. Your not setting a bear on it.
Image
Image Image Image
Remember 'Teardrop Time'.......Take your time, you don't have to have it finished NOW.
User avatar
Gage
8000 Club
8000 Club
 
Posts: 8321
Images: 28
Joined: Sat Apr 17, 2004 9:14 pm
Location: Palmdale, CA
Top

Postby bledsoe3 » Thu Apr 19, 2007 3:17 am

A single layer of 1/8" should be plenty if you're putting aluminum on top of it.
If you do what you've always done, you'll get what you've always got.
User avatar
bledsoe3
3000 Club
3000 Club
 
Posts: 3694
Images: 112
Joined: Tue Jun 07, 2005 5:55 am
Location: Oregon, Portland
Top


Return to Teardrop Construction Tips & Techniques

Who is online

Users browsing this forum: No registered users and 3 guests