Teardrop/Cycle Hauler Build 4.0: The Rise of The Phoenix

Anything to do with mechanical, construction etc

Postby madjack » Wed Jul 11, 2007 10:36 pm

SM...STOP...right now , it is time to put your bulkheads in or at least put those "gussets" back in place...the spars alone, along with your floor/wall connections are NOT enough to keep the whole thing from racking...again!!!!!!!!!
madjack 8)
...I have come to believe that, conflict resolution, through violence, is never acceptable.....................mj
User avatar
madjack
Site Admin
 
Posts: 15128
Images: 177
Joined: Thu Dec 02, 2004 5:27 pm
Location: Central Louisiana

Postby Mary K » Wed Jul 11, 2007 11:33 pm

SandMan, you listen to MJ!!

AND, just want you to know, I am very proud of you for getting back up on that horse.

You Can Do it!!

Mk
Mary K

I don't know half of you half as well as I should like; and I like less than half of you half as well as you deserve. Bilbo Baggins
User avatar
Mary K
6000 Club
6000 Club
 
Posts: 6425
Images: 44
Joined: Wed Aug 02, 2006 3:07 pm
Location: Florida, Pensacola

Postby sandman » Wed Jul 18, 2007 9:01 pm

Thanks for all the support, MaryK. Glad I didn't give up either!

Well, I am being extremely slow and patient with this build. I basically install 2 to 3 spars, clamp everything up and walk away for 24 hours while the glue cures. In the last 4 days, I have finished the vent framing and installed 1 more spar. I am truly taking full advantage of teardrop time this time around. I also managed to make my lower rear bulkhead and but have not permanantly mounted it yet. I simply lay the bulkhead assembly in place to hold the walls square while I quit for the night. I will probably permantly install rear lower bulkhead tomorrow.

Meanwhile, since everyone here loves pics, here's the pics of my meager progress. Enjoy !

Image
I pulled my Fenders out of their box to get ready to drill them out for installation holes. Fenders are from Tractor Supply made by Carry-On.

Image
Here's my Haier 5200 BTU A/C Unit awaiting to be installed.

Image
A rear shot of the vent framing clamped up and drying.

Image
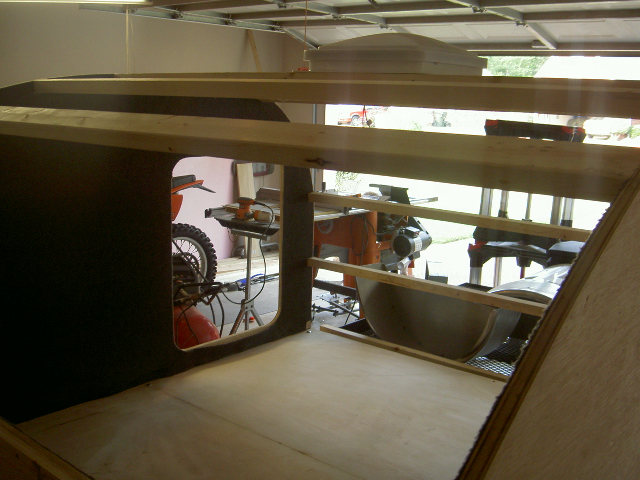
A nice shot through the doorway showing the newly installed vent framing and next to last roof spar. Just one more to go and roof spars are all done.

Image
A shot of my Parallax RV Power Center which will be handling all the 12volt and 110 Outlets plus it has a built in battery charger.
User avatar
sandman
Donating Member
 
Posts: 326
Images: 154
Joined: Sat Oct 28, 2006 6:29 pm
Location: Bartlett, TN
Top

Postby diverguy » Thu Jul 19, 2007 2:02 pm

that is nice looking "again". if you can get this far you can go the rest of the way, no doubt. but i think MJ is right. you need more support in the walls. bulkheads or the gussetts. something besides just your spars. keep up the great work. looks fantastic. i like that carpet one the walls a lot. but you are going to hate sawdust till iti is finished. :thumbsup: :thumbsup:
User avatar
diverguy
The 300 Club
 
Posts: 320
Images: 192
Joined: Wed Mar 07, 2007 11:37 am
Location: Arkansas, Cabot
Top

wow

Postby Jeeper92 » Thu Jul 19, 2007 2:30 pm

Nice to see you are sticking it out and not quitting. No one like a quitter!!!!!! :D
Its like i tell my wife, Id quit chewing tobacco but, mama didnt raise no quitter!!!!!!
Looks great keep up the good work
Jeeper92
500 Club
 
Posts: 529
Joined: Thu May 17, 2007 8:03 pm
Top

Postby MOKI SEAKER » Fri Jul 20, 2007 9:29 am

Wow good job, if you have seen pic's of guys building house's, you will notice how they run a brace from the floor to the oppisite (sic) wall to keep every thing square, It has been done that way for years. It doesn't have to be measured or anything two nails and it will keep the wall from racking, it might be a good idea here...looks real nice from here....Jim G
If you don’t read the newspaper, you are uninformed.. If you do read the newspaper. You are misinformed.
Mark Twain
User avatar
MOKI SEAKER
The 300 Club
 
Posts: 465
Images: 41
Joined: Thu Oct 12, 2006 5:50 pm
Location: UTAH, Kearns
Top

Postby NoNeck » Fri Jul 20, 2007 6:07 pm

:thinking: Hey i dont want to start any new glue wars but what was it about? Just wondering because the leg of one of my coffee tables just fell off last week, and it was on with screws and gorrilla glue. :cry:
Remember that a lone amateur built the Ark. A large group of professionals built the Titanic.
User avatar
NoNeck
Teardrop Advisor
 
Posts: 56
Images: 7
Joined: Mon Mar 26, 2007 7:59 pm
Location: Alvarado Texas
Top

Postby sandman » Sat Jul 21, 2007 9:24 pm

Well, after letting the newly installed spars set up for a few days, I got back to work today and finished framing and carpeting the lower bulkhead. I built the lower bulkead 20" tall. The bulkhead will sit on the sawhorses overnight while carpet adhesive cures. I will come back tomorrow and trim the carpet and install the bulkhead permanently. I am planning on installing a few stereo speakers in the bulkhead as well some other little bling items.
User avatar
sandman
Donating Member
 
Posts: 326
Images: 154
Joined: Sat Oct 28, 2006 6:29 pm
Location: Bartlett, TN
Top

Postby peggyearlchris » Sun Jul 22, 2007 11:22 am

Now your cooking sandman. Everything is looking just super. Great job. :thumbsup: :thumbsup: Peg
User avatar
peggyearlchris
500 Club
 
Posts: 984
Images: 56
Joined: Mon May 29, 2006 8:49 pm
Location: corpus christi,texas
Top

Postby sandman » Sun Jul 22, 2007 1:01 pm

Well, I was cooking until I dry fit the Lower Bulkhead Wall. I will explain that in a minute. I managed to get to work trimming the excess carpet off the Lower Bulkhead this morning. I took a template and trimmed the wall carpet back where the bulkhead was going to go. I wanted wood to wood contact so I carefully trimmed around the template and then cleaned off the carpet adhesive with mineral spirits and a scraper. Here's pics of today's progress......but wait until the end of my post and read about the potential disaster... :cry:

Image
Here's the Lower Bulkhead with the freshly trimmed carpet installed.

Image
Here is the trimmed area where the Lower Bulkhead is supposed to go. It's 80" from the front of the Teardrop.

Image
And here's the other side all trimmed and ready for the bulhead to be dry fit.

Image
I just laid the bulkhead wall in for a test fitting. Here's a shot from the back.

Image
A shot of the left side rear of the dry fit bulkhead.

Image
A front shot of the dry fit bulkhead...get ready for my disaster.

Image
Yep, we have all seen this image played out over and over again. It's my carpenter's square showing that the left wall is out of square BAD!!!!

As stated above, after installing the bulkhead for dry fit and putting in a few screws to hold it in place, I checked my walls and found the driver's side wall out of square almost a 1/2" inch. I went back and tripled measured each spar to make sure they were all 76" wide. I double checked the Bulkhead Assembly and it's 76" wide too. I am not continuing the build until this gets resolved. Boy, I need help!!!
User avatar
sandman
Donating Member
 
Posts: 326
Images: 154
Joined: Sat Oct 28, 2006 6:29 pm
Location: Bartlett, TN
Top

Postby asianflava » Sun Jul 22, 2007 5:22 pm

I wouldn't worry about it being out of square. If the bulkheads are square, they should pull the walls in where they should be. Make shure the carpet isn't getting stuck underneath. And lastly, check to make shure the square IS square.
User avatar
asianflava
8000 Club
8000 Club
 
Posts: 8412
Images: 45
Joined: Mon Aug 02, 2004 5:11 am
Location: CO, Longmont
Top

Postby sandman » Tue Jul 24, 2007 7:09 pm

After a BRIEF detour into insanity over why my driver's side wall was bowed. I got all the help I needed from the crew here and was able to correct much of the issue. I have slowed down even more and and basically installed 1 roof spar yesterday and walked away and installed one more roof spar today and walked away feeling pretty good about my build. I only have ONE MORE ROOF SPAR to install and then on to the skinning and cabinetry.

Here's some pics of the progress since Sunday...
Image
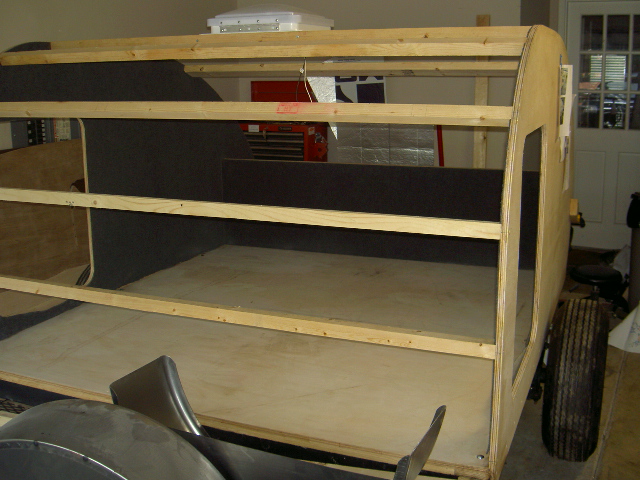
A nice shot of the front showing the Lower Bulkhead Installed and also test fitting the roof vent.
Image
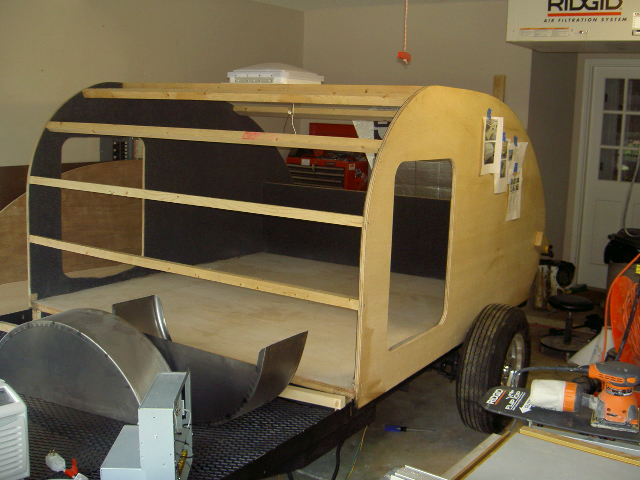
Ok, now a side profile...Say Cheese!!! :lol:

Image
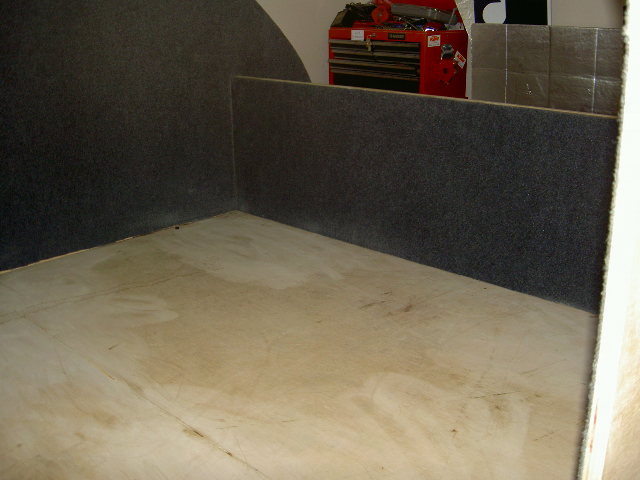
Leaning in through the doorway, I got an interior shot of the newly installed Lower Bulkhead which is 20 1/8" tall. Since I have no plans, the height just sounded good so therefore that's why it's 20 1/8".

Image
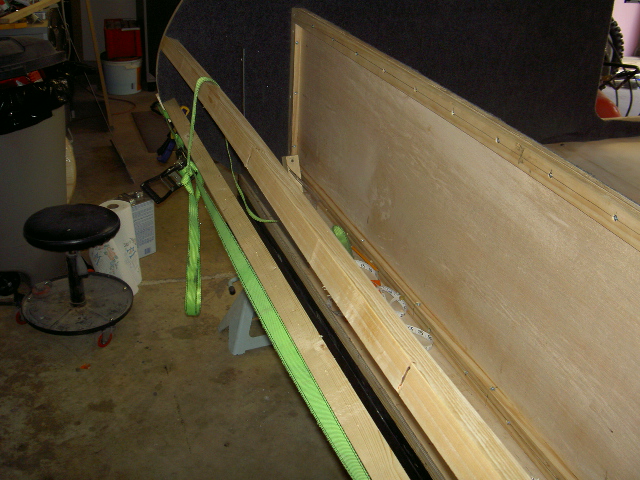
Yesterday I installed the lower hatch roof spar. I had no clue where to put it but since I am building minute by minute, I decided to space the lower hatch spar 36" from the back of the roof spar where the hatch hinges will go.
Image
After I let the main lower hatch spar cure overnight under clamping pressure, I came back today and installed the next roof spar 8" lower than the main hatch spar. Why there, I have no clue. I am still building blind with no plans to speak of. Between this spar and the hatch spar, the taillights will be installed....I hope.
:lol:

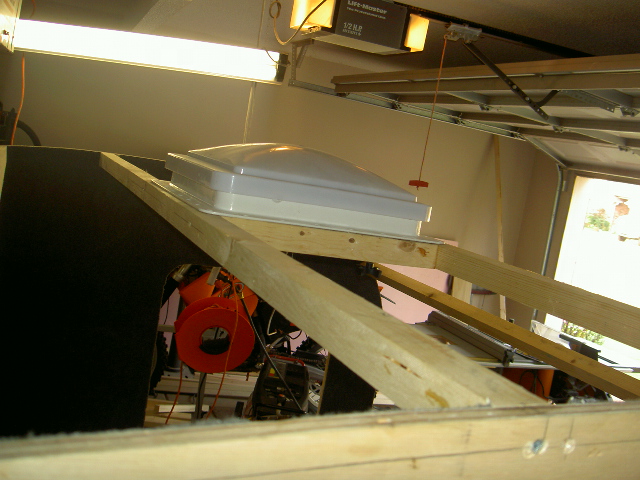
Image
A shot of the upper hatch spar which is a full 2x4 for strength and to give the hatch hinges something to bit into.
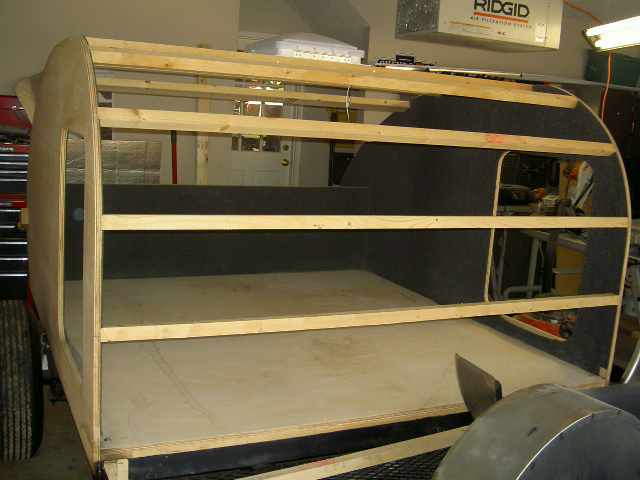
Image
Here's a shot of the roof with the test fitting of the roof vent. It fits in there nicely with a little wiggle room to center it.
Image
One more pic of the front from the left side....just because.
User avatar
sandman
Donating Member
 
Posts: 326
Images: 154
Joined: Sat Oct 28, 2006 6:29 pm
Location: Bartlett, TN
Top

Postby volfanatic72 » Tue Jul 24, 2007 7:18 pm

Will you hurry up and finish that thing so you can come help me??? :D
volfanatic72
Teardrop Advisor
 
Posts: 97
Images: 6
Joined: Fri Feb 23, 2007 9:23 pm
Location: TN - Cleveland
Top

Postby sandman » Tue Jul 24, 2007 7:22 pm

Hey Volfanatic,

Dude, are you SURE you want ME to help YOU????? After all the trouble I have had?????? Man, you really are flirting with disaster...lol. Seriously, if you need any help like routing walls or anything, I would love to take a road trip, bring my dirtbike, and help you out for a few days. Since I have basically made 10 wall panels, I can turn them out like it's nobody's business...lol. I kept a template of my profile to make more tears for friends....provided I get mine finished. A few dirtbikers I ride with are wanting to build one now.

Post a pic of your final profile if you have it ready..would love to see it.
User avatar
sandman
Donating Member
 
Posts: 326
Images: 154
Joined: Sat Oct 28, 2006 6:29 pm
Location: Bartlett, TN
Top

hey

Postby Jeeper92 » Tue Jul 24, 2007 8:37 pm

Great j, what size wood did you use on the sides, and you are bracing it? Is your carpet going to be the insulation?
what type of carpet is that?
Jeeper92
500 Club
 
Posts: 529
Joined: Thu May 17, 2007 8:03 pm
Top

PreviousNext

Return to Teardrop Construction Tips & Techniques

Who is online

Users browsing this forum: No registered users and 6 guests