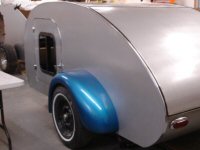
Eliminate the Galley Hinge!!!!

Anything to do with mechanical, construction etc

Postby Guest » Tue Mar 01, 2005 11:06 am

Dave,
Thanks for the link, if I go that route... I'll anodize it myself.
Everyone that I've checked with so far, isn't willing to do such a small request, they have outrageous minimal orders based on volumne.
Guest
 

Galley hinge

Postby An Ol Timer » Tue Mar 01, 2005 1:29 pm

If the pin that the hatch pivots on has a slotted opening then the hinge can slide forward to seal against a seal that is imbedded in a slot and it would allow the hatch and the roof to come together eliminating all but the line between them. Just a thought!

Image
An Ol Timer
Teardrop Master
 
Posts: 293
Joined: Wed Jan 26, 2005 4:08 pm

Postby Guest » Tue Mar 01, 2005 4:25 pm

I like that O.T.

Here's a shot of the side wall and hatch with the gutter drain system and double compression bulb seal that I described.
Image
Guest
 
Top

Postby fornesto » Tue Mar 01, 2005 5:50 pm

Well, I've abandoned this concept 'cause my hatch is almost done, but on my next teardrop ( :twisted: :? ) I would definitely consider it. I think the right way to do it is to steam and bend 1" x 4" oak on end and do the slot thing mentioned by an 'ol timer. With the right set-up, it would be beautiful, especially on a woodie...
User avatar
fornesto
Donating Member
 
Posts: 774
Joined: Fri Jun 25, 2004 5:12 pm
Location: Lodi, CA
Top

Hingeless Hatch

Postby An Ol Timer » Tue Mar 01, 2005 10:32 pm

After thinking about it, I thought that I'd post this other photo that I've been working on. It should be self explanatory. The drawing is to a scale of 1/4" skin over 2" frames. I found that you would only have to move the hatch back a little over 5/8" for the joint to clear as the hatch is raised up. Also when closed the joint would be stronger with a series of locator pins as well as the pivot rod. With both the rod and the pins one should expect a fairly stable joint. With a channel routed out for the seal you should be able to close the joint in the outer skin completely.

Image
An Ol Timer
Teardrop Master
 
Posts: 293
Joined: Wed Jan 26, 2005 4:08 pm
Top

Postby asianflava » Tue Mar 01, 2005 11:44 pm

I see what you are talking about now. Looks cool, it will give the rear a clean look. You could also use draw latches to snug up the hatch.
User avatar
asianflava
8000 Club
8000 Club
 
Posts: 8412
Images: 45
Joined: Mon Aug 02, 2004 5:11 am
Location: CO, Longmont
Top

Postby Ron Dickey » Thu Mar 03, 2005 9:12 pm

gosh .... :shock: I have never seen you guys go at it so intense before.

Maybe you should do in the hinge all together and make it slide in to the top like this :twisted: and then add a roll out canvas cover to if you hit your head it will not hurt so much?

:cry: I just wanted to play too.

Ron D.
173882......173887
Inside almost done--Trolly top has opening windows & roof.doors need assembling--pictured above waley windows..galley 1/3 done
Cross Bow in Build Journals....http://www.tnttt.com/viewtopic.php?f=50&t=54108
User avatar
Ron Dickey
Silver Donating Member
 
Posts: 3109
Images: 787
Joined: Tue Apr 20, 2004 5:56 pm
Location: Central Coast, CA
Top

Previous

Return to Teardrop Construction Tips & Techniques

Who is online

Users browsing this forum: No registered users and 4 guests