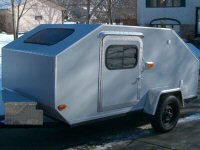
I'm finally starting my framing for walls! Pics added

Anything to do with mechanical, construction etc

I'm finally starting my framing for walls! Pics added

Postby benzu » Sat Aug 25, 2007 10:33 am

:D After 2 months of design and procrasination, I'm finally routing my framing for the wall.

If anyone has seen any of my old posts, they would know that I work at a sign company in Denver and my job is to set up files to go to a cnc router. Well that's how my walls are being made. It's all done on the computer and sent to the router. I'm doing all the framing out of 4'x8' x 3/4'' cabinet grade plywood, and so far I have one side and a door cut. Currently the other side of the wall is being routed. I just checked my window and it's off about a 1/16'' for the inside flange to fit, :x see even doing it with a computer I can be off.

My TT is 59'' tall so I have to put a 3/8'' "Lap or Rabbit" joint on it, there will be some sanding to make the joints even, even with the router doing
it. The 3/4'' boards do have some bowing so the cuts are not an exact 3/8''.

I won't have pictures of the router routing my job, but I will take a pictures of it on Monday routing a sign so everyone can see it. I'll also take pictures of the finished pieces when I get home.

One more step done, now I have to set up the exterior walls to be cut. I'm cut them out of 1/4'' birch and 1/4'' red oak making a southwestern design. My wife loves Canyon Lands near Moab, Utah so we found a photo of the landscape we both liked and are using it for the side graphics. Lets all hope it works.

After I get home from work both frames will be done. Tomorrow I will bring in the the Birch and Red Oak to route

:D
Mike


Image

Image

Image

Image
Last edited by benzu on Tue Aug 28, 2007 1:19 pm, edited 2 times in total.
User avatar
benzu
Teardrop Master
 
Posts: 230
Images: 119
Joined: Mon Feb 05, 2007 4:37 pm
Location: Denver, Colorado

Postby doug hodder » Sat Aug 25, 2007 12:28 pm

I like the graphics Mike...going to lay it up in vinyl? Doug
doug hodder
*Snoop Dougie Doug
 
Posts: 12625
Images: 562
Joined: Tue Dec 14, 2004 11:20 pm

Postby benzu » Sat Aug 25, 2007 12:30 pm

No, I'm making a woody. First time but that's one reason I was asking all the questions about fiberglass or not.


Mike
User avatar
benzu
Teardrop Master
 
Posts: 230
Images: 119
Joined: Mon Feb 05, 2007 4:37 pm
Location: Denver, Colorado
Top

Postby doug hodder » Sat Aug 25, 2007 11:00 pm

Mike...so how are you going to do the woody? veneered ply and a CNC routed insert to fit in, like a jig saw puzzle and overlaid on a core? That would be absolutely killer, and I know you have access to the tools to make it happen, if the boys at "Big Red" will let you do it. Really a great idea, you can get good color separation using a mahogany ply and a contrasting birch as an insert. you'll get more depth in the mahogany over a lighter wood, in my opinion, but it will be fantastic! Don't use an oil based stain...a water based aniline dye will hold color and epoxy finish much better... doug
doug hodder
*Snoop Dougie Doug
 
Posts: 12625
Images: 562
Joined: Tue Dec 14, 2004 11:20 pm
Top

Postby Micro469 » Sat Aug 25, 2007 11:10 pm

Easiest way to cut that profile is to place a light and dark wood on top of each other and then to cut it out of each. Then combine the top of one and the bottom of the other to get the look you want. Will also give you a set of side for a mirror image for tear #2...... :thumbsup:
John
Image
User avatar
Micro469
Super Lifetime Member
 
Posts: 3185
Images: 382
Joined: Mon Nov 07, 2005 10:46 pm
Location: Brampton,Ontario,Canada
Top

Postby benzu » Mon Aug 27, 2007 8:00 am

Mike...so how are you going to do the woody? veneered ply and a CNC routed insert to fit in, like a jig saw puzzle and overlaid on a core? That would be absolutely killer, and I know you have access to the tools to make it happen, if the boys at "Big Red" will let you do it. Really a great idea, you can get good color separation using a mahogany ply and a contrasting birch as an insert. you'll get more depth in the mahogany over a lighter wood, in my opinion, but it will be fantastic! Don't use an oil based stain...a water based aniline dye will hold color and epoxy finish much better... doug


Yeah, that what I'm doing the router is perfect and No YESCO doesn't care. My chassis was built here and now my framing for the walls. So all have is the skinned grahpics. The router program EnRoute has a really good inlay program that will allow me to get a perfect cut for the graphics, just like a puzzle. Thanks for the suggestion on wood types. :thumbsup:

overlaid on a core?


My core is the internal wood and insulation frame, is that enough? I hope so. That's why I asked about the fiberglass, if I need it or not. Sounds like I can keep with just the epoxy.

I'm going to try to rout the skin this week, still need to go and buy the wood. My epoxy should come this week from Raka. One step closer, trying to get done before Sept. 28 for the Last Gasp gathering here at the Royal Gorge. We should get almost everything done to make road worthy and fine tune later fall. :worship:


Mike
User avatar
benzu
Teardrop Master
 
Posts: 230
Images: 119
Joined: Mon Feb 05, 2007 4:37 pm
Location: Denver, Colorado
Top


Return to Teardrop Construction Tips & Techniques

Who is online

Users browsing this forum: No registered users and 2 guests