Teardrops n Tiny Travel Trailersor t n ttt for short (tnttt.com) |


![]() by del » Sat Sep 22, 2007 12:40 pm
by del » Sat Sep 22, 2007 12:40 pm
Cave Man is this a 67 bug?Cave Man wrote:New to this but this looks real cool. There certinly is alot of hard work and some good lessons in your photos.
I have had several air cooled vws along the way. two of my favorites were a 59 double cab, and a 60 bug flatbed pickup (homemade). Now I tend to drive subies (still a boxer 4) cause they have heaters and are 4x4.
Thanks for dropping by del
-
del - 5000 Club

- Posts: 5674
- Images: 410
- Joined: Fri Sep 08, 2006 3:27 pm
- Location: washington, yakima but tell Mary K Fairbanks
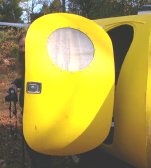
 Yes sir thats "Ruby" a 67 with a sunroof and a 1776 with MSD and 36 Dells. Plenty of get-up-and-go for pullin the Porta Cave to the shows and to Camp.