Anthony's Teardrop

Did you just design your very own teardrop or tiny trailer? Want to discuss it? Here's the place to post your design for discussion!

Anthony's Teardrop

Postby Palm » Sat Nov 10, 2007 7:30 pm

After studying many many pictures I have decided on a design that I want to build. :D
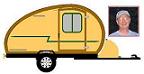
I played around with paint shop and this is what I would like to build. It sort of looks a bit like a bullet. I am unsure of what style it is called.
Image

I am still unsure of how to seal the rear hatch and doors correctly so i decided to build a miniature first. I thought that was easier than building the teardrop and having to sort out the problems once I got there.
I built the miniature hatch and door on Saturday. I had some ideas on how to seal the hatch but I didn't have a design yet of how I was going to do it, so I cut up some small pieces of wood and played around until I had an idea of how I could seal and build the sides. I bought $80 worth of wood, cheap hinges and supplies.
This is what I came up with.
Image
There are more pictures in my album.

What I found out about building the miniature was:
Don't expect to buy a second saw horse after 13 years and expect it to be the same height as the first one. :(
The screws you buy will be either 2mm too long or 2mm too short.
The sides appear to seal pretty good. I don't like the way I finished the bottom of the hatch and will change that but that is why I built a miniature so I can find out these things.
I tried 3 different seals for the side door but didn't like any of them. I will try some pinch weld rubber next weekend.
The 3mm ply wood I bought only liked to bend one way.

After building the miniature I now know what I need to make longer or bigger.

Any thought of how I sealed the sides of the hatch if I can improve it or what can be changed?

Anthony
User avatar
Palm
Teardrop Inspector
 
Posts: 9
Images: 0
Joined: Fri Sep 07, 2007 6:49 am
Location: Mackay Australia

Postby Palm » Sat Nov 10, 2007 9:34 pm

Image

Image

Image

Image

Image

Image

Image
User avatar
Palm
Teardrop Inspector
 
Posts: 9
Images: 0
Joined: Fri Sep 07, 2007 6:49 am
Location: Mackay Australia

Postby Sam I am » Sat Nov 10, 2007 10:21 pm

Nice design, Anthony! I built my hatch in place then cut it free like your miniature, but I didn't think to put in the inner lip like yours. Yours should seal well. Water would have to climb over the inner lip and past the seal to get inside. The only place it might do that is at the very bottom of the hatch. If the inner lip had a hook on it to follow the cut line, I think it might seal better. Then raise your last spar a bit to clear it. Here's a Paint drawing to show what I mean. The greenish area is the added wood. Image
Sam
User avatar
Sam I am
500 Club
 
Posts: 770
Images: 106
Joined: Sun Jul 02, 2006 9:19 pm
Location: Central PA
Top

Postby halfdome, Danny » Sat Nov 10, 2007 10:44 pm

How are you going to protect that exposed plywood edge? Some TD's the hatch overlaps the outside wall edge and is sealed with a lip and weather stripping. :D Danny
Sorry for the dark photo. This is how I did mine.
Image
ImageImage
"Conditions are never just right. People who delay action until all factors are favorable do nothing". William Feather
Don't accept "It's Good Enough" build to the best of your abilities.
Image
Teardroppers Of Oregon & WashingtonImage
User avatar
halfdome, Danny
*Happy Camper
 
Posts: 5894
Images: 252
Joined: Sun Aug 14, 2005 11:02 pm
Location: Washington , Pew-al-up
Top

Postby Podunkfla » Sun Nov 11, 2007 12:56 am

Anthony... You might want to look at Steve Frederick's website:
http://www.steve-frederick.com/index3.html
Your test hatch looks pretty darn good... But, you are sort of re-inventing the wheel there. Steve has built some of the nicest tears & TTTs your likely to find and there are lots of pictures and tips on his site. He also publishes a Teardrop Builder's Shop Manual on CD that is very complete and well worth the nominal fee. Good luck on your cool tear idea. :thumbsup:
<B>~ Brick
<I>... I've done so much with so little for so long... Now I can do almost anything with nothing! </I></B>
Image...Lots more pix here!
User avatar
Podunkfla
ol' noodle haid
 
Posts: 2261
Images: 5
Joined: Fri Aug 04, 2006 9:25 pm
Location: North Florida near the Suwannee River
Top

Postby Palm » Sun Nov 11, 2007 4:08 am

I looked at Steve's site and that is where I got the idea how to seal the sides. I just could not remember which site I found it on as I have looked at so many. I have now saved the link to Steve's site :thumbsup:
My idea of building a test hatch was because on nearly every forum, everyone seemed to ask how to seal your hatch and doors. I could not find the exact picture that showed me how to seal the top or the bottom of the hatch.
I am so glad I did built a test hatch as I have learned a lot. If I had waited until I was at that stage on the teardrop I would of made some big oops. I mainly built the the test hatch to prove to myself that I could do it and piece of mind that I would be able to seal it.

I have a friend who is a Fiberglasser and he said he will fiberglass the whole teardrop for me once it is completed. He assures me that he can seal the exposed edges.

I changed the top and bottom seals today. I will post some more pictures a bit later.
User avatar
Palm
Teardrop Inspector
 
Posts: 9
Images: 0
Joined: Fri Sep 07, 2007 6:49 am
Location: Mackay Australia
Top

Postby Palm » Sun Nov 11, 2007 4:49 am

Today I changed the top and bottom seals.
I added a cross member at the top and the bottom so it can seal on something. I cut off the overhanging ply from the bottom and now it presses hard against another face to seal.
Image

Image
Image

I looked at the top seal and the more I thought, what if it is raining and the hatch is open or what if water came in from the side of the hinge. There is nothing stopping the water from running in over the top beam.
Image
I thought what if I cut a drain in the top beam that will guide water away and have the rubber seal just after the drain.
Image
Image
When closed the test hatch now appears to be fully sealed all the way round. I think I will be able to use a piano hinge as I do not need the hinge to act as a seal.

Anthony

I would also like to say thank you to Tony Campton. I have been emailing Tony with my ideas and he has been a great help.
User avatar
Palm
Teardrop Inspector
 
Posts: 9
Images: 0
Joined: Fri Sep 07, 2007 6:49 am
Location: Mackay Australia
Top

Postby Sonetpro » Sun Nov 11, 2007 6:18 am

It looks like it will seal good with the hatch closed. But with it open it is going to come pouring in. You are going to need something to direct the water. That channel is a bit small. Maybe a strip of aluminum at the back edge of that spar.
Remember that in a good rain all of the water from the roof as well as the hatch is going to go right there. When mine is is a good rain it has water sprouts on both sides where the hurricane hinge directs it.
}><)))'> ~--------------·´¯) SteveT
You don't know what the limit's are until you take it there.ImageImageImage
User avatar
Sonetpro
Site Admin
 
Posts: 2038
Images: 107
Joined: Sun Oct 30, 2005 8:11 am
Location: Plantersville, TX
Top

Postby Miriam C. » Sun Nov 11, 2007 8:18 am

:applause: :thumbsup: You now have a nice though narrow tongue box. Your seal and hatch look great. :thumbsup: If you use a piano hinge you will want to put a rubberized something over it. I used pond liner for mine. A bike inner tube works too.

Thanks for the pictures and good photo's of how to. :thumbsup:
“Forgiveness means giving up all hope for a better past.â€
User avatar
Miriam C.
our Aunti M
 
Posts: 19675
Images: 148
Joined: Wed Feb 15, 2006 3:14 pm
Location: Southwest MO
Top

Postby halfdome, Danny » Sun Nov 11, 2007 12:10 pm

This isn't my original idea but it works great with an open hatch.
The rain water from the roof/hinge area just runs down the side.
Maybe you could fabricate something similar in your exterior material.:D Danny

Image
ImageImage
"Conditions are never just right. People who delay action until all factors are favorable do nothing". William Feather
Don't accept "It's Good Enough" build to the best of your abilities.
Image
Teardroppers Of Oregon & WashingtonImage
User avatar
halfdome, Danny
*Happy Camper
 
Posts: 5894
Images: 252
Joined: Sun Aug 14, 2005 11:02 pm
Location: Washington , Pew-al-up
Top

Postby Miriam C. » Sun Nov 11, 2007 9:13 pm

Oops, I forgot to mention something. I noticed you have your cross spars flat. Great for gluing but if you put them on end they can add some to the hatch ribs.
“Forgiveness means giving up all hope for a better past.â€
User avatar
Miriam C.
our Aunti M
 
Posts: 19675
Images: 148
Joined: Wed Feb 15, 2006 3:14 pm
Location: Southwest MO
Top

Postby Wimperdink » Wed Nov 14, 2007 1:30 pm

I stole your design and edited it just a lil.... I liked what you came up with but I could use a lil more headroom so I photochopped your pic a lil bit and came up with what I'd love to build.

Image
Image You know a man is on the level if his bubble is in the middle.
User avatar
Wimperdink
1000 Club
1000 Club
 
Posts: 1058
Images: 33
Joined: Mon Sep 17, 2007 8:29 pm
Location: East TN
Top

Postby MrBuzz » Wed Nov 14, 2007 4:17 pm

Nice hatch design, easy to build because you cut from the side and the inner lip helps with keeping the weather on the outside...I'll probably hack that idea on my next build.
Somewhere along the line (probably on this forum) I picked up an excellent tip about sealing the hinges.
On my TD I used a standard piano hinge but then put a layer of rubber inner tube under the hinge. The rubber tube material is screwed down with the hinge and the edges of the hinge are sealed with caulk. It makes the hinge water tight. Water has to run off the sides of over the hinge.
It's not perfect, but a really good, easy, inexpensive sealing trick for hinges!
Generic Benroy - built 2007, 4X8, 1175 HF trailer, Structoglass roof and headliner, 12v and 110v electrics with Schumacher charger.
User avatar
MrBuzz
Teardrop Master
 
Posts: 261
Images: 77
Joined: Mon Apr 02, 2007 9:13 pm
Location: Wisconsin, Eau Claire
Top

Postby Palm » Thu Nov 15, 2007 5:15 am

Thanks Aunty M, I never thought about the cross spars adding strength by putting them on end.

Would I be able to use a piano hinge without a tube or seal on the hinge?
When closed the hatch is sealed on all 4 sides. The hinge is 40mm behind the top seal and doesn't play a part in the sealing process.
I will router a bigger and deeper gutter on the top when I buy an inverted trim bit to help with drainage. I will also use the inverted trim bit to run a 1-2mm deep gutter down the side of the inner lip to help drain water.
My theory is that when the hatch is closed it is sealed on all 4 sides and any water that runs through the hinge cannot penetrate through the top seal and will drain to the sides and drain away. When the hatch is open, any water that penetrates through the hinge will be easily drained away because of the gutter.
User avatar
Palm
Teardrop Inspector
 
Posts: 9
Images: 0
Joined: Fri Sep 07, 2007 6:49 am
Location: Mackay Australia
Top

Postby Palm » Thu Nov 15, 2007 5:32 am

I think the idea for the headroom is great.
I have played around with ideas of going 4' wide, then 5' wide, having a sloping back, squared back and the list went on and on.
But I keep coming back to the reason why I will build a teardrop, and that is because I own a Suzuki Jimny 1.3lt and there is no room to put anything. I need to make the Teardrop and light but as practical as I can.
Image
User avatar
Palm
Teardrop Inspector
 
Posts: 9
Images: 0
Joined: Fri Sep 07, 2007 6:49 am
Location: Mackay Australia
Top


Return to Member Designs

Who is online

Users browsing this forum: No registered users and 0 guests