Frame Modification Advice

Anything to do with mechanical, construction etc

Frame Modification Advice

Postby bve » Tue Nov 20, 2007 12:37 am

I got my freebie frame revealed after a few days of tearing down the camper rotting on it, now I need some advice on narrowing the frame.

The frame is 78" wide which is too big for my needs, more important I don't want it 18" wider than the Jeep.

I want to reduce the width a fair bit, what I am thinking is I can remove the sections between the red lines to add support where the blue lines are and then bring the remainder of the sides into the green to give it a 5' width.

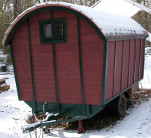
Am I going to be creating an unsafe frame? The tongue and spring mounting rails are 2x3 boxed the rest is a mix of C channel with and without a lip on each end of the C - I'm not sure the picture shows this well.

Image

Thanks in advance.
Burke

KISS > COMPLEX
Image
Image

Build threads converted to PDFs.
As of 2008-08-08 I have added more build threads to the pdf collection
User avatar
bve
500 Club
 
Posts: 694
Images: 98
Joined: Sat Aug 25, 2007 1:44 am
Location: Edmonton, Alberta, Canada

Postby Leon » Tue Nov 20, 2007 2:15 am

My opinion - take the axle and build a frame the dimensions you need, on top of it.
User avatar
Leon
Silver Donating Member
 
Posts: 559
Images: 21
Joined: Mon Oct 24, 2005 12:23 am
Location: So Cal (Ridgecrest)

Postby bve » Tue Nov 20, 2007 9:49 am

Thanks Leon, that's essentially what I am suggesting, only without starting completely from scratch :)

I think a view from the front may better help show what I tried to explain above.

Image

I actually want the wheels inset from the edge of the frame such that I build the trailer box around them.

The red is additional support and the green is bringing the existing sides in. I would add the additional support in first to keep things square and together before cutting the cross members.

Again thanks in advance.
Burke

KISS > COMPLEX
Image
Image

Build threads converted to PDFs.
As of 2008-08-08 I have added more build threads to the pdf collection
User avatar
bve
500 Club
 
Posts: 694
Images: 98
Joined: Sat Aug 25, 2007 1:44 am
Location: Edmonton, Alberta, Canada
Top

Postby angib » Tue Nov 20, 2007 11:00 am

I think the answer is: probably OK.

What you're suggesting will be quite a bit weaker than the original frame because you won't have anything replacing the side rail between the red lines. But then a teardrop doesn't need as much strength as a pop-up camper because its body is largely self-supporting.

Adding the blue (in the first photo) support will strengthen the frame a fair bit but its joint to the spring mount tube won't be that strong as there is the cross-member in between.

If the extra supports go where the red line is in the second photo, they won't work nearly so well as they're not connected to the spring mount tube.

Andrew
User avatar
angib
5000 Club
5000 Club
 
Posts: 5783
Images: 231
Joined: Fri Apr 30, 2004 2:04 pm
Location: (Olde) England
Top

Postby madjack » Tue Nov 20, 2007 11:05 am

Burke, you really don't need the support in the red areas...cut, trim, fit and weld up the rest properly and you should be good to go...the only thing else I would add, is to check the bearings and seals closely....
madjack 8)
...I have come to believe that, conflict resolution, through violence, is never acceptable.....................mj
User avatar
madjack
Site Admin
 
Posts: 15128
Images: 177
Joined: Thu Dec 02, 2004 5:27 pm
Location: Central Louisiana
Top

Postby depatty » Tue Nov 20, 2007 12:39 pm

That looks like a mirror image of the popup frame I built my TTT on. Difference being the floor connection strip/band is on the other side. I'd say go for it, with or without the bit in red in the second posting. Once the teardrop is attached/built on it, it should be quite rigid.
User avatar
depatty
Teardrop Master
 
Posts: 280
Images: 175
Joined: Thu Oct 04, 2007 10:39 am
Location: Weaver, Alabama
Top

Postby bve » Tue Nov 20, 2007 11:28 pm

Thanks for the replies, you all have pretty much put my mind to rest on something I figured would be OK.

Andrew, I get what you are saying about the red in the 2nd image. I'm not sure why I moved the added supports inward on the 2nd (I'll chalk it up to early morning), my intent was as in the first image to keep them inline with the spring rails.

Madjack, your advice on the bearings and seals is understood - I've seen you post that in a few other threads and I certainly know the importance having witnessed what can happen to negleted bearings.

Dave I figured my frame looked a lot like yours, the door on mine was behind the axle your's appears to have been in front. I won't be building quite as large as you did though.


Thanks again.
Last edited by bve on Thu Jan 24, 2008 9:22 am, edited 1 time in total.
Burke

KISS > COMPLEX
Image
Image

Build threads converted to PDFs.
As of 2008-08-08 I have added more build threads to the pdf collection
User avatar
bve
500 Club
 
Posts: 694
Images: 98
Joined: Sat Aug 25, 2007 1:44 am
Location: Edmonton, Alberta, Canada
Top

Postby Alphacarina » Wed Nov 21, 2007 10:00 am

It looks to me like most of the strength in that frame is in the side rails and you propose removing those. Welding in bits and pieces here and there isn't likely to make it as strong as it originally was . . . . but maybe you don't need it all that strong for what you want to build on top of it - A teardrop can be essentially a pretty inflexible 'box' and those don't require a really sturdy frame

But - You're about to 'design' your whole project on the patched up frame you'll have inder it and that's never a good thing - The frame should be designed for what you wat to build on top of it and not the other way around

If you can weld, I would keep the axle and buy some 2 inch angle and weld me up a frame 'made to order' - You can use some of the peices of this one for crossmembers and such. Maybe you can reuse most of the tongue on your new frame?

Don
User avatar
Alphacarina
500 Club
 
Posts: 826
Images: 4
Joined: Tue Jun 19, 2007 3:26 pm
Location: Ocean Springs MS
Top

it's norrowed.... finally

Postby bve » Mon Jul 14, 2008 9:08 am

After putting it off for way too long I finally have finished (mostly) with narrowing the frame.

This shows the side rail cut and inserted to be used to add support - just sitting in for a test fit.
Image

Here I decided to add a gusset (so to speak) too.
Image

Most of the cutting on one side done.
Image

Everything cut and tacked into place. Still need to stitch all the welds up, but the worst is done with.
Image

I also got at it a bit with a wire wheel on the grinder, still lots of that to do though.

I'm now with an odd width of 64" which is going to cost me in materials, however at this point the only investment I've made so far is in tools, which don't count, and time.

Time to pick and commit to a profile... :thinking:
Burke

KISS > COMPLEX
Image
Image

Build threads converted to PDFs.
As of 2008-08-08 I have added more build threads to the pdf collection
User avatar
bve
500 Club
 
Posts: 694
Images: 98
Joined: Sat Aug 25, 2007 1:44 am
Location: Edmonton, Alberta, Canada
Top

Postby starleen2 » Mon Jul 14, 2008 10:36 am

looks good on the trailer mods - don't keeps us waiting for the profile :thumbsup: :thumbsup:
User avatar
starleen2
5th Teardrop Club
 
Posts: 16272
Images: 224
Joined: Sat May 12, 2007 8:26 pm
Location: Pea Ridge ,AR
Top


Return to Teardrop Construction Tips & Techniques

Who is online

Users browsing this forum: No registered users and 3 guests