Looking real good there Steve, I'm very impatient, As you are I'm sure, to see your finished Trailer... it's like the start of summer there right?? keep up the good work and I'll keep watching with interest... Enjoy...
Teardrops n Tiny Travel Trailersor t n ttt for short (tnttt.com) |
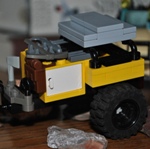
![]() by Wright » Mon Dec 17, 2007 7:06 pm
by Wright » Mon Dec 17, 2007 7:06 pm
Looking real good there Steve, I'm very impatient, As you are I'm sure, to see your finished Trailer... it's like the start of summer there right?? keep up the good work and I'll keep watching with interest... Enjoy...  Wright

![]() by bve » Tue Dec 18, 2007 1:14 am
by bve » Tue Dec 18, 2007 1:14 am

![]() by Steve F » Wed Dec 19, 2007 1:51 am
by Steve F » Wed Dec 19, 2007 1:51 am


![]() by Miriam C. » Wed Dec 19, 2007 6:27 am
by Miriam C. » Wed Dec 19, 2007 6:27 am
 I think the door is gonna work. I see you have some extra plywood for the next td too.
  Have fun with the cabinets. I found mine are a bit high but since I will not be cooking on them it is OK.

![]() by Steve F » Fri Dec 21, 2007 1:26 am
by Steve F » Fri Dec 21, 2007 1:26 am
 As an aside it's very roomy in there, I was quite surprised. I think I can get a nice thick mattress in there


![]() by Wolffarmer » Fri Dec 21, 2007 9:05 am
by Wolffarmer » Fri Dec 21, 2007 9:05 am

![]() by bobhenry » Fri Dec 21, 2007 10:04 am
by bobhenry » Fri Dec 21, 2007 10:04 am


![]() by schaney » Fri Dec 21, 2007 11:20 am
by schaney » Fri Dec 21, 2007 11:20 am
![]() by Steve F » Sat Dec 22, 2007 4:26 am
by Steve F » Sat Dec 22, 2007 4:26 am


![]() by mikeschn » Sat Dec 22, 2007 4:57 am
by mikeschn » Sat Dec 22, 2007 4:57 am

![]() by bve » Sat Dec 22, 2007 2:41 pm
by bve » Sat Dec 22, 2007 2:41 pm
![]() by Steve F » Sun Dec 23, 2007 8:16 pm
by Steve F » Sun Dec 23, 2007 8:16 pm
bve wrote:Great progress I sure do like the design. That big opening window is going to provide some serious ventilation.
![]() by Steve F » Tue Jan 01, 2008 3:27 am
by Steve F » Tue Jan 01, 2008 3:27 am


Users browsing this forum: No registered users and 0 guests