Ideas to hide fasteners on a wood roof

Anything to do with mechanical, construction etc

Ideas to hide fasteners on a wood roof

Postby 2bits » Sun Feb 17, 2008 1:07 am

I am mulling over options for attaching a the outside layer of the roof.

To preface, I have Grants profile, the Generic Benroy plans for construction and what all the excellent build photos can show me, so that gives me just about everything, not to mention a healthy dose of my own ideas, but sometimes I run into little snags. That's half the fun! There are always a variety of ways that people have invented on how to do things, and to me that is one of the most exciting parts of this, is that there is so much freedom.

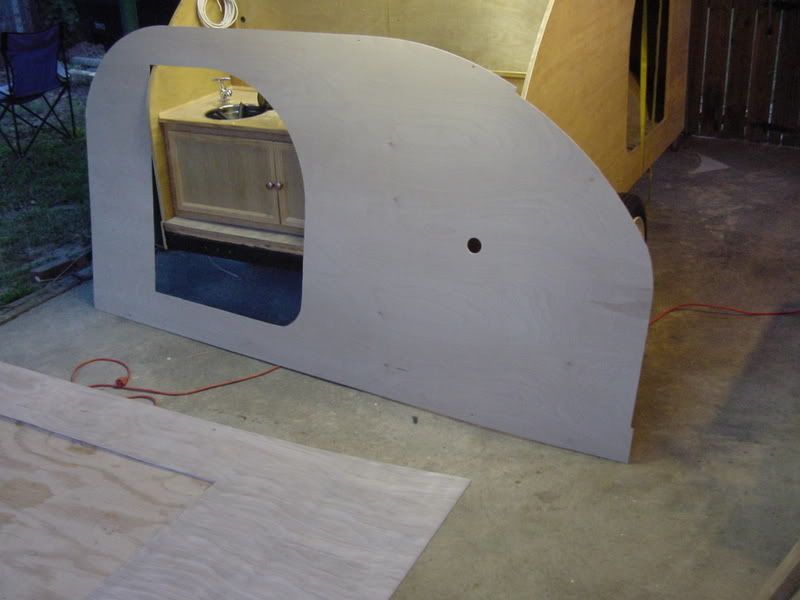
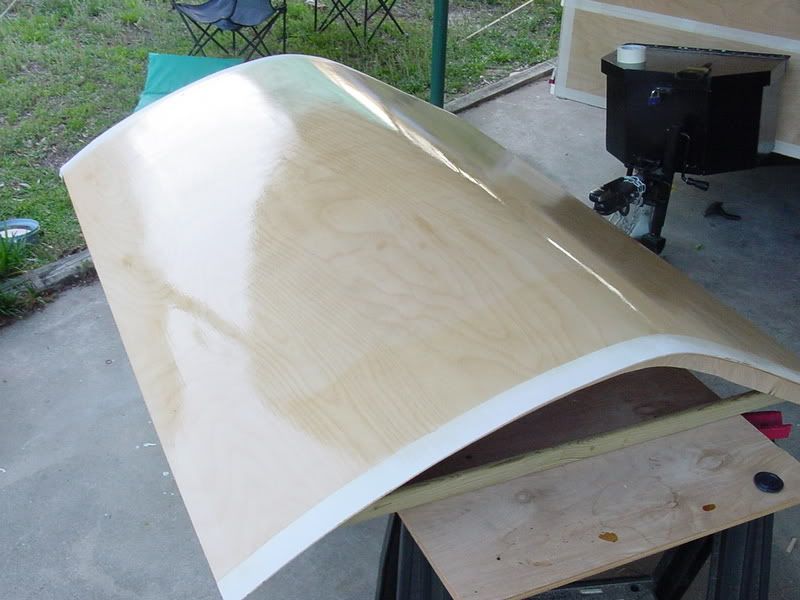
So anyway, I am going to do the 1/8 Luan roof on a woody using side trim to cover screw holes for the spars and cabinets, but I am perplexed regarding the roof. Steve Cox's is the style I am looking to do. (Nice work Steve!)

Image

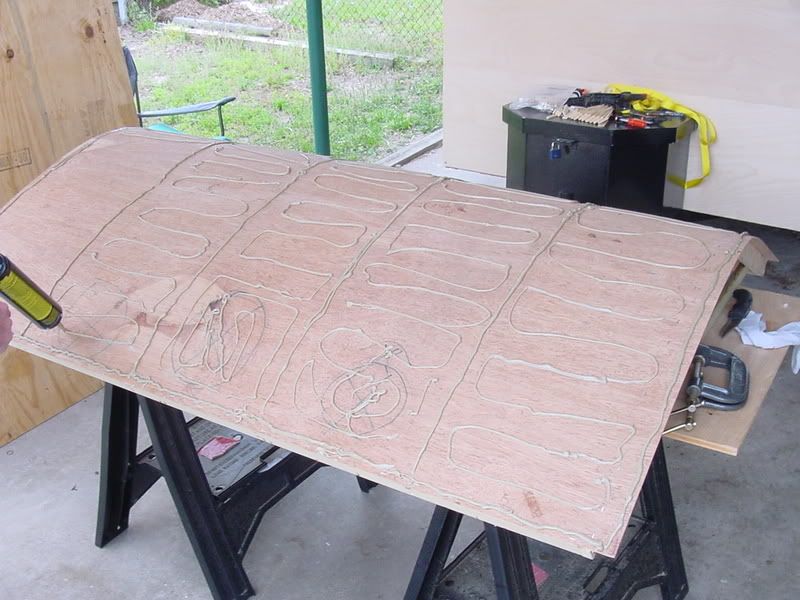
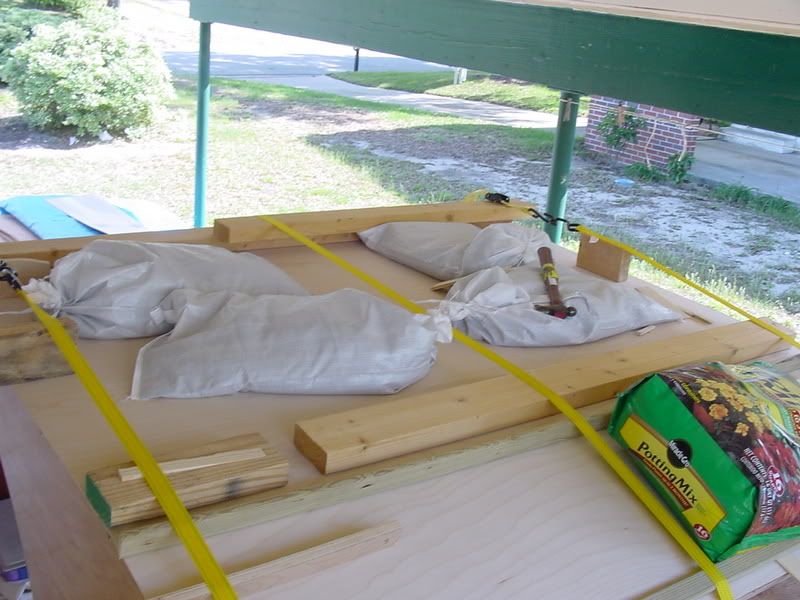
I am thinking there are two options, glue only, and let it float like with Aluminum, but wood likes to spring back alot more than aluminum! So to use a trim nail gun and filler like you would use for crown molding would be my second choice. I guess screws would be fine if it was going to be painted or covered, I just can't remember seeing how it could be done.

Also, I can handle a strip every 4ft for when a new sheet starts, it's the parts in between I am wondering about.

Any input on what you guys have done would be awesome.
Thomas

Image
User avatar
2bits
2bit Member
 
Posts: 5132
Images: 8
Joined: Thu Dec 27, 2007 6:04 pm
Location: Lake Tawakoni, TX

Postby bobhenry » Sun Feb 17, 2008 2:19 am

Image

This pic is before all the rosettes were in but you can see a couple at the bottom of the hatch. The roof being lexan had to be predrilled and the pressure from the screw had to be dispersed so I used plastic mirror rosettes. The make some real neat metal ones as well. For the price I toyed with drilling a penny and using copper fastners. Talk about cheap.

Just a thought I am sure the woody purist just had a cow ! :lol:
Growing older but not up !
User avatar
bobhenry
Ten Grand Club
Ten Grand Club
 
Posts: 10368
Images: 2623
Joined: Fri Feb 09, 2007 7:49 am
Location: INDIANA, LINDEN

Postby prohandyman » Sun Feb 17, 2008 8:09 am

Not a cow - maybe a chicken or two! :lol:
Thomas
Glue would be your best option. Aluminum expands and contracts more than wood, so most builders float it. If you penetrate the wood with a fastener, you have to go to even greater extremes to seal that penetration. Whether you use wood trim or not, how are you planning to seal the wood, epoxy? urethane or varnish? Water finds it way in areas that may surprise some people. And may go unnoticed for too long. Wood has a real cool vintage look to it, but does require more maintenance than other materials. And I agree - Steve's tear "has it goin on"!! :thumbsup:
Dan
155200 Facebook group 164774163701
User avatar
prohandyman
Super Lifetime Member
 
Posts: 1919
Images: 785
Joined: Fri Dec 22, 2006 3:21 pm
Location: Greenwood, IN
Top

Postby aggie79 » Sun Feb 17, 2008 1:06 pm

I'll be interested to see the responses.

I would like the same "no fastener" look, but for the interior skin rather than exterior. My current thinking is to polyurethane glue or epoxy the spars while the ply is flat and then lay in the ceiling panel with attached spars on a ledge ala Steve F's technique.

Maybe you could do the reverse. The end spars could have fasteners because they will be covered by a trim piece.
Tom (& Linda)
For build info on our former Silver Beatle teardrop:
Build Thread

93503
User avatar
aggie79
Super Duper Lifetime Member
 
Posts: 5405
Images: 686
Joined: Tue Aug 07, 2007 5:42 pm
Location: Watauga, Texas
Top

Postby 2bits » Sun Feb 17, 2008 1:26 pm

I was planning on folding the wood on the grain so it would roll better, so I guess if it is held down securely on all four ends, it "can't" come up eh.

My tear will be garage kept, so it won't be out in the weather permanently, so that should help it last, but I am thinking I will do this the same way as I did the wood bed in the back of my truck and seal it with polyurethane. I am thinking 6-10 coats after the trim is on should seal just fine. Rubber around the hatch opening and Grant's no leak hinge, with possibly a strip of rubber on top of that.
Thomas

Image
User avatar
2bits
2bit Member
 
Posts: 5132
Images: 8
Joined: Thu Dec 27, 2007 6:04 pm
Location: Lake Tawakoni, TX
Top

Postby b.bodemer » Sun Feb 17, 2008 1:52 pm

I used 1/4" thick by 2 1/2" trim to cover my roof screws. At 1/4" it took the front 24" radius with no problem.

Image

Image

Image

Image


Trim work took a lot of time but was well worth the effort to hide things.
Image

Barb
User avatar
b.bodemer
1000 Club
1000 Club
 
Posts: 1608
Images: 328
Joined: Mon May 08, 2006 5:43 pm
Location: Lakewood OH
Top

Postby 2bits » Sun Feb 17, 2008 2:14 pm

Thanks Barb, so it looks like you just glued or floated the center too eh! That's good to see.
Thomas

Image
User avatar
2bits
2bit Member
 
Posts: 5132
Images: 8
Joined: Thu Dec 27, 2007 6:04 pm
Location: Lake Tawakoni, TX
Top

Postby Ralf » Sun Feb 17, 2008 8:40 pm

Can't beat brad nailer or finish nailer. I use both. line up the rectangle left by the gun with your wood grain, a little filler and they disapear.
Fayetteville West Virginia, at the rim of the New River Gorge National River. Whitewater, mountain biking, rock climbing. One of BUDGET MAGAZINE'S TOP TEN COOLIST SMALL TOWNS IN AMERICA. Fetured in National Geographic Adventure Magazine., Noah Adams' (NPR) book,"Follow the River". Neww River George Bridge, 876 foot tall single arch. On Bridge Day sky divers jump from the bridge and live, most of the time.
User avatar
Ralf
Teardrop Advisor
 
Posts: 89
Images: 15
Joined: Wed Sep 19, 2007 8:04 pm
Location: Fayetteville, WV
Top

Postby kiacker » Sun Feb 17, 2008 8:44 pm

Hi Thomas,
Here's a couple pics of my Benroy woodie. I used construction adhesive (PL something) on the roof spars and along the edges, then bent the roof plywood into place. I used construction screws to tighten everything down placing screws along the edges and along the roof spars. After it cured (I waited about 3 days) I went back through and removed the screws into the spars. I left the screws along the edge and covered them with trim like Barb did. The screw holes from the ones I removed I filled in with oak wood filler and sanded flush (as in the first picture). The whole thing was covered with epoxy sealer from The Rot Doctor then 8 coats Spar Urethane applied (second picture). By the way, one thing I learned was to use all brand new screws instead of reusing the same screws I had removed elsewhere. They left a cleaner, smaller hole to fill than the reused screws which tore up the wood a lot more.

Image
Image

Can't hold a candle to Steve's beauty, but I'm proud of it anyhow! Hope this helps!
Lisa

My life's work is to be my dog's servant, pay his rent, drive him to the park, and keep his food bowl full!
User avatar
kiacker
Teardrop Advisor
 
Posts: 78
Images: 26
Joined: Sat Jul 01, 2006 9:13 pm
Location: Des Moines, Iowa
Top

Postby doug hodder » Sun Feb 17, 2008 8:46 pm

Another option...screw and glue (epoxy) the top, after the glue has cured, back out the screws, use a forstner bit to drill the screw hole, and cut a 3/8" plug. Install a bung plug and epoxy it in, sand flush. Just like on the deck of a boat. You could use the same type wood or a contrasting one for a detail effect. I don't think I'd float a wood roof however. Just my opinion. Doug
doug hodder
*Snoop Dougie Doug
 
Posts: 12625
Images: 562
Joined: Tue Dec 14, 2004 11:20 pm
Top

Postby 2bits » Sun Feb 17, 2008 9:10 pm

Hi Lisa,

I think your Tear looks great. It's cool to see how you made it wide over the wheels. The woodgrain and trim looks very nice, this is exactly what I think I will do.

How did you and Barb attach your side trim to the top trim? Does the top trim just hang over the sides to meet flush with the side trim?
Thomas

Image
User avatar
2bits
2bit Member
 
Posts: 5132
Images: 8
Joined: Thu Dec 27, 2007 6:04 pm
Location: Lake Tawakoni, TX
Top

Postby Mark McD » Thu Feb 21, 2008 8:57 am

Barb,
I live in North Olmsted, I would love to check out your tear sometime, it's gorgeous!

Cheers,
Mark
I like turtles
Mark
I don't feel tardy
User avatar
Mark McD
The 300 Club
 
Posts: 427
Images: 63
Joined: Sat Jan 19, 2008 12:53 am
Location: Northeast Ohio
Top

Postby kiacker » Thu Feb 21, 2008 3:54 pm

Hey Thomas,
Yes, the top trim over hangs the side trim. I used 1/4 oak trim boards (can't remember how wide - I think about 2 1/2 inches - used millwork lumber) for most of the trim. I cheated on the curves and used 1/4 inch oak ply cut in a curve so I didn't have to bend it. (Was tired of building at that point and just wanted to get 'er out camping!) Others here have done it differently and ended up with a nicer finished appearance. I attached the trim with the PL adhesive (had considered epoxy but just didn't have the experience with that) then screwed it down as well as threw in some brad nails. Helps to wet the wood first then bend into place. I used pieces of scrap wood to drive the screws through into the trim so it would have a wider "footprint" to hold the trim instead of just around the screw. After it cured, I pulled the screws and filled the holes. I did have a piece of my top trim near the hatch which let go and popped up after the tear was finished and I was camping. That piece I did use epoxy then screws to reattach it (removed the screws after a week and filled the holes with the epoxy mixed with red oak sawdust). The epoxy did hold the best. If I did it over again I would use epoxy not the adhesive.

I attached my top trim first, making sure to have a little more than 1/4 inch overhang on the sides. I then attached the side trim. I took a sander and smoothed the top trim edge to be flush with the side trim surface so it was a nice square edge. I sealed all the trim edges where it met the top/front or sides with silicon caulk so any gaps would be sealed. Then came the epoxy sealer & spar urethane.

What I have learned here is that there is a million and one ways to do a great job at building a tear. I took many different ideas everyone had to offer and put them into my tear. The sweetest thing was how the woodgrain came out after she was finished - I didn't expect that. Be sure when you buy your wood to buy the best quality you can afford and get all your side,front, hatch, and top plywood at the same time. Then you'll end up with pieces that are very similar and maybe even matching like mine were. I also bought an extra sheet than I had figured for - always a good idea in case of cutting errors! :lol: (I speak from experience! :lol: )

Best of luck in your build! This forum is a great resource and the builders are are the best! If you get stuck, there is always someone here who can help ya out! Don't forget the pictures!!!! :thumbsup:
Lisa

My life's work is to be my dog's servant, pay his rent, drive him to the park, and keep his food bowl full!
User avatar
kiacker
Teardrop Advisor
 
Posts: 78
Images: 26
Joined: Sat Jul 01, 2006 9:13 pm
Location: Des Moines, Iowa
Top

Postby Steve_Cox » Thu Feb 21, 2008 5:10 pm

Hi Guys and Gals,

That TD looked familiar. 8)

If anyone wanted to know, the outside is 1/4" red oak plywood. the top was glued on with epoxy, no screws, nails or staples, just clamped in place. I epoxied an edge to a spar, let it set up then pulled it around the radius with nylon web ratchet straps, and put pressure at the spars with wood wedges, clamps where I could get them on.
Image
Steve
User avatar
Steve_Cox
4000 Club
4000 Club
 
Posts: 4903
Images: 196
Joined: Sun Apr 03, 2005 8:46 am
Location: Albuquerque New Mexico
Top

Postby Mary K » Thu Feb 21, 2008 5:47 pm

Here are some pics for you.


I skinned (birch) the sides to cover the screw holes.
Image


And I PL glued the 1/8" birch skin over 1/8" luan.
Before
Image


After
Image

I did the same as Barb and Steve Cox and glued & strapped the skin down over the TD and used sandbags and shims. Potting mix bag came in handy too.:lol:

Image

I have TONS of pictures of the skinning of my TD in my Build Album. Ya just have to click View All and scroll down and find them.

Good Luck :thumbsup:

Mk
Mary K

I don't know half of you half as well as I should like; and I like less than half of you half as well as you deserve. Bilbo Baggins
User avatar
Mary K
6000 Club
6000 Club
 
Posts: 6425
Images: 44
Joined: Wed Aug 02, 2006 3:07 pm
Location: Florida, Pensacola
Top

Next

Return to Teardrop Construction Tips & Techniques

Who is online

Users browsing this forum: No registered users and 9 guests

cron