Ripples in annealed trim

Anything to do with mechanical, construction etc

Ripples in annealed trim

Postby AmyH » Wed Jun 04, 2008 11:43 am

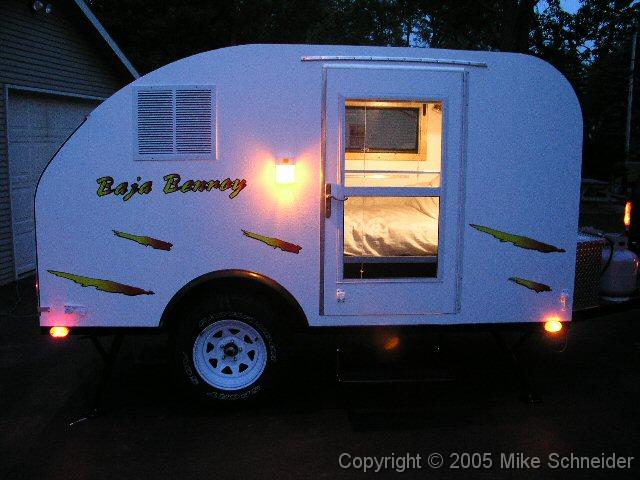
Is there an "acceptable" level of leftover ripples one should expect after annealing and bending aluminum trim around curves? I annealed my trim (3/4" by 1/20th inch thick) using the candle soot / MAPP gas method, I let it cool off slowly, I worked it around the curves slowly, massaging the kinks as I went along with a rubber mallet, but I still have some wrinkling / ripples left over from the work. I can live with this, but I still wonder if I could have done it better and been able to get rid of all the wrinkles.

I haven't done the hatch trim yet, and I am pretty nervous about doing it, since the trim has a wider leg (1 1/2 inch). I would really like the hatch trim to come out better than the roof edge trim.

Any suggestions?
Amy
"...follow humbly whereever and to whatever abyss Nature leads, or else you shall learn nothing." T.H. Huxley

Photo Log
Camping Trips with the Tear
User avatar
AmyH
*The 300 Club
 
Posts: 624
Images: 4
Joined: Sat May 15, 2004 8:35 pm
Location: Shoreline, WA

Postby madjack » Wed Jun 04, 2008 12:20 pm

Amy, the best way to work out ripples is with your rubber mallet and a hardwood block(or dolly)...this will allow to be very specific in addressing the ripples...on your hatch trim...the 1.5"...is that on the "down" leg, that is a lot to bend without rippling...that is a lot, is it absolutely needed........
madjack 8)
...I have come to believe that, conflict resolution, through violence, is never acceptable.....................mj
User avatar
madjack
Site Admin
 
Posts: 15128
Images: 177
Joined: Thu Dec 02, 2004 5:27 pm
Location: Central Louisiana

Postby AmyH » Wed Jun 04, 2008 12:22 pm

I have used a rubber mallet and a hardwood block, but I still have leftover ripples that can't be completely flattened out. Ugh, it is driving me crazy! :?

On the hatch trim, I wanted to make sure I had enough to completely cover the gap. Plus, I am using the Generic Benroy plans, and they call for 1 1/2" angle for the hatch trim.
Amy
"...follow humbly whereever and to whatever abyss Nature leads, or else you shall learn nothing." T.H. Huxley

Photo Log
Camping Trips with the Tear
User avatar
AmyH
*The 300 Club
 
Posts: 624
Images: 4
Joined: Sat May 15, 2004 8:35 pm
Location: Shoreline, WA
Top

Postby Dean_A » Wed Jun 04, 2008 12:56 pm

I agree with Jack. I think 1.5" is probably overkill. You've probably got a .375" gap, and .25" skin. That means you need to cover about .625". I think 1" angle would give you enough overlap and would be easier to work with. That's what I'm going with.
Get a test piece and try it out. it may work fine.
User avatar
Dean_A
Gold Donating Member
 
Posts: 597
Images: 55
Joined: Sat Oct 21, 2006 5:24 pm
Location: San Diego, CA
Top

Postby tonyj » Wed Jun 04, 2008 1:13 pm

I would think that 1-1/2 would be very tough to anneal and bend without getting lots of ripples.

I used 1" and still have ripples, but worked out as many and as well as I could. Unless you have to use the 1-1/2 to cover the gap, I would suggest using 1". Remember, the trim will divert water while the trailer is parked, but it is the foam gasket underneath the trim that keeps everything watertight especially while driving.
Still graced with two eyes and ten fingers (due in no small part to luck!).

Just when you think a problem is solved, an uglier result replaces it.

tony
User avatar
tonyj
Super Lifetime Member
 
Posts: 2468
Images: 160
Joined: Mon Sep 26, 2005 10:18 pm
Location: Texas, Corpus Christi
Top

Postby AmyH » Wed Jun 04, 2008 1:31 pm

Hmm, now I am thinking it is time to anneal some 1" angle.

I noticed in some other posts on annealing that people have suggested reheating the aluminum occasionally as you are bending it. Has anyone here done this, and does it help?
Amy
"...follow humbly whereever and to whatever abyss Nature leads, or else you shall learn nothing." T.H. Huxley

Photo Log
Camping Trips with the Tear
User avatar
AmyH
*The 300 Club
 
Posts: 624
Images: 4
Joined: Sat May 15, 2004 8:35 pm
Location: Shoreline, WA
Top

Postby madjack » Wed Jun 04, 2008 5:31 pm

Amy, when you bend annealed Al, it will "work harden"...unless you bend it in the same place 3r4 times, you would not need to re-anneal it...also, we rip one leg of the angle/channel down to 1/2" in size...this is the down leg...in fact on some trim we rip it down to !/4"...this technique, done on the tablesaw requires a bit of knowledge on using featherboards and such to do it safely........
madjack 8)
...I have come to believe that, conflict resolution, through violence, is never acceptable.....................mj
User avatar
madjack
Site Admin
 
Posts: 15128
Images: 177
Joined: Thu Dec 02, 2004 5:27 pm
Location: Central Louisiana
Top

Postby looped » Wed Jun 04, 2008 6:00 pm

what thickness is best for the aluminum angle?

also with light rippling can they be sanded smooth?
"face it man. It's just not possible to fry an egg with a bicycle powered hairdryer!"
- Dave Lister
User avatar
looped
The 300 Club
 
Posts: 392
Images: 31
Joined: Sun Apr 20, 2008 2:03 pm
Location: dfw texas
Top

Postby madjack » Wed Jun 04, 2008 7:07 pm

...as thin as possible...1/16th is usually available at most chain hardware and box stores(at least around here)........

...yes, if not heavily rippled...may not look the best but might be good enough and not be too noticeable to most....
madjack 8)
...I have come to believe that, conflict resolution, through violence, is never acceptable.....................mj
User avatar
madjack
Site Admin
 
Posts: 15128
Images: 177
Joined: Thu Dec 02, 2004 5:27 pm
Location: Central Louisiana
Top

ripples

Postby ssrjim » Thu Jun 05, 2008 1:57 am

Dean_A wrote:I agree with Jack. I think 1.5" is probably overkill. You've probably got a .375" gap, and .25" skin. That means you need to cover about .625". I think 1" angle would give you enough overlap and would be easier to work with. That's what I'm going with.
Get a test piece and try it out. it may work fine.


I had to go with the inch and 1/2 stuff, I needed it big enough to reach the metal frame underneath so I could use pop rivets. Not as smooth as I would have liked but I will live with it for now.


Image
93079
User avatar
ssrjim
1000 Club
1000 Club
 
Posts: 1187
Images: 12
Joined: Fri Feb 04, 2005 7:02 pm
Location: Glendale, az
Top

Postby looped » Thu Jun 05, 2008 3:08 am

hf has that edge shrinker stretcher thing out there with a coupon for 80 now..

just thought i would let you know
"face it man. It's just not possible to fry an egg with a bicycle powered hairdryer!"
- Dave Lister
User avatar
looped
The 300 Club
 
Posts: 392
Images: 31
Joined: Sun Apr 20, 2008 2:03 pm
Location: dfw texas
Top

Postby Jim Marshall » Thu Jun 05, 2008 10:29 pm

If you will look in my album you will see where I made a jig to bend the angle aluminum. MadJack told me how to anneal the aluminum and it worked great. My trim was 1/2 X 1/2 inch but I may be wrong, it may have been 3/4 X 3/4 inch and it looked good. I used 3/4 inch plywood cut to the same shape as the tear side and made a spacer the thickness of the aluminum. I then cut a piece of 1/4 inch plywood the same shape as the 3/4 in plywood. On top of the 1/4 plywood I put oak blocks to hold the 1/4 plywood firm.

Have someone hold tension on one end of the trim as you tap the aluminum around the form with a rubber mallet. It does a great job. If you like I can draw a diagram of the jig and post it here. Take a look at my album if you like and you will see the form I built there.

Jim
I started out with nothing and I still got plenty left.

VOL-N-TEAR
User avatar
Jim Marshall
The 300 Club
 
Posts: 343
Images: 63
Joined: Wed Sep 28, 2005 12:31 pm
Location: Chattanooga, Tennessee
Top

Postby AmyH » Fri Jun 06, 2008 11:00 am

I am going to pick up some 1" angle and give that a go this weekend. I'll probably make a plywood jig as well, since I think that will make it a bit easier to work with. As for the 3/4" angle I have already installed on the roof edge, I think I am going to live with the small amount of wrinkles, at least for a while. They really don't look that bad at all. I may redo them in the future.

Thanks for the tips everyone.
Amy
"...follow humbly whereever and to whatever abyss Nature leads, or else you shall learn nothing." T.H. Huxley

Photo Log
Camping Trips with the Tear
User avatar
AmyH
*The 300 Club
 
Posts: 624
Images: 4
Joined: Sat May 15, 2004 8:35 pm
Location: Shoreline, WA
Top


Return to Teardrop Construction Tips & Techniques

Who is online

Users browsing this forum: Bing [Bot] and 8 guests