My New VegasTeardrop Construction Has Begun.

Anything to do with mechanical, construction etc

Postby pathdoc2 » Sun Jun 29, 2008 2:56 pm

Looking great. I've never seen aluminum on the bottom of the floor like that before. Looks slick.
pathdoc2
Teardrop Builder
 
Posts: 40
Joined: Sat Jun 07, 2008 3:25 am
Location: Allen, TX

Postby Ken Fincher » Sun Jun 29, 2008 7:55 pm

I had a bunch more pic's ready to down load late last night but my computor locked up & I lost all of the pic's :x :cry:

I will try to post some more pic's later tonight.
Well I better get back to work on my TD I do not want to waste my daylight.

The Sin City Teardropper.(s)
Ken F.
Thanks to the Highways & Byways & our National & State Parks,What a beautiful Country we live in.
Image

( www.VegasTeardrop.com )
User avatar
Ken Fincher
The 300 Club
 
Posts: 378
Images: 28
Joined: Sat Aug 18, 2007 1:07 am
Location: Las Vegas,Nevada

Postby Ken Fincher » Mon Jun 30, 2008 2:45 am

Pathdoc
I have not seen anyone else do there floor the way I did mine either, I just figured why should I build up my floor so that I could insulate it when I already have a frame that I can insulate, so I did a little fabricating.

Well I am going to try to post some more pictures.

This time I'll do a couple then post them then I'll click on the edit on my posting & add some more & keep doing the same process.
This way I should'nt loose all of the pic's before I get them posted like the last time I tried to post my pic's.

Well here I am trying put up my cabin cieling.
Image

Oppsss! I made a boo boo.
Notice the piece of wood that I have on the floor to protect it.
I forgot to remove it before I framed in the front, Well I'll just
have to use the skill saw to remove it.
Image But I think I'll leave it where it's at for now to protect the floor.

A little more painting.
Image

Here I installed a nice chrome bar, which will come in handy.
(I put one on both sides of the TD)
Image
Thanks to the Highways & Byways & our National & State Parks,What a beautiful Country we live in.
Image

( www.VegasTeardrop.com )
User avatar
Ken Fincher
The 300 Club
 
Posts: 378
Images: 28
Joined: Sat Aug 18, 2007 1:07 am
Location: Las Vegas,Nevada
Top

Postby Gage » Mon Jun 30, 2008 3:02 am

Ken, what are you using for you ceiling skin. I'm trying a sheet of formica (drill, tac & glue) and we'll see what happens. :thinking:
Image Image Image
Remember 'Teardrop Time'.......Take your time, you don't have to have it finished NOW.
User avatar
Gage
8000 Club
8000 Club
 
Posts: 8321
Images: 28
Joined: Sat Apr 17, 2004 9:14 pm
Location: Palmdale, CA
Top

Postby Ken Fincher » Mon Jun 30, 2008 3:19 am

Gage
I used FRP it's around $29 a sheet at HD or Lowes & I used screws to secureit to the cieling & I used Fast Grab adhesive to secure it to the walls & my shelving.
That Fast Grab is some good stuff it is real easy to use if you have a solid surface on your cieling you can use F/G & put your piece of FRP up to the roof and with a little rolling the fast grab will hold it in place.
I used aviation snips to cut it a lot less messy then the skill saw or table saw I did use a jig saw on a few cuts, & used a router to cut out my vent hole,but if you use a router be sure to use the proper safety equipment
and have a shop vacume handy because the shaveings will be flying :lol:

Is'nt formica real brittle and not very flexible?

Are you going to have your TD at the IRG ?

We will see ya soon.

Ken F.
Thanks to the Highways & Byways & our National & State Parks,What a beautiful Country we live in.
Image

( www.VegasTeardrop.com )
User avatar
Ken Fincher
The 300 Club
 
Posts: 378
Images: 28
Joined: Sat Aug 18, 2007 1:07 am
Location: Las Vegas,Nevada
Top

Postby Ken Fincher » Mon Jun 30, 2008 3:43 am

Well back to the build.

This is a steam table pan I picked up at a kitchen supply store,I plan on making a sink out of it.
Image

Here I am cutting a hole in my counter top for my future sink.
(Well there go's my drawing board)
Image

The pan fits perfect, I also picked up a faucet (It is a reverse osmosis faucet.)
Image

Here I am making the hole for the drain.
Image

Here I used the router to make the hole in the FRP the same as the hole
in the wood.
Image

Here I have made some cupboard doors for my lower cupboards.
Image
Thanks to the Highways & Byways & our National & State Parks,What a beautiful Country we live in.
Image

( www.VegasTeardrop.com )
User avatar
Ken Fincher
The 300 Club
 
Posts: 378
Images: 28
Joined: Sat Aug 18, 2007 1:07 am
Location: Las Vegas,Nevada
Top

Postby Ken Fincher » Tue Jul 01, 2008 2:42 am

Well it's getting a little toasty here it was 112 at 2pm & I know it got a lot hoter :?
After seeing 112.8 on the themometer I realy did not want to look at it again and ya got to remember the temp. is mesured in the shade :(

But thank goodness for Lowes & thier cases of gatorade :beerhat: they have on sale you pay $9.95 & you get a $10 cash card good for $10 off of your next purchase of $50 or more & it's good till late Sept.needless to say I try to keep my purchases around $50 somtimes I may spend $50 & take the merchandise out to my car & go wright back in the store & do it again I know that I have saved a few $100 using these gift cards.
(If you buy any of thier gatorade be shure to make shure the gift card is in the case it is usually in one of the ends of the case.People tend to take (steal) the cards.

Well enough of that lets get back to the build.

Here I am running a little of my electrical :lol:
Image
Image

Here I have put some trim around the front area.
Image

I decided to pay the piper and I purchased a reversible and multi
speed fan vent combo.
Image

Now I have started to frame in the cupboards in the rear cabin area.
Image
Image

Now I am framing in some future drawers in the rear galley area.
Image

Well I have made another change, I have decided to put drawers in the cabin area.
Image

Here I have cut and put in some insulation and have also nailed
in the trim around the future cupboards and drawers.
Image

Here I have painted the trim on the face of the cupboards and drawers
and I also started to install some small black trim inside of the cupboards.
Image

Here I have cut out some of my drawer face pieces and some of my cupboard doors and also painted them.
Image

Here I am starting to build some of my drawers.
Image

Here I have put handles on and hung some cupboard doors.
Image
Image
Thanks to the Highways & Byways & our National & State Parks,What a beautiful Country we live in.
Image

( www.VegasTeardrop.com )
User avatar
Ken Fincher
The 300 Club
 
Posts: 378
Images: 28
Joined: Sat Aug 18, 2007 1:07 am
Location: Las Vegas,Nevada
Top

Postby Ken Fincher » Wed Jul 02, 2008 2:36 am

I have edited and put a bunch more pictures on my last post.
Now I will try to post some more.


Here I have insulated the roof,And I marked and predrilled some holes for the chrome pieces that I intend to use for a rack.
Image
Image

Now I am starting to skin the roof.
Image
Image
Image

Two drawers have been built and the faces and handles have been installed.
Image

You can see I have cut out the window and A/C holes.
Image

I also attached the drawer faces and the cupboard door in the galley area.
Image

Picked up my aluminum and stainless steel.
Image

Here I am framing in some cupboards and future shelves above the drawers above the stove.
Image

I trimmed some of the aluminum for the roof.
I did not want to stop but it was getting late and I definitely did not want to make any mistakes it could be very costly, so I will get wright back to it in the morning.
Image
Image
[img]http://www.vegasteardrop.com/sitebuilder/images/TD5ftX10ft_web_pg_folder3_215_43_-250x187.jpg
Image
Thanks to the Highways & Byways & our National & State Parks,What a beautiful Country we live in.
Image

( www.VegasTeardrop.com )
User avatar
Ken Fincher
The 300 Club
 
Posts: 378
Images: 28
Joined: Sat Aug 18, 2007 1:07 am
Location: Las Vegas,Nevada
Top

Postby Miriam C. » Fri Jul 04, 2008 8:51 am

:applause: :applause: :thumbsup: Hey Ken that is really coming along nicely. Drawers look like a great idea. :thumbsup:

Thanks for posting the pictures. :thumbsup:
“Forgiveness means giving up all hope for a better past.â€
User avatar
Miriam C.
our Aunti M
 
Posts: 19675
Images: 148
Joined: Wed Feb 15, 2006 3:14 pm
Location: Southwest MO
Top

Postby wingnutt111 » Thu Jul 10, 2008 5:07 am

did you screw your walls directly into the frame? i like your floor and want to do my td the same way.i want to go 5 ft interior on a 5 ft trailer. i thought of welding tabs to the bottom of the frame so the walls actually have something to sit on and then screwing them into the frame.
someone said no to me today!,what does this mean?
User avatar
wingnutt111
Teardrop Builder
 
Posts: 30
Images: 19
Joined: Sun Jun 15, 2008 5:12 pm
Location: venice, ca.
Top

Postby Ken Fincher » Fri Jul 11, 2008 6:18 am

wingnutt
Yes I mounted my outer walls to the sides of my frame, my inner wall & interior wall are sitting on top of the frame & my wood flooring.

Well I better post a few more pic's I wouild of posted more pic's this last week but I downloaded a microsoft service pack on my laptop & it killed my computer :cry: :x
I use my laptop to do all of my website building & updating, so I have tried to transfer all of my website building tools to my stationary home computer & it did not transfer correctly, needless to say I was up till 5am yesterday trying to to repair my web page.


Well back to the build.

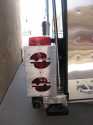
Here is a pic of my galley hatch seal.
Image

here my lower stainless steel trim is being installed.
Image

Now I'm cutting out a hole in one of my doors so that I can install a window,
Image

Starting to build my galley hatch
Image
ImageImage
Image

now I'm starting to skin the hatch.
ImageImage
Image

Here I have mounted my hatch locks.
Image

Here I am covering my galley cupboard walls & the bottoms of all of the shelves,In this pic you can see it is kind of hard to get my nail gun in such a tight space so I predrilled some holes & used a mini wratcheting screwdriver.
Image

Here I have cut my drawer slides to the correct lengths & have mounted them.
Image

Now it's time to build some more drawers.
ImageImage
Image

Well I figured it was time to pull the trailer out from under the awning.
I will not leave it out for to long it may rain Friday (today)
You know that it is our monsoon season :lol: (for real I'm not jokeing)
Image

You can see that My drawers & cupboard doors have been made & installed.
And I have ?temporarily? sat in my stainless steel counter top.
Image
Here I have cut out the hole for my sink.
Image

Now I am fabricating & installing the face trim on the lower part of the galley.
Image

My TD is getting real close to being ready to roll :)
Image

Well I will try to add some more pic's today.

The Sin City Teardropper.
Ken F.
Thanks to the Highways & Byways & our National & State Parks,What a beautiful Country we live in.
Image

( www.VegasTeardrop.com )
User avatar
Ken Fincher
The 300 Club
 
Posts: 378
Images: 28
Joined: Sat Aug 18, 2007 1:07 am
Location: Las Vegas,Nevada
Top

Previous

Return to Teardrop Construction Tips & Techniques

Who is online

Users browsing this forum: No registered users and 9 guests