Hatch -Match

Anything to do with mechanical, construction etc

Hatch -Match

Postby Mitch M » Sun Jul 13, 2008 4:13 pm

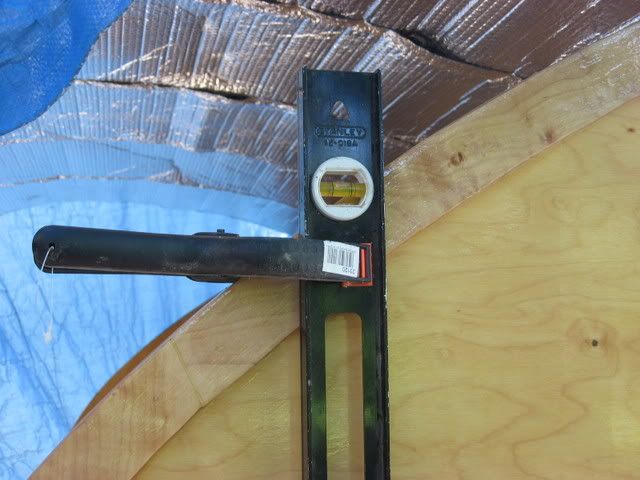
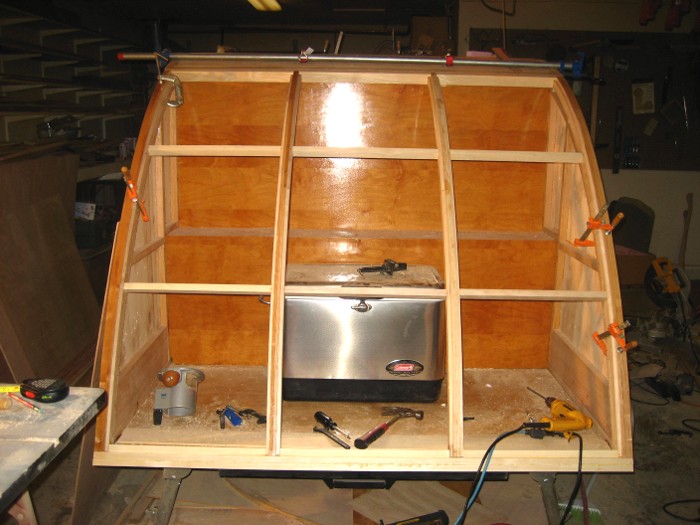
Good afternoon fellow garage mongers! I'm slowly working my way into the dreaded "hatch zone",and have had a stare-down with these ribs I've cut out,such as they are :thinking: Now I'm going to reveal my geometery ineptness. Before I cut these wrong,and have to start drinking heavily, what is the best way to scribe the proper angle on the top of these ribs for the right cut to match the last spar between the hinge and the hatch. Does that make sense? Anyway, any help would be appricieated.........Thanks guys and gals
Things that make you say hmmm
User avatar
Mitch M
Teardrop Builder
 
Posts: 25
Images: 41
Joined: Sun Apr 13, 2008 3:09 pm
Location: Gig Harbor, WA

Postby Juneaudave » Sun Jul 13, 2008 4:35 pm

Yeah Mitch...that makes sense to me. The only help I can give is to leave that cut long, work it a bit at a time, and build in place so everything fits. The other method I can recommend involves three shots of JD, a stuffed amadillo, and a dozen eggs...the second method gets results but not quite what a fella would hope for!!!

Image
User avatar
Juneaudave
Super Duper Lifetime Member
 
Posts: 3237
Images: 380
Joined: Sun Jul 03, 2005 12:11 pm
Location: Juneau, Alaska

Postby Mitch M » Sun Jul 13, 2008 5:36 pm

Although the second method is curiously tempting. I think that I'll stay with your first suggestion......Thanks
Things that make you say hmmm
User avatar
Mitch M
Teardrop Builder
 
Posts: 25
Images: 41
Joined: Sun Apr 13, 2008 3:09 pm
Location: Gig Harbor, WA
Top

Postby mikeschn » Sun Jul 13, 2008 5:58 pm

I know what you are saying. I had to deal with that today.

When I finally got the length right, the angle was wrong. What the heck. I glued it up anyways. Then I added a three shorter pieces which I glued and screwed to the top spars and the ribs. So it's plenty strong. But it was frustrating.

Image

Mike...
The quality is remembered long after the price is forgotten, so build your teardrop with the best materials...
User avatar
mikeschn
Site Admin
 
Posts: 19202
Images: 475
Joined: Tue Apr 13, 2004 11:01 am
Location: MI
Top

Postby tinksdad » Sun Jul 13, 2008 6:00 pm

Does it have to be JD??? Will Jose Cuervo give the same results?? :lol:

I've got one of those adjustable bevel thingies....I'm hoping that will get me close!!
User avatar
tinksdad
500 Club
 
Posts: 966
Images: 155
Joined: Mon May 05, 2008 9:20 pm
Location: Olive Branch, MS
Top

Postby mikeschn » Sun Jul 13, 2008 6:57 pm

Here's my error of the day... :cry: If it still bothers me in a week, I'll have to glue in a tiny piece to make it look right, otherwise, who cares...

Image

Mike...
The quality is remembered long after the price is forgotten, so build your teardrop with the best materials...
User avatar
mikeschn
Site Admin
 
Posts: 19202
Images: 475
Joined: Tue Apr 13, 2004 11:01 am
Location: MI
Top

Postby Juneaudave » Sun Jul 13, 2008 7:22 pm

Mitch...iffn the cut doesn't turn out quite right...it's ok...your going to gain a lot of strength when you put in the blocking (assuming you do) or especially if you add an inside panel...This pic shows the blocking...I could have made the cruddiest cut in the world and it would never show.

The one thing you do want to do is make sure that your hatch matches the body of the tear...

Image
:thumbsup:
User avatar
Juneaudave
Super Duper Lifetime Member
 
Posts: 3237
Images: 380
Joined: Sun Jul 03, 2005 12:11 pm
Location: Juneau, Alaska
Top

Postby planovet » Sun Jul 13, 2008 8:04 pm

mikeschn wrote:Here's my error of the day... :cry: If it still bothers me in a week, I'll have to glue in a tiny piece to make it look right, otherwise, who cares...

Image

Mike...


If that was your only error of the day then I say you did a great job. The perfectionist in me would say "fix it". But it's not really that noticable so "who cares".
ImageMark (& Cindi)
Visit our website: Little Swiss Teardrop

I was wondering why the water balloon was getting bigger... and then it hit me.

ImageImageImageImage
User avatar
planovet
The Cat Man
 
Posts: 5583
Images: 3
Joined: Tue Nov 27, 2007 4:48 pm
Location: Plano, Texas
Top

Postby Mitch M » Mon Jul 14, 2008 2:44 pm

Thanks for the replies guys. And,yes Mike that is exactly what I was concerned about. I am quickly becoming a function before form guy, but I am also becoming better at concealing the "measurement indiscretions" that are unavoidable when usuing a sabre saw aka Jaws.
Things that make you say hmmm
User avatar
Mitch M
Teardrop Builder
 
Posts: 25
Images: 41
Joined: Sun Apr 13, 2008 3:09 pm
Location: Gig Harbor, WA
Top

Postby Gage » Mon Jul 14, 2008 4:04 pm

If you make the end cut perpendicular to the profile, you won't be wrong. Don't over think what your doing. Hatches are simple and is only an extension of the roof that is made as a removable section.
Image Image Image
Remember 'Teardrop Time'.......Take your time, you don't have to have it finished NOW.
User avatar
Gage
8000 Club
8000 Club
 
Posts: 8321
Images: 28
Joined: Sat Apr 17, 2004 9:14 pm
Location: Palmdale, CA
Top

Postby Miriam C. » Mon Jul 14, 2008 5:14 pm

You can use a square or a level to get that cut. You need to clamp it on the outside (so it can be long enough) and mark from there.

Oh yeah---take a picture so when this works someone will have one!

Ok this is a pretend hatch rib. 8) If you make your mark where the hatch spar joins and cut back the distance of your end board+ whatever gap you need for the hinge you are using you should be there. Thing is too long is fixable and too short is too. :D You just double the end board. :thumbsup:
Image
“Forgiveness means giving up all hope for a better past.â€
User avatar
Miriam C.
our Aunti M
 
Posts: 19675
Images: 148
Joined: Wed Feb 15, 2006 3:14 pm
Location: Southwest MO
Top

Postby Mitch M » Sat Aug 09, 2008 3:41 pm

New picts. in my album reguarding my hatch build.
O.K. Mike,& Dave,Gage,& Miram. Believe it or not , all of your advice got me through the hatch build and I can't thank you guys enough! The key steps that helped me out were ... #1 Build in place. #2 Mike's advice about adding pieces between the ribs on the top hatch spar.It really stiffened things up. #3,And very important,was Gage's advice to not"overthink it". Sometimes you just have to start building and "modify" as you go along. #4 Clamping, squaring,and spacing the outside ribs before building in place. :thumbsup:
Things that make you say hmmm
User avatar
Mitch M
Teardrop Builder
 
Posts: 25
Images: 41
Joined: Sun Apr 13, 2008 3:09 pm
Location: Gig Harbor, WA
Top


Return to Teardrop Construction Tips & Techniques

Who is online

Users browsing this forum: No registered users and 14 guests