Puffin 2

Anything to do with mechanical, construction etc

Postby steve wolverton » Wed Dec 31, 2008 11:02 am

HubCapKevin wrote:hub caps and wheel covers are kinda my thing ( along with sprayed on bedliners) ... If I can help let me know. you need to bump up to a 14" wheel then we can put on a cool pair on smooth disks.. very retro.


Can't do anything for these 12" wheels? :(

I can't upgrade wheels on this build, but if I did I'd run some 22's on spinnaz! ;)
�veni, vidi, vici.�
User avatar
steve wolverton
1000 Club
1000 Club
 
Posts: 1676
Images: 11
Joined: Sun Nov 07, 2004 9:39 pm
Location: Brazoria, TX

Postby steve wolverton » Wed Dec 31, 2008 11:04 am

aggie79 wrote:[Can you say where you bought your roof edge trim and insert?


Sure - PPL Motorhomes at Beltway 8 & 59. South side - huge place.
�veni, vidi, vici.�
User avatar
steve wolverton
1000 Club
1000 Club
 
Posts: 1676
Images: 11
Joined: Sun Nov 07, 2004 9:39 pm
Location: Brazoria, TX

Postby HubCapKevin » Wed Dec 31, 2008 11:47 am

I do carry a set of 12" covers they have VERY good clips and paint well.

Image
HubCapKevin
Teardrop Inspector
 
Posts: 14
Images: 15
Joined: Mon Sep 24, 2007 11:42 am
Location: Grand Rapids MI
Top

Postby surveytech » Wed Dec 31, 2008 2:01 pm

I have the same wheels and trailer and put these on .........

Image

fit the 5 lug wheel and just push on.
picked them up at Camping world.


just another idea.

.
surveytech
Donating Member
 
Posts: 776
Images: 6
Joined: Fri Apr 29, 2005 7:13 pm
Location: kissimmee, florida
Top

Postby aggie79 » Wed Dec 31, 2008 6:48 pm

steve wolverton wrote:
aggie79 wrote:[Can you say where you bought your roof edge trim and insert?


Sure - PPL Motorhomes at Beltway 8 & 59. South side - huge place.


Thanks for the info.
Tom (& Linda)
For build info on our former Silver Beatle teardrop:
Build Thread

93503
User avatar
aggie79
Super Duper Lifetime Member
 
Posts: 5405
Images: 686
Joined: Tue Aug 07, 2007 5:42 pm
Location: Watauga, Texas
Top

Postby shopfabricator » Wed Dec 31, 2008 7:04 pm

Stole this from Georgeandpat. For Baby Moons he drilled and tapped four 1/4-20 holes and installed round head bolts with locktight. He reported three trips with no problem.
http://img.photobucket.com/albums/v422/georgeandpat/hubcapmountingbolts.jpg
http://img.photobucket.com/albums/v422/georgeandpat/babymooninstalled.jpg
Looks like a doable fix.
Gary
...materials can no longer be purchaced at quite those prices mentioned here!
User avatar
shopfabricator
Donating Member
 
Posts: 189
Images: 138
Joined: Fri Aug 24, 2007 9:51 pm
Location: Mooresville, NC
Top

Postby steve wolverton » Wed Dec 31, 2008 7:59 pm

I just put the first coat of undercoater on the sides. I've found the key to keeping the paint job is multiple thin layers. It takes a lot more time, but it's well worth it.

Image

I have just a few (5 or 6) tiny areas that need to be filled in before the next coat of undercoater. I plan to finish the undercoating tonight, and then I'll put the first coat of white on about 2:00 AM. I'll recoat 4 hours after that, so I'll be setting the alarm at 6:00 to put the second, and probably final topcoat on.

It seems all the practice with painting boats is paying off. ;)
�veni, vidi, vici.�
User avatar
steve wolverton
1000 Club
1000 Club
 
Posts: 1676
Images: 11
Joined: Sun Nov 07, 2004 9:39 pm
Location: Brazoria, TX
Top

Postby steve wolverton » Wed Dec 31, 2008 8:01 pm

HubCapKevin, surveytech, & shopfabricator - Three good suggestions - thank you guys. I'm intrigued with surveytech's setup - might go that route. :thumbsup:
�veni, vidi, vici.�
User avatar
steve wolverton
1000 Club
1000 Club
 
Posts: 1676
Images: 11
Joined: Sun Nov 07, 2004 9:39 pm
Location: Brazoria, TX
Top

Postby planovet » Wed Dec 31, 2008 8:37 pm

steve wolverton wrote:I just put the first coat of undercoater on the sides. I've found the key to keeping the paint job is multiple thin layers. It takes a lot more time, but it's well worth it.


That's what I did. 3 coats of primer and 5 coats of topcoat. The thinner the better (to a point of course).

Nice job! :thumbsup:
ImageMark (& Cindi)
Visit our website: Little Swiss Teardrop

I was wondering why the water balloon was getting bigger... and then it hit me.

ImageImageImageImage
User avatar
planovet
The Cat Man
 
Posts: 5583
Images: 3
Joined: Tue Nov 27, 2007 4:48 pm
Location: Plano, Texas
Top

Postby steve wolverton » Thu Jan 01, 2009 3:31 am

planovet wrote:That's what I did. 3 coats of primer and 5 coats of topcoat. The thinner the better (to a point of course).

Nice job! :thumbsup:


Thanks. I've got two coats of undercoater and I've put the first topcoat on tonight. It looks fantastic with just one coat. I can see myself in it. It looks like gelcoat. :thumbsup:

I think one final coat tomorrow will do it.
�veni, vidi, vici.�
User avatar
steve wolverton
1000 Club
1000 Club
 
Posts: 1676
Images: 11
Joined: Sun Nov 07, 2004 9:39 pm
Location: Brazoria, TX
Top

Postby steve wolverton » Thu Jan 01, 2009 3:32 am

I finished cutting the graphics for the camper tonight. I'm hoping to get them installed Friday.

Image
�veni, vidi, vici.�
User avatar
steve wolverton
1000 Club
1000 Club
 
Posts: 1676
Images: 11
Joined: Sun Nov 07, 2004 9:39 pm
Location: Brazoria, TX
Top

Postby surveytech » Thu Jan 01, 2009 9:38 am

steve wolverton wrote:HubCapKevin, surveytech, & shopfabricator - Three good suggestions - thank you guys. I'm intrigued with surveytech's setup - might go that route. :thumbsup:


Steve,
I wanted baby moons real bad but I didnt have any confidence that I could drill and tap some clips into the wheel and have them stay on while traveling.
( i know its been done but I dont trust my skills here)
so i painted the center of the wheel black and purchased these

http://www.campingworld.com/shopping/it ... rcle/21685

these are available other places as well.......search "quicktrim". I have a camping world here locally so I went that route.

another option might be VW hubcaps with the mounting clips. There are lots of places to buy new bug caps (without logo) that mount with the VW clips.
Google it and you will see another option that might work.

I was lazy and wanted something that just pushed on and stays on.

good luck. The trailer looks great!

Walter
surveytech
Donating Member
 
Posts: 776
Images: 6
Joined: Fri Apr 29, 2005 7:13 pm
Location: kissimmee, florida
Top

Postby steve wolverton » Thu Jan 01, 2009 2:10 pm

surveytech wrote:( i know its been done but I dont trust my skills here)
so i painted the center of the wheel black and purchased these

http://www.campingworld.com/shopping/it ... rcle/21685

these are available other places as well.......search "quicktrim". I have a camping world here locally so I went that route.


One way that I could get those hubcaps to work is to mount the wheels backwards and drill for a new valve stem. That's more work than I want to do, so I'll probably go your route. I like the look of the white/black/chrome and that would fit my setup nicely. I hope you don't mind if I "borrow" that idea. ;)
�veni, vidi, vici.�
User avatar
steve wolverton
1000 Club
1000 Club
 
Posts: 1676
Images: 11
Joined: Sun Nov 07, 2004 9:39 pm
Location: Brazoria, TX
Top

Postby steve wolverton » Thu Jan 01, 2009 2:12 pm

Image
The camper now has its first topcoat. It's really bright! It doesn't look it in the photo because it's gray and overcast today. :(

I'll put the second coat on tonight. I may wait until Sat to apply the graphics. After I get the graphics, I'll mask for the black bedliner material on the bottom.
�veni, vidi, vici.�
User avatar
steve wolverton
1000 Club
1000 Club
 
Posts: 1676
Images: 11
Joined: Sun Nov 07, 2004 9:39 pm
Location: Brazoria, TX
Top

Postby steve wolverton » Thu Jan 01, 2009 2:26 pm

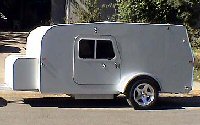
Here's something I thought was really cool. I'd been bouncing ideas in my head how trim the insulation inside the camper. I didn't want to add another skin inside to cover the spars, but I didn't want an unfinished look either. As I was about to fall asleep a few nights ago, and idea popped into my brain.

I picked up some 1.5" PVC pipe and ripped it lengthwise. The first thing I did was to mark a centerline.

Image
After the line was marked, I clamped it to some sawhorses and cut it. I had no problems cutting the PVC with a fine wood blade in my jigsaw. It cut through the entire piece in one pass.

Image
I then took a piece of 1/2" pink foam and wrapped it in some spare material I had laying around. I then countersunk two screw holes in the pvc and slipped everything in place.

Image
Obviously when it comes time to do the real thing the foam/fabric will cover the entire width. This was just an example to see if I wanted to do this.

Image
This is the finished look. Cool eh! It really cleans up the look of the interior. It's much cheaper than trim, and it has a few added benefits. The foam will act as insulation. I don't need much here in Texas, but it's not a bad thing to have. The panels aren't glued in place, but held in place by the PVC. If you ever need to access the areas behind the panels all you'd need to do is unscrew one of the PVC sections and pull the panel. This would be helpful for adding wiring, vents, etc. later if you decide to modify your build.

Just a few notes. I'll use 2" PVC next time instead of 1.5". By using 2" PVC I can control how tightly the foam is pressed into place by how tightly I screw the PVC onto the spars. The 1.5" is too short to pull the foam to the ceiling tightly. The PVC will act as a full length clamp. Another thing I'll do is paint mine. I'm going to paint the PVC red to give some nice contrast in my camper. One cool thing is you could always leave it unpainted. I took some 220 grit sandpaper and sanded the lettering off the PVC.

The foam insulation will run about $30 for my camper, $15 or so for the 3 pieces of PVC I'll need, plus the cost of fabric to cover the panels. Not too bad, and I think it looks great. :D
�veni, vidi, vici.�
User avatar
steve wolverton
1000 Club
1000 Club
 
Posts: 1676
Images: 11
Joined: Sun Nov 07, 2004 9:39 pm
Location: Brazoria, TX
Top

PreviousNext

Return to Teardrop Construction Tips & Techniques

Who is online

Users browsing this forum: No registered users and 2 guests