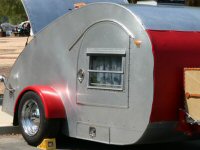
Is there a trick to installing a door.

Anything to do with mechanical, construction etc

did Dean put a spell on my gun port door never to be changed

yes
10
77%
no
1
8%
GUN PORT GUN PORT you are getting sleepy now GUN PORT
2
15%
 
Total votes : 13

Is there a trick to installing a door.

Postby Ron Dickey » Wed Mar 25, 2009 9:43 pm

We tried several times to install my doors. I had piano hinges on my old doors and changed over to commercial hinges because there were no piano hinges available locally and I wanted to use old fashioned commercial door honges.
I have never installed a solid door before. the first one across from the gun port door we got in and after some cardboard under the bottom hinge it worked fine. The second door has been a pain. We have filled the screw holes 3 times and the door still binds. We looked at house doors and wondered it the hinge should cover all the way across the door end or only part.
the first try the top hinge seemed ok then as we went down adding the other two hinges it would spring back but did not hit the jam. 2nd and 3rd trys it now hits the jam and we quit for the night. :x

Help how do you hang a door seems simple in thought and for those who have done it before it may be second nature. I may put on a piano hing on that side maybe Dean put a spell on it and untill a gun port is put on will not work.!!! :cry:

Ron D.
173882......173887
Inside almost done--Trolly top has opening windows & roof.doors need assembling--pictured above waley windows..galley 1/3 done
Cross Bow in Build Journals....http://www.tnttt.com/viewtopic.php?f=50&t=54108
User avatar
Ron Dickey
Silver Donating Member
 
Posts: 3109
Images: 787
Joined: Tue Apr 20, 2004 5:56 pm
Location: Central Coast, CA

Postby doug hodder » Wed Mar 25, 2009 11:34 pm

Ron....is you door flat? It didn't cup or anything and fits into the cut out hole just fine right? You should have some play. What I do is hold the door in place and then take a bunch of little shims and shim it all the way around so that you have an equal gap around the door and the jamb. So that the door is being held in place with all these little shims. Then drill for the hinge, only a couple holes top and bottom, and screw the door to the hinge and jamb. Get out and check it out and make sure it all swings without hanging up. Since you are installing exterior hinges and not the piano hinge, once you get the door all shimmed in place go out mark and install the hinges.

If none of this made any sense, maybe I have no idea on what you are wanting to do with your doors and you are not using the type of hinge I think you are.

Once you get them hung, if they want to rub a little on the jamb, I take a piece of carbon paper fold it in 1/2, and stick it in the door and open and close it a bunch of times while I move the paper around the door. The dark spots reveal where you need more clearance, sand/ grind as necessary. Doug
doug hodder
*Snoop Dougie Doug
 
Posts: 12625
Images: 562
Joined: Tue Dec 14, 2004 11:20 pm

Did Dean of the Redwoods lay a curse on Captain Ron's doors?

Postby Esteban » Thu Mar 26, 2009 1:22 am

I'm Captain Ron's door upgrade assistant, Steve. We're getting (too) good at filling screw holes with slivers of wood and glue. Then moving the hinges a little to start over. Hoping they'll work better "next time." The ex gun port side is frustrating us because the hinges keep binding. Did Dean of the Redwoods lay a curse on them?

Ron's door is rectangular and flat. We checked it with a 4' drywall square. The hinge side is straight and flat. Ron cut recesses for the hinges into the door and the door opening. The leaves, installed in the recesses, are screwed to the door and the door opening...much like residential doors...except the hinge knuckles are on the outside. As the door is opened the 3 hinges bind like they're out of alignment. We can't figure out where/how. The door fits into the door opening with plenty of clearance...about 1/8 to 1/4" per side.

Ron plans to take his lovely bride to the Dam Gathering in about a month. Before then he needs good working doors that help her feel safe at night.
Steve - SLO, CA
Esteban
Donating Member
 
Posts: 1684
Images: 15
Joined: Fri Jul 28, 2006 4:39 pm
Location: California, San Luis Obispo
Top

Postby aggie79 » Thu Mar 26, 2009 8:48 am

It sounds like your are recessing or mortising the hinge leaves into the door jamb and door edge, so only the hinge knuckle is exposed when the door is closed.

Your binding may be a result of not centering the screw holes. In addition to what Doug said about installing just two screws per hinge, you might try using a vix drill bit. This is a self-centering drill bit.

Image

I'd start with the jamb side first. Place the hinge in the mortise and hold it tight making sure that the hinge leaf is parallel to the jamb. Then use the vix bit to drill the center screw hole. Repeat for the door edge side. Then repeat for the bottom hinge and see how the door swings. If okay, drill the other holes.

Tom
Tom (& Linda)
For build info on our former Silver Beatle teardrop:
Build Thread

93503
User avatar
aggie79
Super Duper Lifetime Member
 
Posts: 5405
Images: 686
Joined: Tue Aug 07, 2007 5:42 pm
Location: Watauga, Texas
Top

Postby Kevin A » Thu Mar 26, 2009 9:02 am

Try leaving the center (3rd) hinge out, if it doesn't bind, then you can attach one side of the third hinge to the door and at that point mark the screw holes where it will attach to the wall. It sounds like you just don't have all 3 hinges in alignment with each other.
"Follow me, I'm right behind you"

ImageImage
User avatar
Kevin A
The other guy
 
Posts: 3222
Images: 289
Joined: Mon Jan 17, 2005 1:16 am
Location: California, Eureka
Top

Postby doug hodder » Thu Mar 26, 2009 9:17 am

I think Kevin has the answer...I didn't get that you were using 3 hinges. If you've got the wood looking like a sponge from too many holes, use a forstner bit, drill out the hole and install a dowel in it instead of the little sticks. It'll give you something more solid to attach to. The Vix bit is also a big plus...really centers your drill holes. Doug
doug hodder
*Snoop Dougie Doug
 
Posts: 12625
Images: 562
Joined: Tue Dec 14, 2004 11:20 pm
Top

Postby Arne » Thu Mar 26, 2009 3:54 pm

the edge of the door that closes against the jam is not 90 degrees, it has to be beveled... not sure if that is your problem or not..

if you look at a door in your house you will see what I mean.
www.freewebs.com/aero-1
---
.
I hope I never get too old to play (Arne, Sept 11, 2010)
.
User avatar
Arne
Mr. Subject Line
 
Posts: 5383
Images: 96
Joined: Fri Aug 13, 2004 12:25 pm
Location: Middletown, CT
Top

Postby Mini Renegade » Thu Mar 26, 2009 4:02 pm

doors door dorrrrrss. My tear only has one but I ended up making 3 with different construction methods just to get one to fit. the hanging of it was another nightmare!
I had never hung a door but I shimmed it using 3mm thick offcuts along the bottom and visible side then I shut my eyes and fit the hinge.......And it works, I still dont know how though!!
If evvr tha dus owt fr nowt, allus do it fr thissen
User avatar
Mini Renegade
500 Club
 
Posts: 520
Joined: Tue May 15, 2007 2:26 pm
Location: (Old) York
Top

Postby Arne » Thu Mar 26, 2009 9:06 pm

I've built 2 t/d's. built the wall, cut out the door and all fit great. the space around the door was just the width of the circular saw blade. used piano hinge, beveled back of door and bottom (for water drainage)

On the current one I did put a support on the back edge of the door to keep it from sagging. It is a lot of strain to have a door supported only at the front hinge with the t/d bouncing down the road for thousands of miles. no. 1 did get a bit of sag.. hardly noticeable, but could see the seam between door and body was tapered a bit.
www.freewebs.com/aero-1
---
.
I hope I never get too old to play (Arne, Sept 11, 2010)
.
User avatar
Arne
Mr. Subject Line
 
Posts: 5383
Images: 96
Joined: Fri Aug 13, 2004 12:25 pm
Location: Middletown, CT
Top

Postby Esteban » Thu Mar 26, 2009 9:46 pm

These are good ideas. We're mostly centering the screw holes "by eye." Part of the difficulty, because the hinges are mortised on the side of the door and door opening, is that we cannot shim the door in place as we install the hinges. The door has to be open to work with the hinges. We taped a spacer on the floor to help get the door height right. The suggestion to first install only the top and bottom hinges makes sense. Once they work OK then install the middle one. We didn't do that. Hope it helps and cuts down the trial and error.

Ron tells me I'm learning lessons that will help me/us when we install my doors. He's right.
Steve - SLO, CA
Esteban
Donating Member
 
Posts: 1684
Images: 15
Joined: Fri Jul 28, 2006 4:39 pm
Location: California, San Luis Obispo
Top

Postby Ron Dickey » Fri Mar 27, 2009 10:03 pm

I drove down to Harbor Freight got 3 vix bits for 7.99, looks like the trick for that part. I have some oak Plug somewhere too.

Ron
173882......173887
Inside almost done--Trolly top has opening windows & roof.doors need assembling--pictured above waley windows..galley 1/3 done
Cross Bow in Build Journals....http://www.tnttt.com/viewtopic.php?f=50&t=54108
User avatar
Ron Dickey
Silver Donating Member
 
Posts: 3109
Images: 787
Joined: Tue Apr 20, 2004 5:56 pm
Location: Central Coast, CA
Top

Postby Dean in Eureka, CA » Fri Mar 27, 2009 10:40 pm

Just put the gun ports back... I'm telling yaa. :twisted: :lol:
User avatar
Dean in Eureka, CA
The Fogcrawler
 
Posts: 4997
Images: 69
Joined: Thu May 11, 2006 8:44 pm
Top

Postby Ron Dickey » Tue Mar 31, 2009 11:14 am

Dean in Eureka, CA wrote:Just put the gun ports back... I'm telling yaa. :twisted: :lol:

Arrrrgh
who's trailer are you barrowing this time??
If you bring your own I'll be firing across you bow matee. :lol:
Lot a help you are :x
Keep talken like that and I'll give you Gun Ports Matee :beer:
swab them decks we've got a party to go to
Cap im Ron
Arrrrrrrrrrrrrrrrgh
173882......173887
Inside almost done--Trolly top has opening windows & roof.doors need assembling--pictured above waley windows..galley 1/3 done
Cross Bow in Build Journals....http://www.tnttt.com/viewtopic.php?f=50&t=54108
User avatar
Ron Dickey
Silver Donating Member
 
Posts: 3109
Images: 787
Joined: Tue Apr 20, 2004 5:56 pm
Location: Central Coast, CA
Top

Postby Ron Dickey » Tue Mar 31, 2009 11:18 am

I got the Vix bit at home depot 7.99 for 3 sizes
today we try again.
despite Deans ...... arrrrrrrgh
Ron
173882......173887
Inside almost done--Trolly top has opening windows & roof.doors need assembling--pictured above waley windows..galley 1/3 done
Cross Bow in Build Journals....http://www.tnttt.com/viewtopic.php?f=50&t=54108
User avatar
Ron Dickey
Silver Donating Member
 
Posts: 3109
Images: 787
Joined: Tue Apr 20, 2004 5:56 pm
Location: Central Coast, CA
Top

Postby Ron Dickey » Fri Apr 10, 2009 11:18 pm

say Vix bit Vix bit Vix bit
Plug them holes and tart again
This here is Deans Door
Turn around twice ....

I worked I broke the spell

We got the doors on

Thanks to all that helped.
Pluged the holes
Put the hinges on drilled new holes whith the Vix Bit
mounted the top and bottom hinges first then the middle

I got to do some painten but it is about ready for Pixs and other Hall of Fame stuff.

Ron Dickey
PS...
Thank you Steve B. for the use of your equipment and Time.
Good lunches good talks .... Learned lots. Thanks :thinking:
173882......173887
Inside almost done--Trolly top has opening windows & roof.doors need assembling--pictured above waley windows..galley 1/3 done
Cross Bow in Build Journals....http://www.tnttt.com/viewtopic.php?f=50&t=54108
User avatar
Ron Dickey
Silver Donating Member
 
Posts: 3109
Images: 787
Joined: Tue Apr 20, 2004 5:56 pm
Location: Central Coast, CA
Top

Next

Return to Teardrop Construction Tips & Techniques

Who is online

Users browsing this forum: No registered users and 6 guests