This build started life as a pop up. Stripped it down, welded in some braces for the basement and started with the first wall. Box size is 7' x 12'. I am making the overall height so it will roll into the garage. I should end up with about 5' - 10" interior head room and 7" ground clerance to the basement.
Interior layout will have a kitchen across the front, a dinet along the street side next to a 5' long picture window. I have a nice large 2 way refrigerator from the pop up which will sit curb side right behind the entrance door and a queen size bed with storage underneath in the back. Will have a porta potty, propane for the cook top and refridgerator and 110 electric with a 12volt convertor.
Build will have sandwich construction 2" x 2". I am going to lay this wall back down and try to get the curb side wall to have a similar profile. Once both walls are framed, I am going to skin the inside with 1/4" birch and erect the walls and then attach 2" x 2" spars. This will give me access to do all the electrical and interior framing.
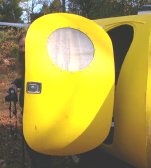
My thoughts on finishing the outsde, and please tell me if I have some unfortunate ideas. I plan on covering the outside walls with 1/4" birch. Skin the roof with some corrigated FRP I saw at Menards. I then plan to buy some rolled 24" flashing (painted, thinking a dark color) and lay it front to back so I will have 4 strips and 3 seams plus edges. I will then lay rolls of that RV caulk and screw down aluminum roof edge and flats on the center 3 seams giving me what I hope will be a unique look. The sides will be a combination of white aluminum and wood. Aluminum covering the bottom 24", wood grain in the center and white aluminum even with the top of the windows.
I really enjoy reading the posts and information on this site. I hope I am not getting over my head in this build. No real plans other than wht I sketched out on graph paper, but adjust as I go.


 Mark (& Cindi)


