I am so proud, I hope you'll excuse me while I pause to wipe a tear from my eye. (Took me about a day and a half, because of rain delays.)
It was a happy, bittersweet, at times confusing, life experience...but one that will hopefully better prepare me for the challenges of doing the more often-used driver's side door.
My story is a unique one, and I didn't curse more than 3 or 4 times during the entire birth.
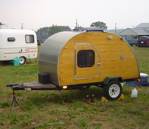
First, as you can see, I abandoned all conventional wisdom and advice and used Tee-Hinges. And as you can ALSO see, this really works with my theme. (It was pretty inexpensive too.)
As you know, even if I measure five times, that doesn't mean I'm going to do the CUT right the ONE time I have to actually do it. So I said the hell with it. I cut the ply to a very tight fit for the opening, almost no conventionally measured gaps all around. I then framed the ply with 1 X 2 pine all around, except for the curve on top, where I used ply. I glued the exterior skin on (plus some brads) and just bradded the interior. With only the sticks to adhere it to on the inside anyway, and no major water considerations to take into account, I figured brads were enough.
I lift the door to the opening, set it on top of VERY thin shims on the sill, and attach the hinges.
I set the hinges forward a little, to the right, so the door can't swing into the cabin at all. Yes, I used a "stop plate" at the bottom of the body, on the inside of the sill, but this is more for waterproofing than it's needed to stop the door.
I now try to close the door, which it is not very willing to do. But I calmly, methodically, strategically and slowly rasped down and used the sheet sander on both the door and opening edges, to achieve the desired end.
I even put my beer down a few times, because it was hard to work the rasp with one hand. (Besides, there was only an ounce or two left, and it was getting warm.)
Anyway, lo and behold, the door closes perfectly--almost. The very upper left corner sticks out a little, but the slighest pressure of even just one finger makes it flush again. So in the above photo, you may see a nail that I temporarily impacted (like that word?) into the body, and then bent over the door to make it sit perfectly flush.
My logic was that this may be a warpage issue--the body, door, or both, who knows--and maybe by letting it sit like this, it'll warp back.
Regardless, I'm not too concerned about this right now. I had been considering using large black slide bolts as my locks ANYWAY, as opposed to a lock on a standard door handle, because again, I'm going for a certain look. The bolt up top will make it sit flush. We'll see.
I then trimmed the outside edges of the door in my own unique...I hope it's kind of waterproof...style. I want to put a narrrow canopy above the door, but I haven't figured out how to adequately do the top edge of the door yet. It may be a piece of curved lumber cut to that curved top profile, that sits flush with the body when closed.
In conclusion, this was not a horrible experience at all. Perfect? No, but I DO have a door, and one-half a window. (I have some finishing work to do on that window, in the interior, and also to correctly mount it so it's really waterproof.)
Lessons learned?
Well, next time, I MAY cut the door a bit narrower than I did this time. After this one was installed, I installed a piece of self-stick foam weatherstripping on the hinge side, on the jam (not the door). After doing so, the door wouldn't close, so I had to remove it. I'm making a guess that I'm still okay, though, because there's hardly ANY gap on that side when the door is closed. Plus, with my exterior rubber trim there, it makes a really tight seal.
Who knows. Once both doors are on, I'm going to give it a hose test.
The other lesson I learned was to keep more beer in the cooler, on ice, and not just in the refrigerator.