Now it begins.

Anything to do with mechanical, construction etc

Postby bledsoe3 » Thu Sep 08, 2005 1:25 am

SmokeyBob, I clicked the link on you post. I really like the pictures there. Mostly because the link goes to my gallery :rofl: . I would be interested in seeing your dust cap tool though.
If you do what you've always done, you'll get what you've always got.
User avatar
bledsoe3
3000 Club
3000 Club
 
Posts: 3694
Images: 112
Joined: Tue Jun 07, 2005 5:55 am
Location: Oregon, Portland

Postby DoWopBox » Thu Sep 08, 2005 1:50 am

SmokeyBob wrote:IraRat


Putting this trailer together has been a learning experience. The first minor problem I encountered was with the 3/8"x3/4" & the 3/8"x1" bolts. The head of the bolt is 5/8" US standard but the 3/8" Nylon nut is 17mm. Lucky for me I have both US and Metric tools.

:


The bolts are 16mm (close to 5/8") and the nuts are 17mm.
Aerodynamics is overated
DoWopBox
Teardrop Advisor
 
Posts: 51
Joined: Fri May 20, 2005 5:43 am
Postby IraRat » Thu Sep 08, 2005 8:25 am

When you cut and pasted that link, when I click on it, it brings me to MY personal gallery, not yours. It'll do the same to anyone else too--bringing them to their own gallery and not yours.

I looked at your dust cap thingy, but I'm all confused. It's been so long since I assembled it, I don't remember:

Didn't I just tap them on with a hammer? Wasn't that all there was to it?
--Ira

"My HD and Wal-Mart have been out of Titebond for weeks, and I think it's a communist conspiracy."
User avatar
IraRat
Forum Storyteller
 
Posts: 1573
Joined: Wed Apr 06, 2005 8:43 am
Location: South Florida
Top

Postby SmokeyBob » Thu Sep 08, 2005 10:59 am

bledsoe3 & Ira, Sorry about the wrong link to my album. :crazy:
I bet you all enjoyed looking at you own album.

Try this one, I'll get it right one of these days.

http://www.mikenchell.com/forums/album_personal.php?user_id=1169

Ira
You can use some type of hammer to put the caps on but you will usually end up putting dents in the cap. Using this 2" pipe keeps you from denting in the dust cap. You hit the end of the pipe with your hammer. On your car or truck you would have a hub cap or wheel cover to hide the dust cap. With the cap exposed on the HP trailer I wanted the cap to look nice.

DoWopBox
Thanks for the heads up. Your right about that 16mm. My set of open end metric wrenches doesn't include 16mm. So when I tried a 5/8 wench the fit was good. I guess the difference between the two is very small.
Well you learn something knew every day. :thumbsup:
Pics for Building the Alegria I
To view video click Here

Bob & Judith
User avatar
SmokeyBob
2000 Club
2000 Club
 
Posts: 2950
Images: 161
Joined: Thu Jun 23, 2005 12:06 am
Top

Postby Gerdo » Thu Sep 08, 2005 11:57 am

Hopfully you can fix this problem.
Image
User avatar
Gerdo
1000 Club
1000 Club
 
Posts: 1361
Images: 156
Joined: Mon Apr 25, 2005 12:02 am
Location: Littleton, Colorado
Top

Postby bledsoe3 » Thu Sep 08, 2005 6:39 pm

SmokeyBob wrote:bledsoe3 & Ira, Sorry about the wrong link to my album. :crazy:
I bet you all enjoyed looking at you own album.

Try this one, I'll get it right one of these days.

http://www.mikenchell.com/forums/album_personal.php?user_id=1169

That link works better. But still like my pictures. :lol:
If you do what you've always done, you'll get what you've always got.
User avatar
bledsoe3
3000 Club
3000 Club
 
Posts: 3694
Images: 112
Joined: Tue Jun 07, 2005 5:55 am
Location: Oregon, Portland
Top

Postby mikeschn » Thu Sep 08, 2005 7:27 pm

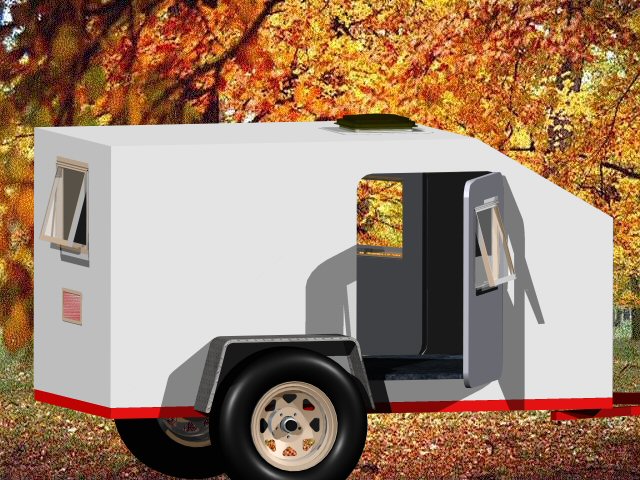
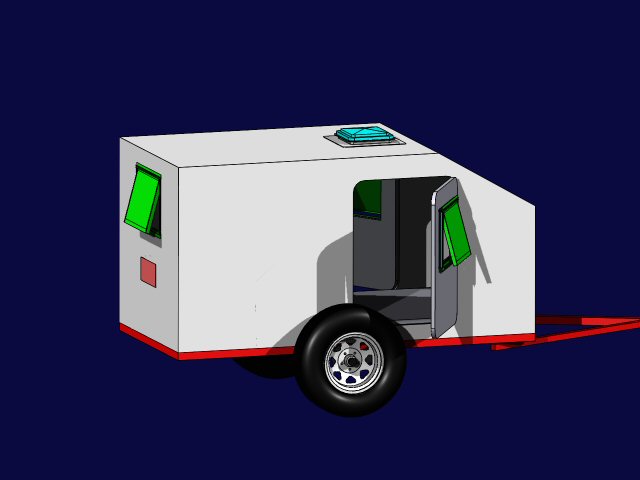
SmokeyBob wrote:Since there is no rear hatch in what I am going to build. I plan on leaveing the axel in it's original position. I'll adjust the tongue weight by moving things around in the camper. I do that all the time for my other trailer and it seems to work out.


Are you sure you want to leave the axle in the original position. According to my CAD program the wheels are in the way of the door...

Image

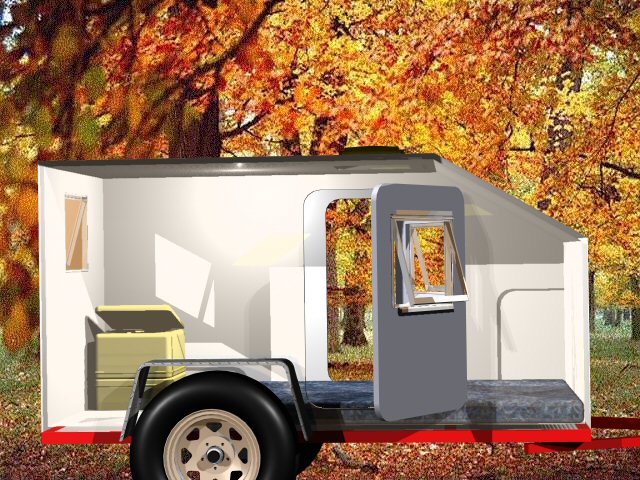
Here I've moved the wheels back, and also added the window in the back you mentioned. There's a porta potty in the back too... maybe I'll make a rendering of that tomorrow...

Image

Mike...
The quality is remembered long after the price is forgotten, so build your teardrop with the best materials...
User avatar
mikeschn
Site Admin
 
Posts: 19202
Images: 475
Joined: Tue Apr 13, 2004 11:01 am
Location: MI
Top

Postby mikeschn » Thu Sep 08, 2005 8:09 pm

Okay, I had a few more minutes this evening...

Looking at this, it doesn't look like you have enough head room. You might have to put a dropped floor in the back there...

Image

Yes, I know I didn't center the porta potty and put a cabinet on each side. But you get the idea! :)

Mike...
The quality is remembered long after the price is forgotten, so build your teardrop with the best materials...
User avatar
mikeschn
Site Admin
 
Posts: 19202
Images: 475
Joined: Tue Apr 13, 2004 11:01 am
Location: MI
Top

Postby SmokeyBob » Thu Sep 08, 2005 10:57 pm

Mike
Those are some fantastic CAD drawings. May I ask what kind of program your using to make these drawings with.

That axle placement is giving me some concern. I'll get out the old tape measure tomorrow and rethink this.

I thought about the head room with the porta potty. I had my wife sit on the porta potty and I measured from the floor to the top of her head. It looked like we could do it. But I'll know more when I start building. I told my wife about the dropped floor, she said no way, that was to low for here. So I thought why not raise the roof. Increase the back two feet of the roof about 6" and have the front part of it slope like the front of the camper.

If this covering with the PVC pipe works I could just put the porta potty outside.


Gerdo
I thought the same thing, how am I going to flip this over. With the axle assembly sticking out past the center of the trailer it acted as a counter weight, making the lifting part easy. Next I put a hydrolic jack under the trailer frame below the axle and raised it about 2'. Then I just lifted up the upper half of the frame and swung it over.
Pics for Building the Alegria I
To view video click Here

Bob & Judith
User avatar
SmokeyBob
2000 Club
2000 Club
 
Posts: 2950
Images: 161
Joined: Thu Jun 23, 2005 12:06 am
Top

Postby IraRat » Sat Sep 10, 2005 8:27 am

Mike, could we see at least ONE curved detail on this, like the fenders?

If you slant a wall 1 degree this way, another 1 degree that way, you now have the world's first TD that can't be detected by radar.
--Ira

"My HD and Wal-Mart have been out of Titebond for weeks, and I think it's a communist conspiracy."
User avatar
IraRat
Forum Storyteller
 
Posts: 1573
Joined: Wed Apr 06, 2005 8:43 am
Location: South Florida
Top

Postby Cutterpup » Sat Sep 10, 2005 11:08 am

If you slant a wall 1 degree this way, another 1 degree that way, you now have the world's first TD that can't be detected by radar.


Ira that would be the first :MLAS stealth drop :twisted: :twisted:
User avatar
Cutterpup
Teardrop Master
 
Posts: 239
Images: 15
Joined: Sat May 07, 2005 4:51 pm
Location: Annapolis, Maryland
Top

Postby mikeschn » Sat Sep 10, 2005 7:12 pm

IraRat wrote:Mike, could we see at least ONE curved detail on this, like the fenders?

If you slant a wall 1 degree this way, another 1 degree that way, you now have the world's first TD that can't be detected by radar.


Ah yes, the stealth teardrop. That one is still on the drawing board! :lol:

And Smoky, I use TurboCAD and Ironcad!

Mike...
The quality is remembered long after the price is forgotten, so build your teardrop with the best materials...
User avatar
mikeschn
Site Admin
 
Posts: 19202
Images: 475
Joined: Tue Apr 13, 2004 11:01 am
Location: MI
Top

Previous

Return to Teardrop Construction Tips & Techniques

Who is online

Users browsing this forum: Bing [Bot] and 3 guests