The scenic II.. (Last update --April 9, 2010) Hatch Struts

...ask your questions in the appropriate forums BUT document your build here...preferably in a single thread...dates for updates, are appreciated....

Postby john » Mon May 04, 2009 11:44 am

Was that devine intervention?


:lol: Perhaps not so divine disengagement...


What are your trailer dimensions and your planned interior finished length, width, and height?


If I keep th 6" intended clearance the exterior height should come in under 7'. The length is 13.5' with the front overhang. The frame alone is 11' long and 6' wide.

Inside height is near 5'10" and width of the all the beds is 5'11.5"
Build I -- Scenic ---
http://www.flickr.com/photos/8121727@N04/
Goto the Tear Build file

Build II -- Scenic II ---
viewtopic.php?t=29603

Build III -- Scenic Solo---
viewtopic.php?f=50&t=50324

Travel Blog----Now without Political Commentary
http://polifrogblog.blogspot.com/2009/0 ... -2009.html

The Constitution was ratified, not an interpretation thereof...

Penomeli ikibobo
john
User avatar
john
500 Club
 
Posts: 663
Images: 261
Joined: Tue Oct 05, 2004 6:26 pm
Location: eden nc

Postby john » Mon May 04, 2009 7:30 pm

Monday update

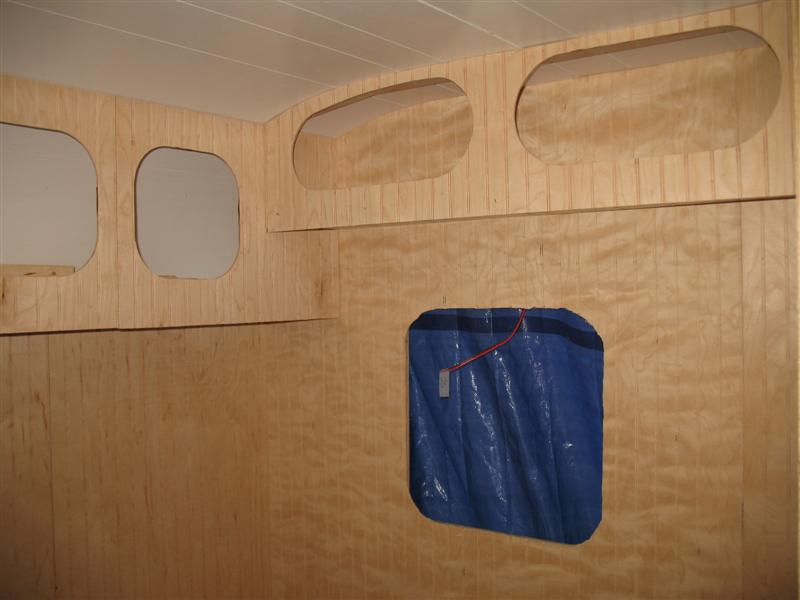
I came to realize yesterday that I was holding up progress with indecision. I needed to skin the interior ceiling if I was going to do any more interior construction. I don't generally like the 70's look of paneling but I settled on some white stuff Lowes carries. It was available and fairly inexpensive. I brought home 5 sheets.

Loading was fun. I was no more the 15 feet from the store when the wind caught the top sheet and carried it over my head to the pavement behind me where it skidded to a stop...finished side down. I turned to get it and as I picked it up the wind started pushing my cart down the parking lot. I chased after the cart with with a single sheet of paneling waving behind me like a flag. I came to realize that the cart was out running me so down went my flag. I caught up to the cart and just in time too as the top sheet of the remaining 4 sheets slid off to the ground. I stepped on it and held the remaining 3 down. About this time a Lowe's loader showed up and bailed me out.

Once home I fished the forgotten tag light wire through the bulkhead and then pulled most of the needed 12v wire. I didn't take any pics of this as I was distracted by rain and thunderstorms.

I did, however, get pics of the white paneling once it was on the ceiling.


Image

Image
Build I -- Scenic ---
http://www.flickr.com/photos/8121727@N04/
Goto the Tear Build file

Build II -- Scenic II ---
viewtopic.php?t=29603

Build III -- Scenic Solo---
viewtopic.php?f=50&t=50324

Travel Blog----Now without Political Commentary
http://polifrogblog.blogspot.com/2009/0 ... -2009.html

The Constitution was ratified, not an interpretation thereof...

Penomeli ikibobo
john
User avatar
john
500 Club
 
Posts: 663
Images: 261
Joined: Tue Oct 05, 2004 6:26 pm
Location: eden nc

Postby kennyrayandersen » Mon May 04, 2009 7:57 pm

nice progress on the build -- it's looking sweet :thumbsup:
User avatar
kennyrayandersen
1000 Club
1000 Club
 
Posts: 1750
Images: 38
Joined: Sun Apr 29, 2007 10:27 pm
Location: TX
Top

Postby john » Tue May 05, 2009 8:44 pm

:rainy:

The above nearly sums up the day. The rain was constant and forced me to focus only on what could be done inside the camper.

I set up the miter saw inside the camper which pretty much consisted of putting it on the floor.

I was able frame up the A/C box and started on the sink below it.
Image

I was also able to frame up the couch/bed frame. Above is the clothes storage framing for the kids.
Image


Finally I was able to frame our a place for the adults to put their rags.
Image
Build I -- Scenic ---
http://www.flickr.com/photos/8121727@N04/
Goto the Tear Build file

Build II -- Scenic II ---
viewtopic.php?t=29603

Build III -- Scenic Solo---
viewtopic.php?f=50&t=50324

Travel Blog----Now without Political Commentary
http://polifrogblog.blogspot.com/2009/0 ... -2009.html

The Constitution was ratified, not an interpretation thereof...

Penomeli ikibobo
john
User avatar
john
500 Club
 
Posts: 663
Images: 261
Joined: Tue Oct 05, 2004 6:26 pm
Location: eden nc
Top

Postby bobhenry » Tue May 05, 2009 8:52 pm

kennyrayandersen wrote:nice progress on the build -- it's looking sweet :thumbsup:


and well sanded :lol: :lol: :lol:
Growing older but not up !
User avatar
bobhenry
Ten Grand Club
Ten Grand Club
 
Posts: 10359
Images: 2623
Joined: Fri Feb 09, 2007 7:49 am
Location: INDIANA, LINDEN
Top

Postby john » Wed May 06, 2009 8:33 pm

Wednesday Update

Again with the rain. The driveway never dried out but I worked on it anyway between the showers. It is the only place for me to cut the sheets of bead board wet or not.

The work was tedious today and it makes me look unproductive. I wasn't. I got the bathroom framing done once I was able to cut the bead board walls to size. The same was true for the vanity and a/c. The kid's clothes storage went well too. The doors will come later.

The last thing I did was the a/c cover. Unfortunately I cut the hole that the a/c pokes out of too wide by an inch. It was likely the result of working in the dark. It is probably a lesson unlearned, though.


Image


Image
Build I -- Scenic ---
http://www.flickr.com/photos/8121727@N04/
Goto the Tear Build file

Build II -- Scenic II ---
viewtopic.php?t=29603

Build III -- Scenic Solo---
viewtopic.php?f=50&t=50324

Travel Blog----Now without Political Commentary
http://polifrogblog.blogspot.com/2009/0 ... -2009.html

The Constitution was ratified, not an interpretation thereof...

Penomeli ikibobo
john
User avatar
john
500 Club
 
Posts: 663
Images: 261
Joined: Tue Oct 05, 2004 6:26 pm
Location: eden nc
Top

Postby john » Thu May 07, 2009 8:26 pm

Thursday.... WAS SUNNY 8)


I still managed to spend most of the workday inside the camper, though.

I could feel myself procrastinating when it came to the A/C ventilation dilemma. I attacked it. I don't know if it will work but I am inclined toward...yes. I decided to bring in fresh air and exhaust warm air under the camper via two 4" sewer lines. Right now there is no inline helper fan, but if it proves necessary I will add one. Also, the vents double as condensate drains. BIG condensate drains. :lol: The last thing I did regarding the A/C was to epoxy the wood under the unit itself. I have more to do there.

Toward the end of the day I boxed in another clothes storage area. This one is the area over the big bed in the rear.


A/C venting pic
Image

A closer A/C venting pic
Image


Rear clothes storage.
Image
Build I -- Scenic ---
http://www.flickr.com/photos/8121727@N04/
Goto the Tear Build file

Build II -- Scenic II ---
viewtopic.php?t=29603

Build III -- Scenic Solo---
viewtopic.php?f=50&t=50324

Travel Blog----Now without Political Commentary
http://polifrogblog.blogspot.com/2009/0 ... -2009.html

The Constitution was ratified, not an interpretation thereof...

Penomeli ikibobo
john
User avatar
john
500 Club
 
Posts: 663
Images: 261
Joined: Tue Oct 05, 2004 6:26 pm
Location: eden nc
Top

Postby Miriam C. » Thu May 07, 2009 9:47 pm

:applause: :thumbsup: :thumbsup: Wow! You are making great progress. Some thoughts:

don't forget to get some caps for those sewer pipes. MIne are screw in. You can put that under if you want and then they won't let cold air in if the air is not in use.

You can cut an insert for around the air conditioner and glue it in good and epoxy the outside really good. Then put some trim over it. :thumbsup:

Image

Oh yeah, don't forget the overflow hose. Water will splash out. :oops: :lol:
“Forgiveness means giving up all hope for a better past.â€
User avatar
Miriam C.
our Aunti M
 
Posts: 19675
Images: 148
Joined: Wed Feb 15, 2006 3:14 pm
Location: Southwest MO
Top

Postby john » Thu May 07, 2009 10:29 pm

I had planned to put screens in the pipes but I was afraid they would restrict airflow.

Caps are the way to go, thanks! :thumbsup:
Build I -- Scenic ---
http://www.flickr.com/photos/8121727@N04/
Goto the Tear Build file

Build II -- Scenic II ---
viewtopic.php?t=29603

Build III -- Scenic Solo---
viewtopic.php?f=50&t=50324

Travel Blog----Now without Political Commentary
http://polifrogblog.blogspot.com/2009/0 ... -2009.html

The Constitution was ratified, not an interpretation thereof...

Penomeli ikibobo
john
User avatar
john
500 Club
 
Posts: 663
Images: 261
Joined: Tue Oct 05, 2004 6:26 pm
Location: eden nc
Top

Postby john » Fri May 08, 2009 10:15 pm

Friday

A/C...This morning I finished the bits that divide the intake from the exhaust behind the a/c and then put on a final layer of epoxy on. I hoped to give the A/C a test by the end of the day. I did. It it looks like I will need a helper fan to increase the volume of air over the condenser. Oh well, I tried.

Between work and a school lunch visit with my daughter Elise (she is now seven) I got a little more done with the last bit of storage inside.

Image


Image


Image
Build I -- Scenic ---
http://www.flickr.com/photos/8121727@N04/
Goto the Tear Build file

Build II -- Scenic II ---
viewtopic.php?t=29603

Build III -- Scenic Solo---
viewtopic.php?f=50&t=50324

Travel Blog----Now without Political Commentary
http://polifrogblog.blogspot.com/2009/0 ... -2009.html

The Constitution was ratified, not an interpretation thereof...

Penomeli ikibobo
john
User avatar
john
500 Club
 
Posts: 663
Images: 261
Joined: Tue Oct 05, 2004 6:26 pm
Location: eden nc
Top

Postby john » Sun May 10, 2009 6:34 pm

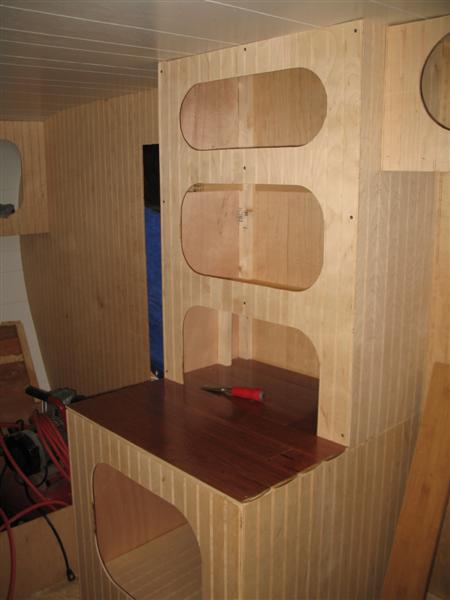
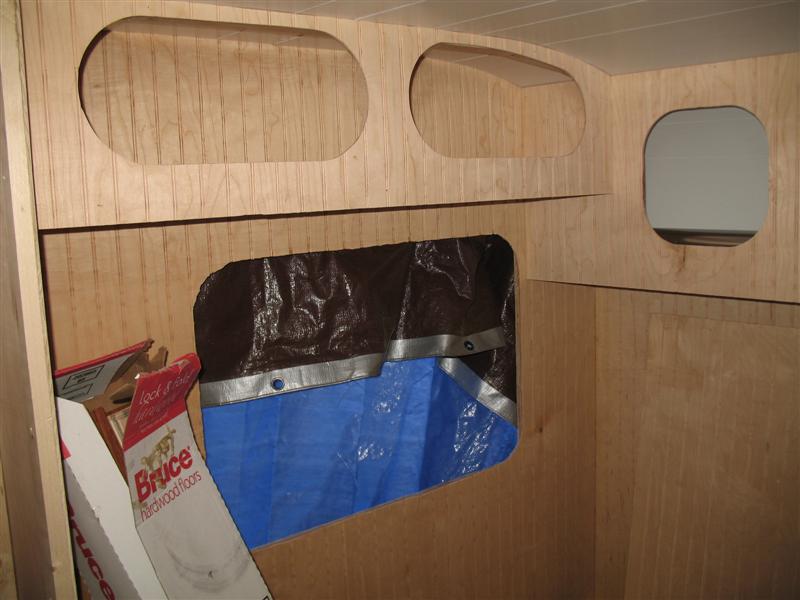
I am slowly completing the interior. I finished more storage over both the pass and driver's sides. Nothing interesting there.

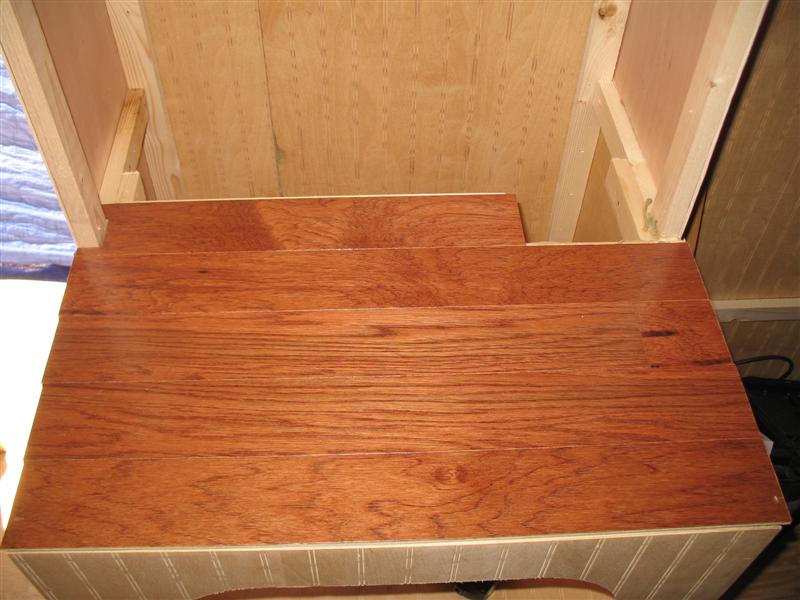
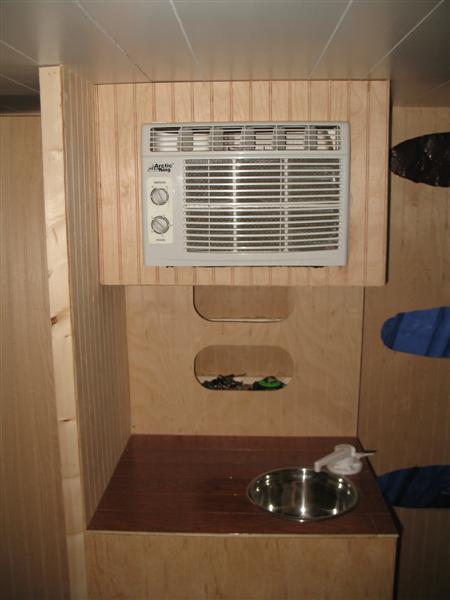
I had been putting off the counter tops for the last couple of days due to indecision. What should they be made of? At 8 square feet almost anything is affordable. In the end I went with some flooring I had on hand. It was some flooring Lowes was unloading cheap months ago. One box will be enough to cover both interior counters and the galley. I didn't use any plywood under them and instead only used the 1x2 edges of the counters. They were made out of real wood in the same fashion as plywood and they interlocked. I glued them together where they locked and also glued them to the 1x2. They still need some edging.

Once the glue dried I was able to cut the hole for the sink and faucet. :) And finish the fronts for both cabinets.

More wiring looms..........
Storage over bed (pass side)
Image


Storage over bed (driver side)
Image

Counter under const.
Image


Image


Sink
Image
Build I -- Scenic ---
http://www.flickr.com/photos/8121727@N04/
Goto the Tear Build file

Build II -- Scenic II ---
viewtopic.php?t=29603

Build III -- Scenic Solo---
viewtopic.php?f=50&t=50324

Travel Blog----Now without Political Commentary
http://polifrogblog.blogspot.com/2009/0 ... -2009.html

The Constitution was ratified, not an interpretation thereof...

Penomeli ikibobo
john
User avatar
john
500 Club
 
Posts: 663
Images: 261
Joined: Tue Oct 05, 2004 6:26 pm
Location: eden nc
Top

Postby john » Wed May 13, 2009 10:29 pm

Work has intervened and slowed progress on the camper over the last few days. I am happy, though, that I managed to get a little plumbing and wiring done. The wiring was most important as it allows me to skin the sides and roof.

It appears, according to NOAA, that I have two days without rain to accomplish the skinning. I have used one. Both sides have been skinned. Tomorrow I will skin the roof if NOAA is any guide.

Although I completed both sides, the pics are on only the pass. side.

Insulation in
Image


The wall
Image


A world without routers is a world in need of routers.
Image
Build I -- Scenic ---
http://www.flickr.com/photos/8121727@N04/
Goto the Tear Build file

Build II -- Scenic II ---
viewtopic.php?t=29603

Build III -- Scenic Solo---
viewtopic.php?f=50&t=50324

Travel Blog----Now without Political Commentary
http://polifrogblog.blogspot.com/2009/0 ... -2009.html

The Constitution was ratified, not an interpretation thereof...

Penomeli ikibobo
john
User avatar
john
500 Club
 
Posts: 663
Images: 261
Joined: Tue Oct 05, 2004 6:26 pm
Location: eden nc
Top

Postby john » Fri May 15, 2009 12:40 pm

I started skinning the roof yesterday.
Image


I decided I needed to cut some kerfs.
Image


Then I decided I needed more kerfs.
Image


On the flat part of the roof I cut the spars with a 3/4" bow to the top.
Image


The end of the day.
Image
Build I -- Scenic ---
http://www.flickr.com/photos/8121727@N04/
Goto the Tear Build file

Build II -- Scenic II ---
viewtopic.php?t=29603

Build III -- Scenic Solo---
viewtopic.php?f=50&t=50324

Travel Blog----Now without Political Commentary
http://polifrogblog.blogspot.com/2009/0 ... -2009.html

The Constitution was ratified, not an interpretation thereof...

Penomeli ikibobo
john
User avatar
john
500 Club
 
Posts: 663
Images: 261
Joined: Tue Oct 05, 2004 6:26 pm
Location: eden nc
Top

Postby Anthony J Grant » Fri May 15, 2009 8:08 pm

Looking good! :thumbsup: :thumbsup: :thumbsup:
Where are we going and why am I in this hand basket?

Tony G.
the HOBO HILTON
User avatar
Anthony J Grant
Teardrop Master
 
Posts: 232
Images: 119
Joined: Wed Dec 31, 2008 8:42 pm
Location: Milan Mi
Top

Postby hunter535 » Fri May 15, 2009 8:28 pm

John,
Kudos to you. That is one great looking camper you are building. I am really enjoying the pics.
Thank You! :thumbsup:
User avatar
hunter535
Teardrop Master
 
Posts: 168
Images: 47
Joined: Sat Apr 11, 2009 8:46 am
Location: Catskill Mtns., N.Y.
Top

PreviousNext

Return to Build Journals

Who is online

Users browsing this forum: No registered users and 17 guests