Wiring order question for my plans.

Anything to do with mechanical, construction etc

Wiring order question for my plans.

Postby cracker39 » Wed Sep 14, 2005 4:36 pm

I have read about different techniques that all of you have used for installing the wiring for the cabim and galley. I am writing my instructional steps for my trailer plans and am at the point where the spars are all installed. and the sides only have the outside skin on with no insulation added as of yet.

Is it easier to do the wiring runs and testing before any front/top/back skin is attached, or after either the interior or exterior skin is on (and which one did you install first?). How did you do it, and if you had to do it over on another trailer (or maybe already have done it over) would you do it differently? I'm looking for answers as to the easiest way to do it the first time.

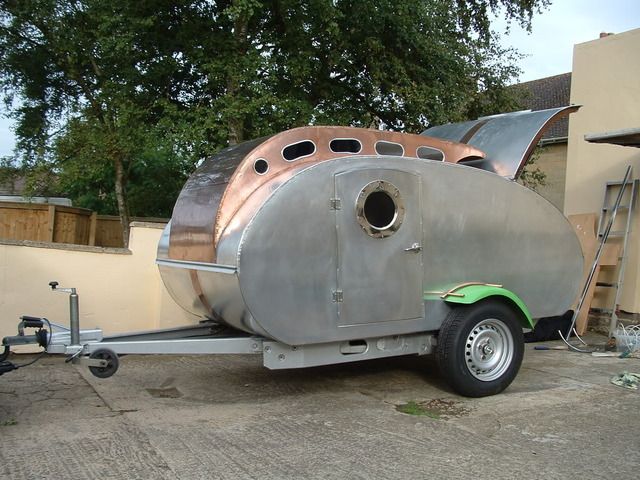
You know, planning build this is a lot tougher than making a model!!!

Thanks once again for the help.
Dale

Sometimes I pretend to be normal. But, that gets boring...so I go back to being me.

Squidget Pop Top Build Pages http://www.thesquidget.com/ptbuild/ptbuild.html

Squidget and Pop Top Plans Info and Photos: http://www.TheSquidget.com
User avatar
cracker39
3000 Club
3000 Club
 
Posts: 3069
Images: 233
Joined: Thu Jun 30, 2005 2:18 pm
Location: Lake Alfred, Florida, USA

Postby mbader » Wed Sep 14, 2005 6:01 pm

I did most of my wiring in the floor insulation.
I have 1/2" plywood bottom then 2" of rigid foam insulation then a removable 1/2" plywood top floor. All the wiring runs in steel tubes in the insulation area.
No wiring in the walls.
One wire run in the celing for the dome light. That one gave me problems.
I ran a 1/4" ID plastic tube through the roof spars after the inside skin was in place but before installing the outside skin. I didn't run the wires at this point.
When installing the outside skin I stapeled throught the plastic tube without knowing it.
It was difficult to clear the tube in order to run the wires.
Malcolm
User avatar
mbader
Teardrop Advisor
 
Posts: 62
Images: 9
Joined: Mon Aug 22, 2005 3:28 pm
Location: Redlands, CA

Postby cracker39 » Wed Sep 14, 2005 6:35 pm

Not a bad idea. However, my floor sits directly on the chassis cross members with the insulation between them. I suppose I could weld a piece of 1" conduit between the chass and the axle tube as it will be mounted an inch below the chassis on welding adapters (it's a torsion axle). But, I would still have to run 12V wiring up the side and end walls to get to my outlets in the front and rear and over head lights and fan in the ceiling, so I may as well stick with all of the 12V wiring inside the walls or ceiling. I still may use the conduit idea for my 110VAC wiring and tail light wiring from back to the front where the AC wiring will go to my electics cabinet and the tail light wiring exits through the battery box to the hitch. Back to my original question. Do I install either the inside or outside skin before running the wiring?
Dale

Sometimes I pretend to be normal. But, that gets boring...so I go back to being me.

Squidget Pop Top Build Pages http://www.thesquidget.com/ptbuild/ptbuild.html

Squidget and Pop Top Plans Info and Photos: http://www.TheSquidget.com
User avatar
cracker39
3000 Club
3000 Club
 
Posts: 3069
Images: 233
Joined: Thu Jun 30, 2005 2:18 pm
Location: Lake Alfred, Florida, USA
Top

Postby Chris C » Wed Sep 14, 2005 6:42 pm

Dale,

Maybe you don't care to hear from someone who hasn't actually built a tear yet, but I, like you, have been planning ahead. I personally plan to build my tear "inside out"...........meaning, after I install the spreaders or spars from sidewall to sidewall, I'll install the inside ceiling. I figure that will keep me from dropping a lot of the wiring. But, I plan to install the majority of my wiring in the floor as Malcolm did. Good luck on your build.
Chris :D

The tension between what is good enough and what is beyond that creates the space for character to become our work.

Teardrop Trailer Build Pictures: http://tinyurl.com/px5cd
Chris C
.
 
Posts: 3302
Joined: Sun May 15, 2005 7:24 pm
Location: Norman, Oklahoma
Top

Postby cracker39 » Wed Sep 14, 2005 8:21 pm

Thanks. I do want to hear what will be done as well as what has been done. All ideas are appreciated.
Dale

Sometimes I pretend to be normal. But, that gets boring...so I go back to being me.

Squidget Pop Top Build Pages http://www.thesquidget.com/ptbuild/ptbuild.html

Squidget and Pop Top Plans Info and Photos: http://www.TheSquidget.com
User avatar
cracker39
3000 Club
3000 Club
 
Posts: 3069
Images: 233
Joined: Thu Jun 30, 2005 2:18 pm
Location: Lake Alfred, Florida, USA
Top

Postby norm perkiss » Wed Sep 14, 2005 8:30 pm

I ran all the trailer wiring in the ceiling. The exterior walls, spars and interior ceiling were installed. It's easier to drill holes and run the wire in the ceiling from the outside. As you mention the wires do not "get away" when the interior ceiling is installed. Minumual wires in the side walls, just two led sconce lights and two light switches.
Not that this method was unsuccessful, next time I might experiment with putting the wiring in the "base boards" along the floor. It was time consuming to cut and fit the foam around the wiring in the ceiling. The wiring would be accessable if there were a problem.
Norm
User avatar
norm perkiss
Gold Donating Member
 
Posts: 161
Images: 62
Joined: Sat Oct 23, 2004 9:30 am
Location: milwaukie, oregon
Top

Postby Chris C » Wed Sep 14, 2005 8:37 pm

Norm,

That's why I'm installing an accessible raceway in the floor of the tear. Just a long narrow "trap door" so I can always get to the wiring. Makes sense to me, at least. At least that's what all the voices in my head tell me. :lol: :o :lol:
Chris :D

The tension between what is good enough and what is beyond that creates the space for character to become our work.

Teardrop Trailer Build Pictures: http://tinyurl.com/px5cd
Chris C
.
 
Posts: 3302
Joined: Sun May 15, 2005 7:24 pm
Location: Norman, Oklahoma
Top

Postby asianflava » Thu Sep 15, 2005 12:33 am

I used the router and routed out a channel along each side of the roof. I put the AC wiring on the curb side and the DC wiring on the street side. I avoided the switch situation by using lights that have switches built in.
User avatar
asianflava
8000 Club
8000 Club
 
Posts: 8412
Images: 45
Joined: Mon Aug 02, 2004 5:11 am
Location: CO, Longmont
Top

Postby IraRat » Thu Sep 15, 2005 7:39 am

Dale, take this advice from a guy who ran his wires (in the sidewalls), put the interior skins on, and then had it pointed out to me (thanks Woody, wherever you are) that I forget to install GROUND wires.

It was an easy fix, but I tell this tragic story for a reason:

I didn't use Romex, I used 3 separate solid copper wires for each line/circuit. Now, you have/will soon read about stranded versus solid, but for the purposes here, it doesn't matter. Point is I DIDN'T use Romex because the single wires are so much thinner, that it was a cinch running it in the side walls, just tucking them into the edges of the insulation. Notching out the wood studs wasn't necessary at all--the wood skins still sit flush.

My distribution panel is in the front of the cabin, or WILL be when I buy it. One line goes to an outlet on the front wall, for an outlet/strip to feed the air conditioning there. Another line goes along the left wall, and the third and final line goes along the right, which is identical to the left line. (No vent fan.)

So the left line feeds the left cabin sconce light, left porch light, left outlet on the underside of rear cabin cabinet, and the leftside outlet in Galley. Exact same thing for the right side.

Of course, all I have right now is bunch of wires sticking out of my walls, and a bunch of lamps and switches sitting in a box in my living room.
--Ira

"My HD and Wal-Mart have been out of Titebond for weeks, and I think it's a communist conspiracy."
User avatar
IraRat
Forum Storyteller
 
Posts: 1573
Joined: Wed Apr 06, 2005 8:43 am
Location: South Florida
Top

Postby IraRat » Thu Sep 15, 2005 7:43 am

asianflava wrote:I used the router and routed out a channel along each side of the roof. I put the AC wiring on the curb side and the DC wiring on the street side. I avoided the switch situation by using lights that have switches built in.


I did this for my cabin lights, but I couldn't find anything switched for the porch lights. I bought these really cool marine-type port lamps at Lowes that aren't switched. I was thinking of modifying them to make them switched, so I don't have to install separate switches.

Just don't know if this is possible, or whether it's worth the trouble, because it's better to have switches INSIDE of the cabin anyway for the porch lights.
--Ira

"My HD and Wal-Mart have been out of Titebond for weeks, and I think it's a communist conspiracy."
User avatar
IraRat
Forum Storyteller
 
Posts: 1573
Joined: Wed Apr 06, 2005 8:43 am
Location: South Florida
Top

Postby cracker39 » Thu Sep 15, 2005 7:48 am

Considering what I've seen and heard so far, I like the wiring raceway on the floor rather than running the wiring through the ceiling. I'll have most of my wiring connections at the rear (tail lights, AC outlet, Additional AC and DC outlets). I'll only have one or two lights and fan in the ceiling, and one "porch" light with a wall switch to run up the wall and across the ceiling. This I can do without having to rout grooves in my ceiling spars.

Mine will not be a TD, but rather a more conventional TTT. There will be only about 30 inches of floor and racewaly along the wall between the forward facing couch/storage box and forward cabinet where the electrics will be. I'm thinking of a 1" wide by 3" high raceway here (will have 1" x 1 1/2" inside dimensions) from the seat to cabinet and the 1" width will be minimal and hardly noticable. I'll be running two Nomex 2+gound, one 5+1 trailer wiring, and 2 or 3 sets of single strand for the 12V stuff. The wiring can be run through the underbed storage boxes, then the 30" raceway. No access will be necessary to the raceway, as the wire can be pulled through the 30" from either end if necessary. I won't put the paneling on the outside of the raceway until all is working. All of my front wiring will run from the fuse panel, through the galley cabinet and up to outlets near the counter top. The incoming wiring will enter from the Battery Box on the tongue into the galley cabinet, then to the electrics cabinet.

Thanks for that idea. Once again, it proves that two (or three or ten) heads are better than one (when it comes to generating ideas anyway). You guys and gals have saved me a lot of mistakes i'd have made if I had to do this all by myself.
Dale

Sometimes I pretend to be normal. But, that gets boring...so I go back to being me.

Squidget Pop Top Build Pages http://www.thesquidget.com/ptbuild/ptbuild.html

Squidget and Pop Top Plans Info and Photos: http://www.TheSquidget.com
User avatar
cracker39
3000 Club
3000 Club
 
Posts: 3069
Images: 233
Joined: Thu Jun 30, 2005 2:18 pm
Location: Lake Alfred, Florida, USA
Top

Postby cracker39 » Thu Sep 15, 2005 8:28 am

HMMMMM....Another consideration. Romex or Nomex. I found a thread on another RV site where a post stated that Romex (solid wire) was for houses where no vibration occurs and that the RV builder should use stranded wire for everything (i.e. Nomex for AC). I searched and couldn't find any other informatio to support this. Any electricians out there who can answer this? After all, all extension cords are for AC and are stranded wire...it make sense to me. And it is more flexible and easier to run the wiring.
Dale

Sometimes I pretend to be normal. But, that gets boring...so I go back to being me.

Squidget Pop Top Build Pages http://www.thesquidget.com/ptbuild/ptbuild.html

Squidget and Pop Top Plans Info and Photos: http://www.TheSquidget.com
User avatar
cracker39
3000 Club
3000 Club
 
Posts: 3069
Images: 233
Joined: Thu Jun 30, 2005 2:18 pm
Location: Lake Alfred, Florida, USA
Top

Postby Chris C » Thu Sep 15, 2005 8:48 am

Dale, I'm no electrician, but it's one of the oldest rules in the book. It's a "no-brainer". Solid wire is for stationary structures (homes, shops, buildings, etc) and stranded is for anything that moves. (trailers, automobiles, motorcycles, boats, etc., etc., etc.)
Chris :D

The tension between what is good enough and what is beyond that creates the space for character to become our work.

Teardrop Trailer Build Pictures: http://tinyurl.com/px5cd
Chris C
.
 
Posts: 3302
Joined: Sun May 15, 2005 7:24 pm
Location: Norman, Oklahoma
Top

Postby Ken A Hood » Thu Sep 15, 2005 8:58 am

I wondered about the same thing; now I'm wondering about wiring the braided wire to a "standard" outlet. I'm assumming all that needs to be done is twisting the wire, and running it around the terminal screw ("hooked" so when it gets tightened it draws the wire in)

PREVIOUS THREAD
Disclaimer: I in no way resemble the avatar shown. Furthermore, I in no way have any affiliation to the Trailer Park Boys and more specifically Bubbles!
User avatar
Ken A Hood
500 Club
 
Posts: 841
Images: 42
Joined: Sun Apr 18, 2004 8:15 pm
Location: ON CANADA
Top

Postby cracker39 » Thu Sep 15, 2005 9:31 am

Ken, I'd think so. But, to be sure, I'd solder the last 3/4 inch or so and have a "solid" piece to bend around the screw and the strands would all stay together for a good contact.

I've been thinking of how to make shllow wall mounter 12V outlets. The standard 12V socket is oven an inch deep plus the wire connectors on the back. My idea now is to use a 120VAC socket and plug with a different prong configuration than the normal one so I can mount the socket in a 1" deep wall box. Then, wire a standard 12V receptical that is enclosed in plastic to the 120VAC plug with a short piece of Nomex as the adapter from a 12V appliance to the wall socket. The different prong configurations would ensure that you could never plug the 12V into the 120V and vice versa.
Dale

Sometimes I pretend to be normal. But, that gets boring...so I go back to being me.

Squidget Pop Top Build Pages http://www.thesquidget.com/ptbuild/ptbuild.html

Squidget and Pop Top Plans Info and Photos: http://www.TheSquidget.com
User avatar
cracker39
3000 Club
3000 Club
 
Posts: 3069
Images: 233
Joined: Thu Jun 30, 2005 2:18 pm
Location: Lake Alfred, Florida, USA
Top

Next

Return to Teardrop Construction Tips & Techniques

Who is online

Users browsing this forum: Bing [Bot] and 3 guests