Need a hatch fix.

Anything to do with mechanical, construction etc

Need a hatch fix.

Postby montanablue » Sun Oct 02, 2005 7:56 pm

This is my first post. I am seeking wisedom from those who have traveled before me.

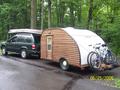
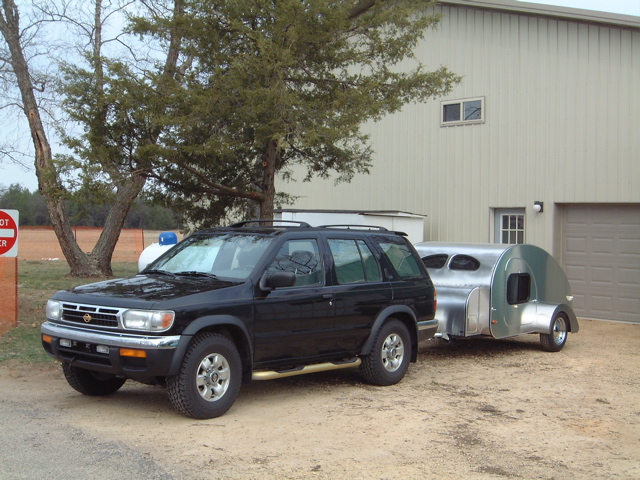
My hatch is done and the right side looks good. My problem is that the leftside does not follow the contour as it did when I made the frame. Everything matches until 8" from the bottom. I will try to post some pictures as soon as I learn how to post. http://tnttt.com/album_ ... ic_id=3190
http://tnttt.com/album_ ... ic_id=3189

Is it possible to bend it back into shape by using eyelette screws, wire and turn buckles. i would attach eyelettes at the top left and bottom left. I figure I could keep turning the turnbuckle until it comes back into shape. There is one thing I did that makes me think that it will not work. I sandwiched aluminum between the plywood. It is pretty stiff

What do the Kings of the Tears say?

Thanks,
Rick[/img]
Last edited by montanablue on Mon Oct 03, 2005 7:16 pm, edited 1 time in total.
User avatar
montanablue
Teardrop Advisor
 
Posts: 65
Images: 30
Joined: Thu Mar 03, 2005 3:58 pm
Location: Greenville, SC

Postby randy chesnutt » Sun Oct 02, 2005 8:46 pm

rick, .i have traveled before. it,s hard to say what to do with out photo. with alum. between the wood will make it tuff to work if not impossible. just back track yourself and see what started the problem and work from there. how far is off? after you have looked it over give us some more information hang in there. welcome to the forum
User avatar
randy chesnutt
Teardrop Master
 
Posts: 144
Images: 65
Joined: Mon Jun 27, 2005 9:52 pm
Location: Humble,tx

Postby doug hodder » Sun Oct 02, 2005 9:03 pm

Montana....it is tough without a photo....when I built my hatch, I skinned the interior first, in 1/4 inch birch...I had enough springback that the exterior curve changed..I figured out how to take care of that in the future...I had to build up the members and then shape to fit the sides of the trailer...you may have a similar problem...it's not that tough to fix..and how far off are you compared to the profile you want? ... a picture would be helpful....I'm sure someone here on the forum has had a similar issue and you will be able to find a fix....Doug
doug hodder
*Snoop Dougie Doug
 
Posts: 12625
Images: 562
Joined: Tue Dec 14, 2004 11:20 pm
Top

Postby Denny Unfried » Sun Oct 02, 2005 9:43 pm

Have you applied an inside skin yet. If not, you might try to pull the left side into shape with your turnbuckle and even a little tighter than you want the finished curve. Then, install your inside skin using plenty of screws & finish washers into the outside ribs. When the turnbuclke is released the new skin will help to hold the new shape.

Denny
aka - "Uncle Denny"
<img src="http://www.uncledennyscorner.com/teardrop/photos/Linux.gif">
User avatar
Denny Unfried
sprint car builder/racer & all that jazz
 
Posts: 411
Joined: Mon Jun 21, 2004 8:54 am
Location: So Bay, CA
Top

Postby Gage » Sun Oct 02, 2005 10:55 pm

You might check for interferance with the counter or somthing else that might be holding your hatch out and not letting it close. Also why did you put alum sheeting in between the ply sheeting? Did I read that wrong?

Have a good day, hope you get it fix'd.

8)
Image Image Image
Remember 'Teardrop Time'.......Take your time, you don't have to have it finished NOW.
User avatar
Gage
8000 Club
8000 Club
 
Posts: 8321
Images: 28
Joined: Sat Apr 17, 2004 9:14 pm
Location: Palmdale, CA
Top

Pictures of my hatch are in my gallery.

Postby montanablue » Mon Oct 03, 2005 6:55 pm

I have posted the pictures of my right and leftside of my hatch in my personal gallery. As you can see the leftside is off at the bottom.

Answers to questions?

Yes, I have skinned the inside of Hatch.

Also, I did use aluminum to strenghten the framing.

Now that you have the pictures, what are your suggestions?

I look forward to hearing what you have to say.

Montanablue "Rick"
User avatar
montanablue
Teardrop Advisor
 
Posts: 65
Images: 30
Joined: Thu Mar 03, 2005 3:58 pm
Location: Greenville, SC
Top

Postby Gage » Mon Oct 03, 2005 7:35 pm

Studying your pictures, it looks like maybe your side trim is off. Did you build your hatch in your tear and then prelocate your hinge while the hatch was in place? How did the hatch fit before you attached the hinge or did you notice?

Another question. The alum that you sandwiched. Is it sheet or extru. I don't understand what your saying when you said you "sandwiched alum between the ply". If it's sht, that may be the cause by wanting to spring out straight.

Have a good day.

8)
Last edited by Gage on Mon Oct 03, 2005 7:51 pm, edited 2 times in total.
Image Image Image
Remember 'Teardrop Time'.......Take your time, you don't have to have it finished NOW.
User avatar
Gage
8000 Club
8000 Club
 
Posts: 8321
Images: 28
Joined: Sat Apr 17, 2004 9:14 pm
Location: Palmdale, CA
Top

Postby goldcoop » Mon Oct 03, 2005 7:43 pm

Montana-

The eyebolt/cable/turnbuckle thing is exactly what I had to do on the Ctear's 6' hatch when things got out of control!

One eye at top, one at bottom, cable in between with the turnbuckle in the middle.

You should probably get at least a 1/4" x 2" lag eyebolt of GOOD quality.

Predrill thru the ply/alum sandwitch with a 3/16" bit and drive your eyes.

Try this and as you snug up the TB make sure you are getting the desired results w/o bending your eyes; you may end up having to go larger/longer!

I ended up using S/S 5/16 x 5 lags in mine!

Now that this arrangement has been on for the past 6 months or so the hatch has gained "memory" of the shape and I could remove the whole mess, but the wife & I have found the cables too useful as mini clothes lines!

Cheers,

Coop,
User avatar
goldcoop
Silver Donating Member
 
Posts: 1276
Images: 32
Joined: Mon Jul 04, 2005 8:02 pm
Location: Lewisburg, PA
Top

Postby montanablue » Mon Oct 03, 2005 7:50 pm

goldcoop wrote:Montana-

The eyebolt/cable/turnbuckle thing is exactly what I had to do on the Ctear's 6' hatch when things got out of control!

One eye at top, one at bottom, cable in between with the turnbuckle in the middle.

You should probably get at least a 1/4" x 2" lag eyebolt of GOOD quality.

Predrill thru the ply/alum sandwitch with a 3/16" bit and drive your eyes.

Try this and as you snug up the TB make sure you are getting the desired results w/o bending your eyes; you may end up having to go larger/longer!

I ended up using S/S 5/16 x 5 lags in mine!

Now that this arrangement has been on for the past 6 months or so the hatch has gained "memory" of the shape and I could remove the whole mess, but the wife & I have found the cables too useful as mini clothes lines!

Cheers,

Coop,


Coop,

Thanks for the reply. Do I understand that this would be something that I would have to leave on for some time? I ask this because the wire would hit the counter which I have already installed in the galley.

What are your thoughts?

Rick
User avatar
montanablue
Teardrop Advisor
 
Posts: 65
Images: 30
Joined: Thu Mar 03, 2005 3:58 pm
Location: Greenville, SC
Top

Postby montanablue » Mon Oct 03, 2005 7:57 pm

Gage wrote:Studying your pictures, it looks like maybe your side trim is off. Did you build your hatch in your tear and then prelocate your hinge while the hatch was in place? How did the hatch fit before you attached the hinge or did you notice?

Another question. The alum that you sandwiched. Is it sheet or extru. I don't understand what your saying when you said you "sandwiched alum between the ply". If it's sht, that may be the cause by wanting to spring out straight.

Have a good day.

8)


Gage,

Thanks for the comments. I did not install the trim on the galley walls when making framing. When I covered the hatch with 1/8 luan on top, it fit well. I covered with aluminum and it still looked OK. In fact, Chip came over to look at it.

The aluminum is from sheet. What I don't understand is why one side is perfect and the other is off. Any ideas?

Thanks,
Rick
User avatar
montanablue
Teardrop Advisor
 
Posts: 65
Images: 30
Joined: Thu Mar 03, 2005 3:58 pm
Location: Greenville, SC
Top

Postby goldcoop » Mon Oct 03, 2005 8:05 pm

Rick-

Sorry, I forgot to mention this arrangement was made from the outside edge of my hatch, which is mostly exposed multi layers of ply.

I'll take some pics and post to my personal gallery in the A.M. light...

Cheers,

Coop
User avatar
goldcoop
Silver Donating Member
 
Posts: 1276
Images: 32
Joined: Mon Jul 04, 2005 8:02 pm
Location: Lewisburg, PA
Top

Postby Will Smith » Wed Oct 05, 2005 9:23 am

I think you had a latch, the latch would hold it down just fine
Benefit mankind, use your screen saver for something useful. More information here:
http://www.worldcommunitygrid.org/
Will Smith
Teardrop Master
 
Posts: 133
Joined: Sun Jun 13, 2004 5:24 pm
Location: Currently in San Saba, Texas
Top

Postby Chip » Wed Oct 05, 2005 9:45 am

Rick,, are you gonna be working on the trailer this evening,,, give me a shout or post a pm here,, got an idea that might work,, but would have a relook at the rear hatch how it seals to the floor

chipper
Living large,,,travling small !!!
54"x9'4" tear
4'x8' tear
Serro Scotty rebuild(in progress)
User avatar
Chip
2000 Club
2000 Club
 
Posts: 2534
Images: 49
Joined: Sat Apr 17, 2004 7:33 pm
Location: Greenville, S.C.
Top


Return to Teardrop Construction Tips & Techniques

Who is online

Users browsing this forum: Bing [Bot] and 2 guests