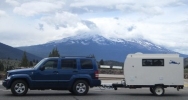
Wolfgang's 2&2 built updated December 25, 2010

...ask your questions in the appropriate forums BUT document your build here...preferably in a single thread...dates for updates, are appreciated....

Postby S. Heisley » Tue Nov 03, 2009 11:29 pm

...Nice! :thumbsup:
User avatar
S. Heisley
Super Lifetime Member
 
Posts: 8866
Images: 495
Joined: Mon Sep 17, 2007 10:02 am
Location: No. California

Postby Wolfgang92025 » Tue Nov 03, 2009 11:42 pm

Thanks Sharon,

Slowly but surely it's taking shape.

Wolfgang
Wolfgang

Image
User avatar
Wolfgang92025
Lifetime member
 
Posts: 1098
Images: 660
Joined: Fri Apr 18, 2008 10:16 pm
Location: Salt Lake City area, Utah

Postby grizz » Sat Nov 07, 2009 2:29 am

Hi Wolfgang, Firstly, AWESOME BUILD !!

I love the way you have done it all.

I too work for an American drug company, have done so for 13 years in 2 countries on 2 contracts, so my service is seen as only 7 years.
They anounced 5500 redundancies by next year globally, and it will impact us all.
I decided to hang in there, rather than scarper off, as a redundancy package may be more attractive than jumping ship, and then being booted off another 6months later, as many companies are following suit.

Lastly, I love this pic.

Had a cat years ago who used to love walking in the garden draped over my neck.

Image
Greetings from England.

Rian.


Hoping to get it all done in time.
User avatar
grizz
1000 Club
1000 Club
 
Posts: 1210
Images: 29
Joined: Mon Sep 21, 2009 2:37 pm
Location: Rochester, Kent, UK
Top

Postby Wolfgang92025 » Sat Nov 07, 2009 9:51 pm

Hi Grizz,

Thank's for the kind comments...........

Seems like on the job front things are tough all over the world.
So hang in there, things will get better again, might take some time, but it will get better.

About the cat, his name is Smoo and he is our top cat. He is one of the bottle rescue babies that never left our house. That was about 12 years ago. Wife was active in feral cat rescues for several years. Bottle fed many a tiny cat babies. Found good homes for them after they were old enough to be adopted.

Wolfgang
Wolfgang

Image
User avatar
Wolfgang92025
Lifetime member
 
Posts: 1098
Images: 660
Joined: Fri Apr 18, 2008 10:16 pm
Location: Salt Lake City area, Utah
Top

Postby davencarla » Wed Nov 18, 2009 1:58 pm

Wolfgang,

First of all, It looks great! I am watching with great interest since I've decided on a 2+2 type and your two tone woody is very much to our liking. I hope you don't mind that I will be copying some.

A couple of questions from a virgin builder:
What did you use to seam the sheets of plywood on the exterior? Did you just let the CPES and varnish take care of it or is there additional filler/seam?

What kind of window do you plan for the door? Shape & size?

What are you using for windows in the round ports? What size are they (look about 12")?

What is your wall height?

Sorry if I'm overly nosy but you do have a nice looking TD coming along with great craftmanship.

Thanks,
Dave
davencarla
Teardrop Inspector
 
Posts: 7
Joined: Mon Oct 19, 2009 3:07 pm
Location: St. Charles, MO
Top

Postby Wolfgang92025 » Thu Nov 19, 2009 12:28 am

First, Welcome to the fun.............

davencarla wrote:Wolfgang,


A couple of questions from a virgin builder:
What did you use to seam the sheets of plywood on the exterior? Did you just let the CPES and varnish take care of it or is there additional filler/seam?

What kind of window do you plan for the door? Shape & size?

What are you using for windows in the round ports? What size are they (look about 12")?

What is your wall height?

Sorry if I'm overly nosy but you do have a nice looking TD coming along with great craftmanship.

Thanks,
Dave


Dave,

As luck would have it I finally got my windows that will be in the doors Monday. They are 18" wide by 27" tall. Got them on E-bay.

Image

I rough cut the seams between the maple and walnut panels. Used a 1/4" router bit to cut a groove between the two. Later I will insert a piece of oak "T" molding to go with the rest of the trim.

The round windows are about 10" in diameter. Found some 1/4" window weatherstrip from JC Whitney (sku 812557) that fits my 1/4" wall. I will use 1/4 tinted polycarb for the window.

The walls are 60" on the outside. By the time you take away the frame, floor and ceiling I have about 54" inside height.

On a side note, I used a -22.5 deg down set axle with 215R15 tires and the whole thing is about 1 to 2" to tall to get in and out of the garage without having to resort to letting air out of the tires once I finish installing the top of the roof. :roll:

Oh well, live and learn...........


Wolfgang
Wolfgang

Image
User avatar
Wolfgang92025
Lifetime member
 
Posts: 1098
Images: 660
Joined: Fri Apr 18, 2008 10:16 pm
Location: Salt Lake City area, Utah
Top

Postby davencarla » Thu Nov 19, 2009 11:56 am

Thanks for the info.

2 inches too high? That's nothing compared to a typical mistake I make on any project. I consider it a victory if there is a work around.
davencarla
Teardrop Inspector
 
Posts: 7
Joined: Mon Oct 19, 2009 3:07 pm
Location: St. Charles, MO
Top

Postby Shadow Catcher » Fri Nov 20, 2009 9:18 am

Beautiful work! it will be stunning when completed, and I like the fur stole.
I am always one to look at the origins of something. The global monetary crisis can be laid at the feet of one man, Alan Greenspan who felt that the market would regulate itself. He has admitted he was wrong. Deregulation which despite warnings accelerated during the Bush administration did not take into account greed. There is a balance point between too much and too little government.
User avatar
Shadow Catcher
Donating Member
 
Posts: 6008
Images: 234
Joined: Sat Apr 11, 2009 8:26 pm
Location: Metamora, OH
Top

Postby Wolfgang92025 » Tue Dec 01, 2009 11:14 pm

Started working on the doors.

Image

Door frame built, lock and window set in place in doorframe to see it it all fit the way I had planned. Seemed to be OK............ :D

Image

Could have used a few more clamps :lol:

Image

Window set in place.
Installing the locks is next. It will have to wait till the weekend, since I'm working in cold and windy Milwaukee this week. At least I get to go home before the cold wet stuff (aka snow) is supposed to hit Friday.

Wolfgang
Last edited by Wolfgang92025 on Sat Dec 05, 2009 4:07 pm, edited 1 time in total.
Wolfgang

Image
User avatar
Wolfgang92025
Lifetime member
 
Posts: 1098
Images: 660
Joined: Fri Apr 18, 2008 10:16 pm
Location: Salt Lake City area, Utah
Top

Postby bve » Wed Dec 02, 2009 12:06 am

Man I can't wait to see the finished product, that's going to be a real beauty.

Thanks for sharing, I am really enjoying following your build.
Burke

KISS > COMPLEX
Image
Image

Build threads converted to PDFs.
As of 2008-08-08 I have added more build threads to the pdf collection
User avatar
bve
500 Club
 
Posts: 694
Images: 98
Joined: Sat Aug 25, 2007 1:44 am
Location: Edmonton, Alberta, Canada
Top

Postby Wolfgang92025 » Wed Dec 02, 2009 3:59 pm

bve wrote:Man I can't wait to see the finished product, that's going to be a real beauty.


That makes two of us.......... :lol: :lol: :lol:

Few hours here and there and it will get done.

So when is IRG ??? :roll: :roll: :roll:

Wolfgang
Wolfgang

Image
User avatar
Wolfgang92025
Lifetime member
 
Posts: 1098
Images: 660
Joined: Fri Apr 18, 2008 10:16 pm
Location: Salt Lake City area, Utah
Top

Postby bve » Sun Dec 20, 2009 12:46 pm

Wolfgang92025 wrote:So when is IRG ???
Wolfgang

http://www.pamplingrove.com/

I hope you weren't waiting on me for an answer :) I don't have enough time to make this one.


Any progress to report?


Burke
Burke

KISS > COMPLEX
Image
Image

Build threads converted to PDFs.
As of 2008-08-08 I have added more build threads to the pdf collection
User avatar
bve
500 Club
 
Posts: 694
Images: 98
Joined: Sat Aug 25, 2007 1:44 am
Location: Edmonton, Alberta, Canada
Top

Postby Wolfgang92025 » Sun Dec 20, 2009 10:14 pm

Bruke,

Made some progress on the doors.
Also made a big mistake, and have to re-skin the lower half of both doors. Oh well................. :cry:

Plus the weather has been cold and rainy for the last few weeks.

Have a couple of 4 day weekend's coming up with Christmas and New Year's.
Hope to get with it again.............

Wolfgang
Wolfgang

Image
User avatar
Wolfgang92025
Lifetime member
 
Posts: 1098
Images: 660
Joined: Fri Apr 18, 2008 10:16 pm
Location: Salt Lake City area, Utah
Top

Postby Wolfgang92025 » Wed Jan 27, 2010 10:09 pm

Started on some of the wiring.

Image

Light switch for interior and exterior light.

Image

One of the reading lamps.

Image

More later............

Wolfgang
Wolfgang

Image
User avatar
Wolfgang92025
Lifetime member
 
Posts: 1098
Images: 660
Joined: Fri Apr 18, 2008 10:16 pm
Location: Salt Lake City area, Utah
Top

Postby bve » Wed Jan 27, 2010 10:24 pm

Nice work!

The labels are a good idea. The switches are nice too, but I really like the brushed copper lights - all my garden lights are brushed copper - I really like that look.

Burke
Burke

KISS > COMPLEX
Image
Image

Build threads converted to PDFs.
As of 2008-08-08 I have added more build threads to the pdf collection
User avatar
bve
500 Club
 
Posts: 694
Images: 98
Joined: Sat Aug 25, 2007 1:44 am
Location: Edmonton, Alberta, Canada
Top

PreviousNext

Return to Build Journals

Who is online

Users browsing this forum: No registered users and 6 guests